Creative Corner: How to Fill the Empty Spaces in Your Home
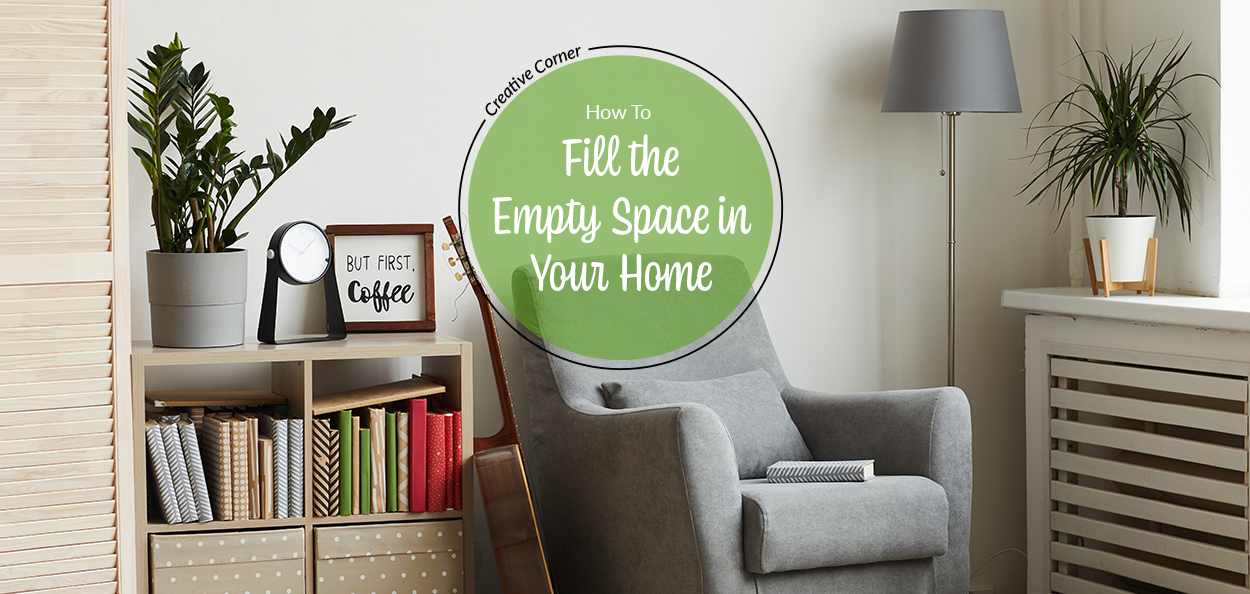
After arranging all of the major pieces of furniture inside your home, there are always those awkward empty spaces left over that you don’t know quite what to do with. Rather than leave them bare, follow these corner decor ideas for inspiration on how to style these nooks and crannies.
Corner Decor Ideas
Floating Shelves
Need extra space for framed photos, vases, and books? Floating shelves are not only a great storage solution, but they are also a hot decor trend in the interior design world. Add them to your empty spaces and you’ve got yourself stylish shelves for your living room corners or even your bedroom.
Tiny Office Nook
Not every home has the square footage for an office room, but that doesn’t mean you can’t create a small office nook. If the location is fitting, transform your empty space into a workstation by setting up a desk and chair. Try to match the style of the room so that the nook adds to the decor of the space rather than detracts from it.
Stylish Storage Pieces
This corner decor idea is a must if you find yourself with so much stuff you don’t know what to do with it all. Combine function and style by incorporating small chest drawers, armoires, sideboards, and console tables into the empty corners of your rooms. These furnishings give you both a beautiful display and a place to store your household items.
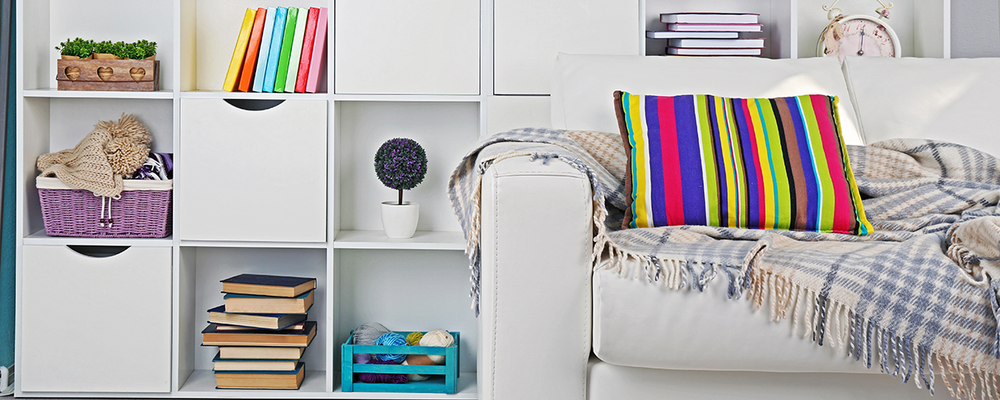
Studious Bookcase
Put those old books to use by showing them off in your very own bookcase. Go as big or small as you want to create a colorful decor piece for almost any corner in your home. You can even mix in other decorative items like flowers and photos to give the shelving more character.
Sophisticated Bar Cart
You don’t need an at-home bar to display your collection of wines and spirits. Grab your liquor and glasses from the kitchen cabinet and show them off on a stylish bar cart that easily fits into a tight corner. Next time you celebrate happy hour, entertaining will be a breeze!
Additional Closet Space
Who said clothing needs to be put away in drawers and walk-in closets? Exposed closets are all the rage right now and they give you the chance to turn your clothes into a fashionable decor piece. All you need for this bedroom corner idea is a clothing rack and your wardrobe to create a fun and functional addition to your space.
Kids’ Play Corner
Give your kids the play area they’ve been begging for by designating that corner space as an enchanting playhouse. Use easy-to-remove washi tape to create the outline of a playhouse on the walls and install a few shelves within it to hold some of their favorite toys. This gives them the creative space to play, while also taking up as little room as possible.
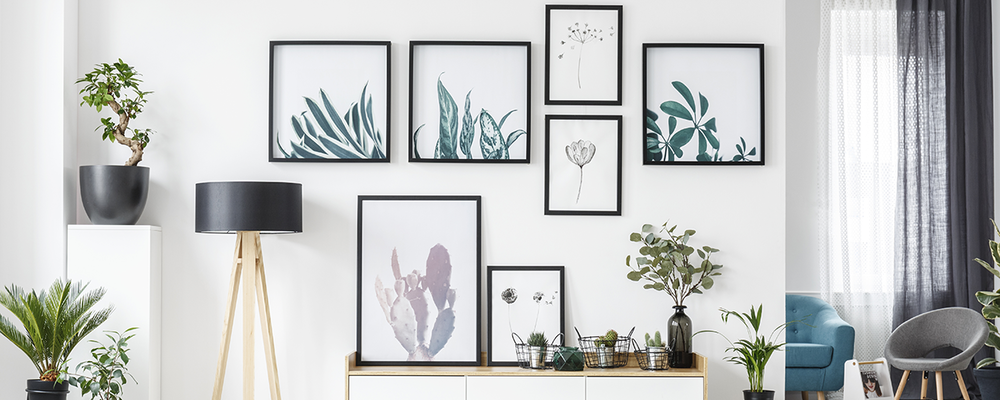
DIY Gallery Wall
You don’t need to go to an art museum to enjoy a gallery experience. Bring conversation starters to your living room corner by curating your own DIY gallery wall with framed prints or paintings. This can turn an ordinary wall corner into the focal point of a room with little to no cost.
Artwork Display
In addition to a gallery wall, you can get in tune with your artistic side by dressing up corners with other types of artwork like sculptures and ceramics. Don’t be afraid to bring in abstract pieces or art of different mediums because they can bring interest and contrast that your run-of-the-mill photos do not.
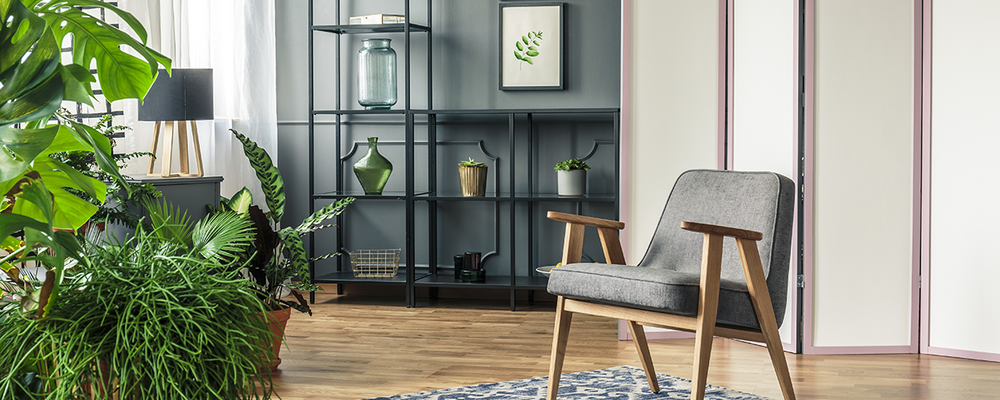
Gorgeous Greenery
The houseplant trend is in full bloom and it just so happens to be another creative corner decor idea. Find corners of your home near natural light and entwine them with any plant you think you have the time and desire to care for — or go for faux plants instead! Whether you feel like being bold with large-leaf plants or prefer a unique hanging terrarium, the finished product is sure to bring new life to your space.
Luminous Lighting
Layered lighting is one of the golden principles of interior design, and chances are, if you have empty corners that need filling, lighting is the perfect solution. Before deciding on the type of lighting you want, consider the area it will be in and the function it will serve.
Floor lamps are great for living room corners, pendant lights are best for illumination of art, and table lamps do wonders for decorative side tables.
Decorative Screen
Does your home have high ceilings? Room separating screens are a great addition to your space because they’re known for complementing homes with high walls. Not only do they emphasize the impressive height of your ceilings, they also decorate your walls without you even touching them.
Keep in mind that screens are corner decor best used in larger rooms because they take up quite a bit of space.
Window Seat
Take advantage of natural light by creating a cozy seat where your window touches the corner of the room. An upholstered bench and some comfy throw pillows are all you need to transform an everyday window into a nook for reading and drinking coffee.
Statement Furnishings
When in doubt, furnish it out! Sometimes the simplest solutions to the empty corner dilemma reside in a statement piece. Which kind of statement piece you choose depends entirely on how much space you have. For a larger room, you may want to consider a sofa, bench, or side table. For tinier spaces, downsize a bit by including a statement chair or accent table topped with a decorative lamp.
To find a stylish piece of furniture that livens up your corner decor, take a look at our eye-catching collections.
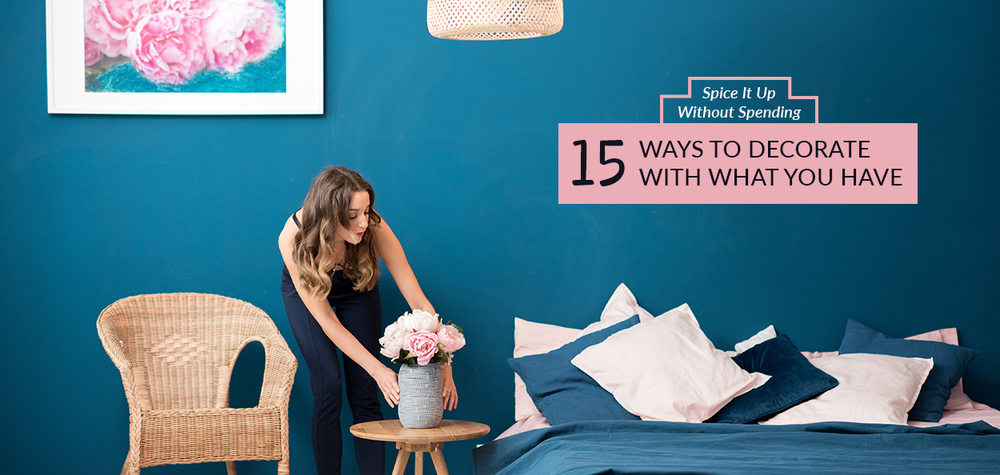
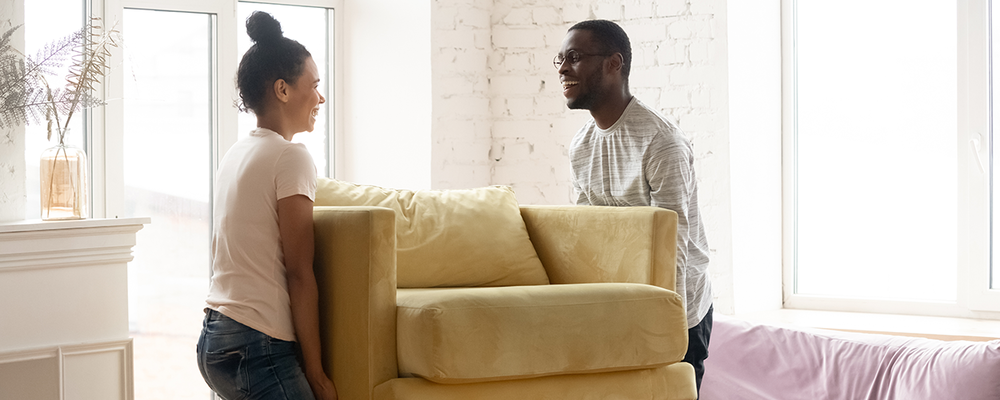
Looking at the same home decor for months or years can get a little bland and boring. While it’s nice to be able to go out and buy brand new furnishings, that’s not always doable when you’re on a budget. However, a little creativity and brainstorming can help you save money and freshen up your space without breaking the bank. Bring new life to your home by following these 15 ways to decorate with what you have!
Frame Family Pictures
Every home should have at least some sentimental decor and family pictures are a perfect option. Whether you have pictures sitting around or need to go get them developed, gather up a few favorites and frame them. Framed photos can transform an ordinary living room wall into a beautiful collage that tells a story. If you need a little inspiration, read our guide on how and where to hang wall art.
Repaint Furniture
Feel like your furniture is getting pretty stale? This budget-friendly decorating idea is sure to liven up any dresser or bookshelf. Simply add a fresh coat of paint to any wooden furniture piece and you’ll be shocked at the transformation. If you’re feeling really adventurous, try choosing a bright color or something out of the ordinary to shake things up.
Switch Out Pillow Covers
Pillows often get overlooked when you’re thinking of ways to decorate with what you have, but they’re a hidden gem you don’t want to miss. Rather than going to the store to buy new ones, try replacing them with a different pillow cover. This will save you lots of money (especially if you’re changing quite a few pillows), while also bringing a stylish accent to every room.
Try a DIY Bar
Having a bar inside your house comes in handy when you have parties, but can cost a pretty penny if you go the whole nine yards. Instead, you can decorate with what you have and create a DIY bar that’ll work just as great for happy hour.
Look around your home and gather up a table tamp, bookcase, and spare drinking glasses to set up your very own bar. You can store the glasses on the shelves and display your fine wine and whiskey on top. If you happen to have extra seating, you can also place those on either side for your guests.
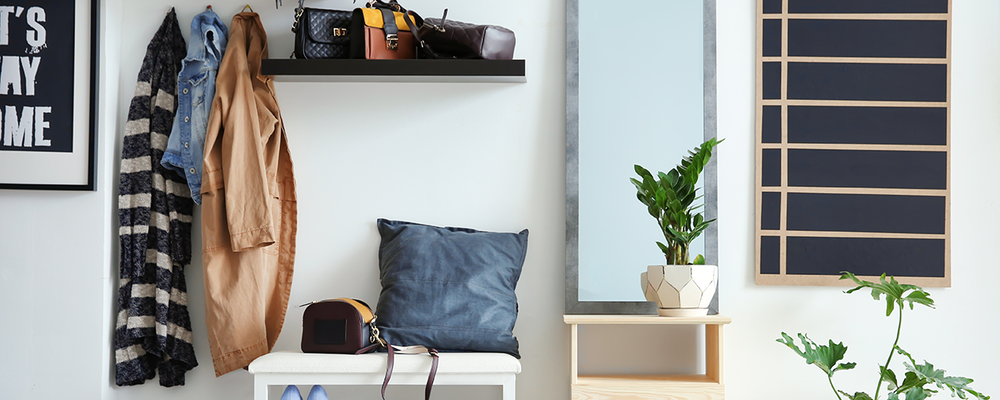
Dress Up Your Entryway
In Feng Shui design, the entryway is extremely important because it’s where energy enters your home. If you haven’t already, give this area some much needed love by decorating it with a few household items like a framed photo or art piece, a spare bench, and a large houseplant. You can even dress up the bench with stacks of books you have cooped up in your room for an added touch.
Show Off Collectibles
Mixing old with new is a popular interior design trend that goes hand in hand with budget-friendly decorating because you can use what you already have. Head to your attic and rummage through those family heirlooms or your favorite collectibles and incorporate them into your home’s design. Antique decor is wonderful because it means something to you and gives your home character.
Give Glass Bottles New Life
Glass often gets tossed to the side and thrown in the recycling, but it can be given new life with a little creativity! Collect bottles, vases, or vessels in similar colors and display them as a collection on your mantle or dining room table. Look for bottles with interesting shapes and have each piece vary in size to create contrast. Add a floral touch with flowers in each vase!
Bring the Outdoors In
If you have a backyard full of outdoor decor, you may want to consider bringing some of that inside — especially during the winter months. Give garden stools and bistro seating a new purpose by incorporating them into your living room or dining room. This budget-friendly decorating tip will help your outdoor furniture last longer, while also giving the inside of your home a new look!
Remove Cabinet Doors
Open shelving is dominating kitchens across the country right now and you can make it happen in your home without spending hundreds of dollars. Simply remove your cabinet doors and touch up the inside shelving for a complete makeover that you’ll love! You can use this opportunity to repaint your cabinets and organize your dishware, so that the finished product looks stylish and tidy.
Accessorize Your Coffee Table
Does your coffee table have any decor on it besides TV remotes and coasters? If not, it’s time to decorate with what you have. Accessorize your table with hardcover books off the shelf to create an interesting tablescape. Plants, candles, and glass collections are other decor pieces that will make this statement table pop.
Fill Your Fireplace
For fireplaces that go untouched, take advantage of the space by filling it with budget-friendly decorating items like books, candles, vases, and potted plants. Arranging these items will bring interest and color to the space and give you the chance to display decor you normally wouldn’t. Make the most of this area when the holidays come around too!
Spice Up Office Supplies
Your office space doesn’t need to have a dull, corporate vibe to it. Help style the room by beautifying office supplies like file boxes and magazine holders with scraps of wallpaper or wrapping paper. Depending on your style preferences, you can choose designs with bold patterns and colors that bring vibrant accents to the room.
Display Your Kids’ Art
What better way to decorate with what you have then by displaying the most meaningful decor there is: children’s art. Frame their finger paintings and construction paper creations and hang them along your hallways or within other rooms of your home. Sculptures and other items can be used as shelf decor. This allows you to enjoy your kids’ creations rather than tucking them away in boxes.
Change Up Throw Blankets
Changing throw blankets is a great way to freshen up your space throughout the year. Grab blankets from your bedroom chest and drape them over your bed, couches, and chairs to give a subtle texture and color change. While you’re at it, you can switch out throw pillows to mix up the patterns and colors in each space, too.
Rearrange Your Furniture
One last tip for home decorating ideas on a budget is to make the most of the furniture sitting right in front of you! Sometimes all you need to do is rearrange your furniture to experience a wild transformation. When rearranging, keep in mind that furniture should be moved away from the wall and set into groupings. This makes the room feel larger and encourages conversation.
Reinventing your space is a fun and exciting process that doesn’t have to loosen your purse strings. Follow these 15 ways to decorate with what you have and enjoy the transformation while staying within your budget! For more budget-friendly home projects, take a look at our tips for organizing your kitchen.

Listening to your loud neighbors next door or your roommate across the hall can get annoying very quickly. Rather than taking a drastic step like moving out, try these easy soundproofing hacks to reduce noise pollution and bring some much needed peace and quiet back to your living space.
Three Critical Points of Sound
Before you jump into trying soundproofing hacks in your home, you need to identify the three points or locations of sound that are making your space noisy. Addressing these areas will help guide your action plan and give you better and quieter results in the end.
1. Source of the Sound
Chances are you are well aware of the source of the sound because it’s been driving you crazy for months. Even if you are, make sure you listen again. Take note of all of the sources and what area of the house they’re coming from. Is it the TV in the living room or your roomie next door — or maybe both?
2. Entry Point
Once you’ve identified the specific locations of the source of the noise, it’s time to consider the second critical area of sound: entry point. As the name suggests, the entry point is the area in your house where the sound enters your room. This could be your window, door, or an entire wall (shared walls in apartments are a great example). Identify how the sound is coming into your room and recognize that there may be several affected areas.
3. Reflection Point
The last critical point to address before soundproofing is the reflection point. When noise makes its way into your room, it reflects back at the same angle that it came. To combat this, you need to identify the angle at which the sound is moving and where it’s bouncing back to. For example, if noise is coming from directly across the hall in a straight line, you’ll want to soundproof the first wall that it hits and the opposite facing wall that it reflects off.
Easy Soundproofing Hacks
After you evaluate the three critical points of sound, you’re ready to learn how to soundproof a room cheaply and without too much hassle. Try these soundproofing hacks to enjoy a more peaceful space.
Use Carpets & Rugs
Covering floors with carpets and rugs is a soundproofing hack that is stylish and easy to implement. Having flooring made of tile or marble is a nightmare when it comes to echoes and sound traveling across your space. Rather than spend thousands of dollars to replace flooring, you can throw down beautiful rugs and carpets to absorb sound.
To combat the loudest of noises, you can also try layering your rugs. This is a big interior design trend and it works wonders for soundproofing rooms!
Hang Tapestries & Curtains
One of the easiest ways to help block noise from your room is by hanging drapes and any other decorative tapestries or blankets. Not only do they give the room added flair, but adding soft and thick fabrics to your walls absorbs and dampens sound.
Floor-to-ceiling curtains and woven wall hangings are just a couple of ideas you can look into. You can even search for noise-reducing curtains that are meant to help soundproof rooms.
Add More Furniture
Have you ever noticed that voices echo much more in an empty room versus a full one? That’s because objects, furniture in this case, help block sound.
When soundproofing, try to add more furniture and place the new pieces in the affected space. Include the heaviest furniture you own, preferably with upholstery. These two elements provide the most sound absorption. Here are some of the best furniture pieces for noise blocking:
-
Wardrobes, dressers, and armoires
-
Bookcases
-
Tables
If you don’t have room for more furniture, you can improvise with thick blankets and plush throw pillows wherever possible.
Simply Rearrange Decor
Sometimes the easiest soundproofing hack is sitting right in front of you. Because you’ve already assessed the layout of your home and where the noise pollution is the worst, you can look to see what furniture pieces can be moved to minimize your exposure. Perhaps you can move your TV and dresser to the entry point of the sound to help block the sound waves. Alternatively, you can rearrange your couch so that it is furthest away from the raucous.
Whether you rearrange one piece of furniture or choose to swap your home office with your bedroom, there are creative ways to soundproof without spending any money at all.
Seal Your Doors & Windows
While it may not be a decorative way to soundproof rooms, sealing your doors and windows is a functional strategy that can make a world of difference.
For doors, check to see if there is a gap underneath where the door doesn’t touch the floor. These gaps are more common than you’d think and they are a major source of noise pollution. To alleviate this problem, use acoustic sealant tape. It’s inexpensive and easy to remove, which is great if you’re renting. Don’t be afraid to use it on the bottom, sides, and top of the door if need be.
As for windows, the same solution rings true. Even if you have double-glazed windows that are amazing at blocking out noise, you can’t forget about the seals around the windows. Use acoustic sealant glue to fully insulate the gaps.
Incorporate Soundproofing Foam
Depending on your style preferences, you may also want to incorporate soundproofing foam into your room. This foam can be purchased for a reasonable price and comes in a variety of colors to fit your design taste. Simply place it on your walls to add an extra layer of sound absorption.
Dealing with noisy street traffic and neighbors is a problem we’ve all dealt with at one time or another, but these easy soundproofing hacks are a great way to bring tranquility back to your home. As you begin soundproofing your walls, check out our guide on the why, where, and how of decorating your walls for some extra style tips!
There are many ways to cultivate a happy household, one of them being an ancient practice called Feng Shui. If you’re looking to refresh your home and improve the energy within it, follow this guide to discover more about Feng Shui design, its principles, and tips for creating a harmonious household.
What is Feng Shui?
Feng Shui or “wind water” is an ancient Chinese philosophy that aims to strike a balance between elements and optimize the “Chi” or energy. The primary goal of Feng Shui is to create a positive energy flow that nurtures your physical and mental health, success, and relationships.
While this ancient philosophy can be practiced in many ways, it is most commonly used in interior design because the Feng Shui analysis can be easily applied to the home.
Five Feng Shui Elements
Now that you know what Feng Shui is and its ultimate goal, take a look at the five elements that drive Feng Shui design and how you can incorporate them into your home.
1. Wood
The first element is wood, which symbolizes growth and vitality. To put this element into practice, place wood items, such as plants, furniture, and wooden art pieces, in your house to encourage personal growth.
2. Metal
Next up on the elements list is metal, which symbolizes logic and intelligence. To support your knowledge and mental sharpness, add this element to your space with metal decor pieces like light fixtures, tables, frames, and sculptures.
3. Earth
Earth is the third element that makes up Feng Shui design and it represents stability and balance. You can encourage these qualities by decorating your home with rocks, crystals, and landscape imagery like paintings and photographs.
4. Water
The fourth element is water, which symbolizes wisdom and serenity. Incorporating water into your home helps you find clarity and relaxation. Mirrors, reflective surfaces, and aquariums are the best items to use for this element.
5. Fire
Fire is the last Feng Shui design element and it represents passion, energy, transformation, and expansion. Use candles and red objects to bring the fire element inside your home.
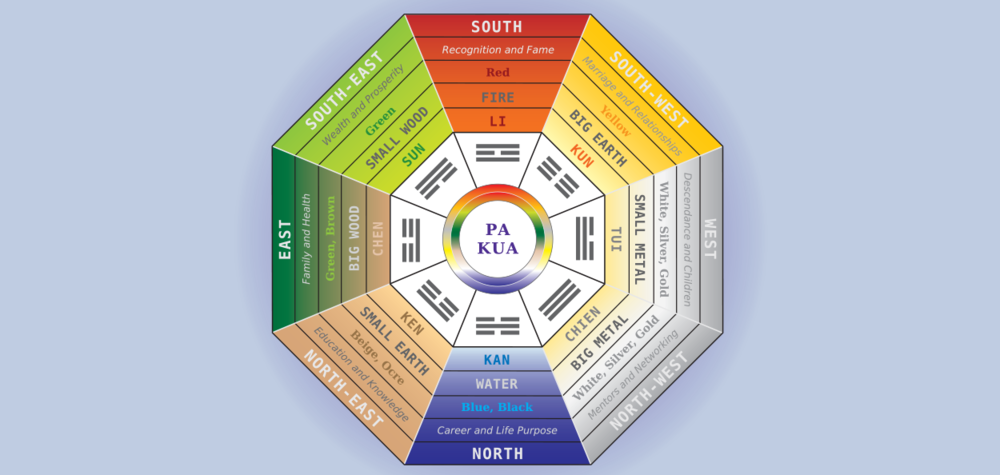
The Bagua Map
Before you start implementing Feng Shui design, it helps to understand the Bagua map. The Bagua map analyzes energy in a given space and suggests which elements to bring into the space to enhance the flow or Chi. The map breaks down nine quadrants, or areas, of your home. Each quadrant has an element and color associated with it, which can help you choose your decor.
There is a traditional version of the Bagua map that uses compass directions for navigation and there’s a western interpretation of the map that is simply divided up into categorized squares. The map above combines both traditional and western elements to make it easier for you to interpret. Here is a breakdown of the nine quadrants and the Feng Shui rules that accompany them.
North
The northern quadrant of your home represents your career and life path, which is guided by the water element. For this quadrant, decorate with mirrors and crystals. Dark colors like black are also helpful for the energy flow in this space. Make sure to avoid earth items, piles of paper, and bright colors.
Northeast
The northeast quadrant of your home symbolizes spiritual growth, education, and knowledge. It is guided by the small earth element and best decorated with books, meditation items, and mountain imagery. Try to avoid alcohol and distracting objects in this space.
East
The eastern quadrant represents health and family and is guided by the wood element. Follow Feng Shui rules by nurturing this space with family heirloom items, floral prints, and light colors. Keep the energy flow pure by avoiding metal items in this part of your home.
Southeast
The southeast quadrant symbolizes wealth and prosperity and should remind you to be grateful for what you have. This part of your home is guided by the wood element and should be filled with valuable items, live plants, and artwork of people and places. Avoid trash cans, bills, bathrooms, and toilets in this area of the house.
South
The southern quadrant represents fame and recognition and is guided by the passionate fire element. This area of your home should highlight who you are as a person and who you wish to become. Tall, vertical, and red decor should be placed within this space. Anything that represents your achievements like diplomas and awards also enhance energy flow here. Follow Feng Shui rules by leaving out water items, heavy objects, and dark colors.

Southwest
The southwest quadrant symbolizes love and marriage and is guided by the big earth element. Invite love and sensuality into this part of your house by decorating with candles, photos of you and your partner, and paired objects. Steer clear of sharp items, broken objects, and family photos.
West
The western quadrant represents creativity and children and is guided by the metal element. This space is meant to awaken your inner child, as well as improve the relationships between you and your children. Fill this area with games, toys, circular items, and earth items. Stay away from fire items, sharp objects, and items that block walkways.
Northwest
The northwest quadrant symbolizes helpful people and is centered around valuing those that support you. Guided by the metal element, this quadrant should be decorated with round objects, tools for sorting, and black and white colors. According to Feng Shui rules, this area needs to be void of clutter, storage items, and objects representing compromise.
Feng Shui Tips for the Home
Once you master the five elements and the Bagua map, you are well on your way to becoming a Feng Shui design expert. As you begin organizing your home and incorporating new decor, consider these additional Feng Shui tips to further enhance the Chi in each room.
Add Plants
Plants are representative of the wood element, which is why you should definitely have at least a couple in your house — in the corresponding quadrants, of course. They help to purify the air and bring freshness and vitality.
Prioritize Your Entryway
The entryway of a home is key within Feng Shui design. It represents the way energy enters not only your home, but your life too. Make it as welcoming as possible by keeping it neat and tidy. Personalize with decor items and try your best to include storage pieces like shoe racks, coat hooks, and bins for rain gear, so that each item has its own home.
Clear Clutter
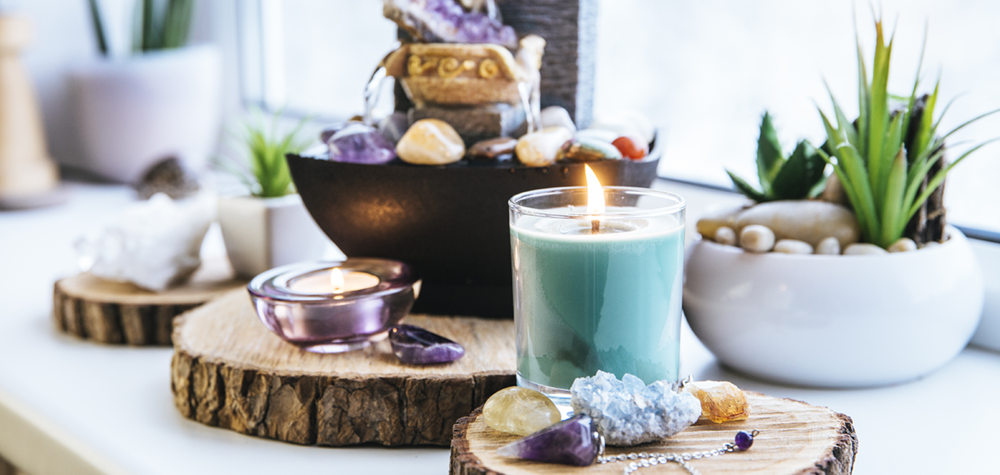
A clean, clutter-free home is one of the most important aspects within the Feng Shui guide. Make sure to regularly clean all surfaces and cleanse the air with essential oils or candles. This helps bring clarity and harmony to the space.
Check Commanding Positions
Commanding position is yet another important principle of Feng Shui design and should be followed in every room of your home. To set up the command position in any space, place the main piece of furniture — a couch, desk, or bed — where you can see the door without being in a direct line with it. This Feng Shui rule aims to position you in the best possible place, so that you can deal with whatever comes into your life.
Let In Air and Light
Air is a crucial component of Feng Shui. After all, “Feng” means wind. You need to make sure your home gets proper air flow and natural light as this combination brings positive energy and rejuvenation.
While there are many more principles and rules within Feng Shui design, this guide provides a solid foundation for you to start enhancing the Chi within your home! As you begin tidying up your space to purify the energy flow, check out these living room layout ideas to make any space feel cozy.
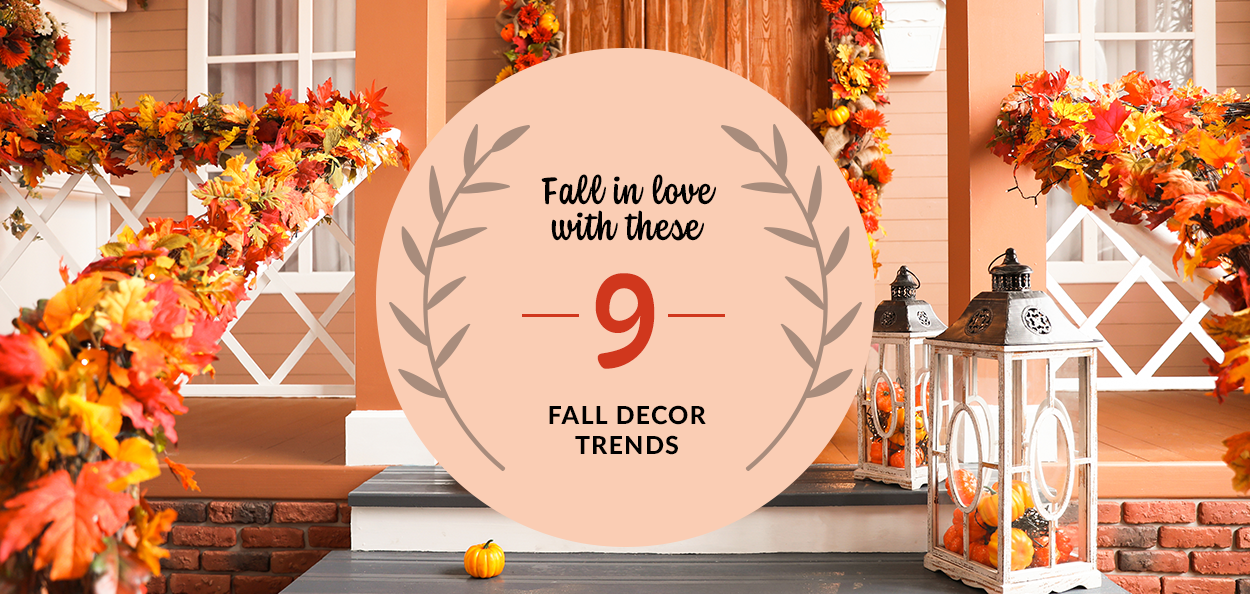
Fall is just around the corner which means it’s time to transform your home from a summer oasis to a cozy autumn retreat. Whether your style consists of pumpkins and plaid or more modern autumn touches, there are plenty of ways to spice up your space for the coming season. Curl up on the sofa and gather inspiration with these 9 fall decor trends.
Autumnal Plants
One of the signature themes of autumn is burnt orange leaves and fall foliage, which is why this fall decor trend is perfect for your home. If you have a green thumb, try your hand at nurturing fall flowers like Chrysanthemum, Celosia, or Croton.
For a zero maintenance alternative, opt for faux plants that achieve the same look. Plants with traditional fall colors like yellow, orange, red, white, or even brown can be strewn throughout each room. Don’t forget to include these plants on your front doorstep as a festive autumn greeting!
Traditional Plaid
As each year passes by, plaid continues to dominate as a popular fall decor idea. There are countless ways to incorporate plaid into your home, so all you need to decide is how subtle or obvious you want it to be. Plaid blankets, throw pillows, table cloths, bedding, furniture, and even wallpaper are just a few ideas you can use to create a plaid palace or a modest plaid design.
Warm Metallics
When thinking of autumn decorations, metallics may not be the first idea that comes to mind, but they’re a big fall decor trend in the design world. Brass, copper, and gold add a touch of luxury to your home, while also grounding it with earthy fall colors. Whether it’s copper dinnerware, brass art pieces, or gold-gilded mirrors, you can’t go wrong by mixing these shiny metallics.
Layered Accessories
Autumn is all about warm and cozy vibes, so it’s no wonder layered accessories are a hit. Try maximalist style by layering accent pillows and blankets. Weave in plain, fall-inspired hues along with corresponding patterns to create contrast and depth. Not only will this fall decor trend add color to your home, but it will also keep you and your guests comfy as the cold weather begins.
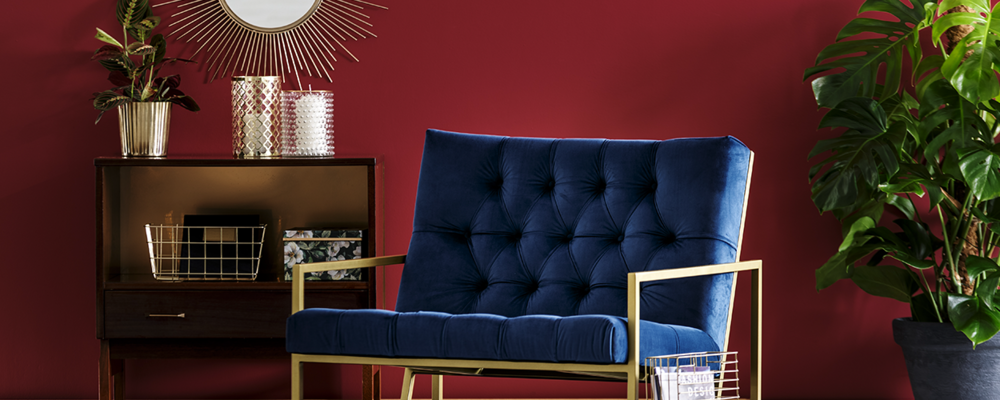
Moody Colors
While bright yellows and burnt oranges work wonders for a classic autumn look, consider moody colors as well. Dark reds, deep greens, navy blues, and gold are gourd-geous fall colors that bring richness to your home. Set the mood with dark green candles and gold vases or get courageous with a deep red accent wall!
Faux Fur
Nothing says cuddle weather more than faux fur accessories! Soften up a modern room with a faux fur rug or throw a blanket over your sofa, bed, and dining room chairs. This adds texture to your home that is not only stylish, but practical as well! Offer up blankets to guests or enjoy a romantic date night on your faux fur rug.
Floral Accents
There’s no need to stress if you aren’t a huge fan of plants. You can still incorporate fall foliage into your home without getting the real deal! Floral accents on dinnerware, table cloths, paintings, and vases are a wonderful way to celebrate the season without filling your home with plants. Follow your fall color theme and you’re golden!
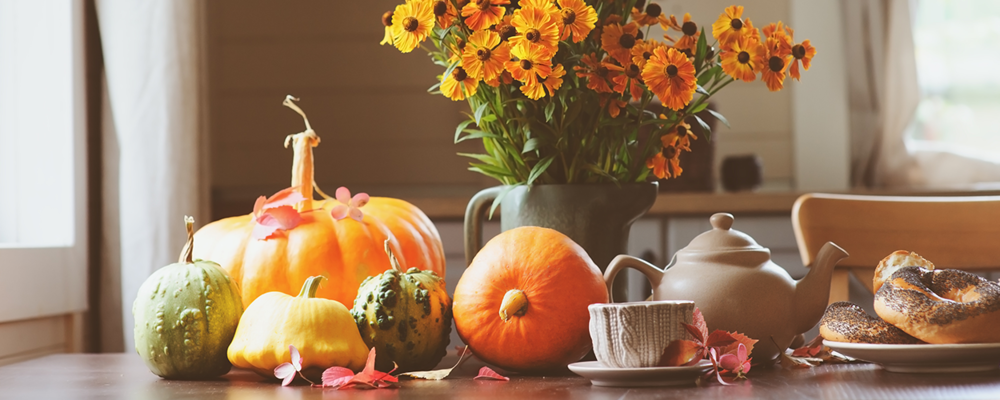
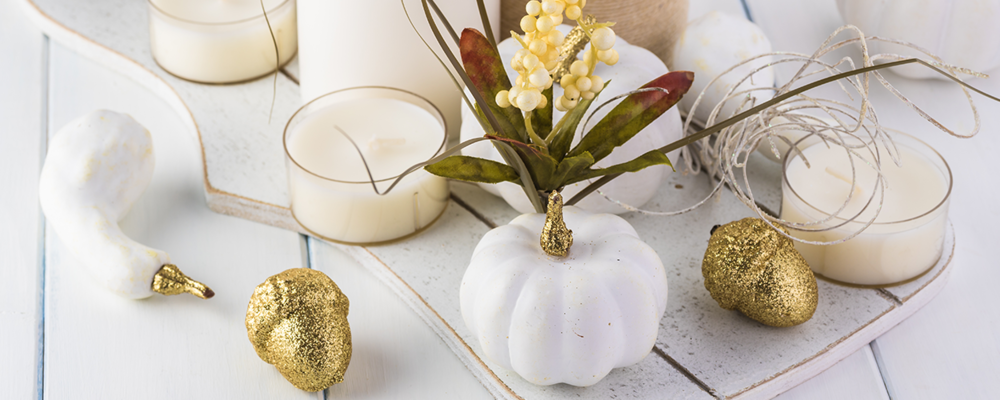
Pretty Pumpkins
You can’t decorate for autumn without including at least a few pumpkins here and there. Go traditional with bright orange pumpkins on the front porch or take a more modern approach. Pale pumpkin shades of orange, white, green, and gray are a great fall decor trend for any home. Metallic pumpkins (copper, gold, brass) are a new-age trend as well. Arrange them in different shapes and sizes, including at least three in a group.
Don’t be shy with placement either! Pumpkin decor can fit in anywhere. Fireplaces, dining room tables, staircases, countertops, and even kitchen islands are a handful of areas that can use some pumpkin pizzazz.
Velvet Furnishings
Incorporating velvet is a must if you love contemporary interior design with an old-school touch. Velvet furnishings are glamorous all year round, but they look amazing during the fall and winter months. Pick from your moody color palette or opt for vibrant fall colors like orange and mustard. Velvet drapes, duvet covers, pillows, and sofas are sample furnishings that make a style statement in any room.
From plaid to pumpkins and everything in between, you now have the inspiration to go decorate your home with these fall decor trends! If new furniture is on your decorating list, take a look at Fusion’s stylish selection of sofas and sectionals that fit any time of the year.
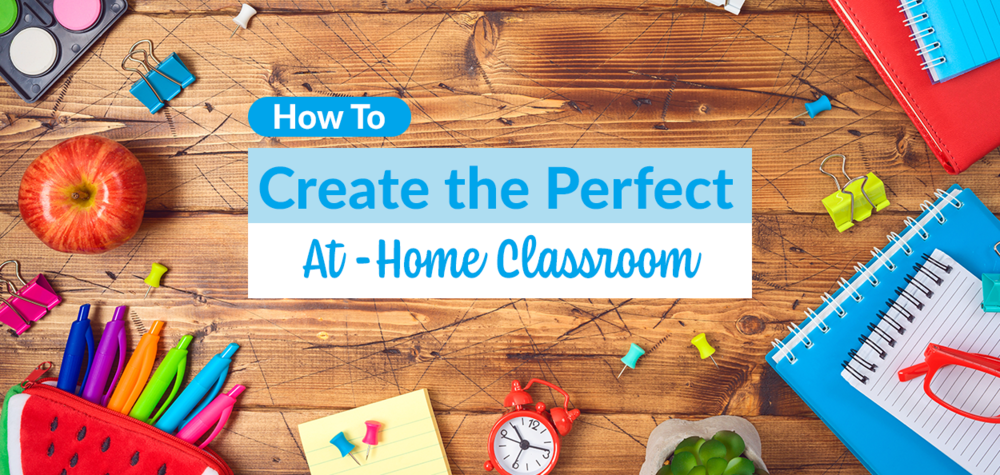
School closures and distance learning are the new normal within the educational world, and that means parents are taking on the role as teacher for their children. Jumping into homeschooling can be overwhelming if you haven’t had the time to prepare or create a classroom for your kids, no matter how old they are.
However, with a little inspiration and DIY work, you can transform your home into a space perfect for learning. Take a look at these at-home classroom ideas, as well as tips for homeschooling, so you feel confident and prepared as the back-to-school season begins.
Ideas for Creating a Classroom at Home
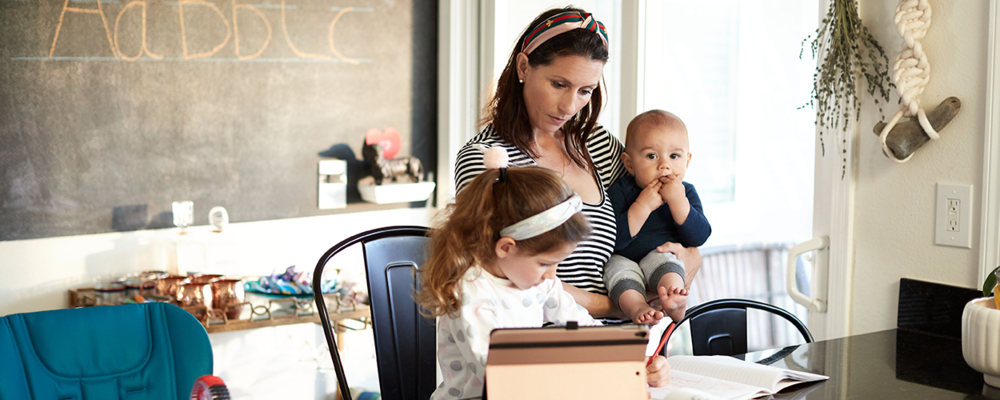
Choose a Space with Natural Light
As you start to prepare your home for learning, it’s important to pick a specific area to be your at-home classroom rather than letting the kids roam the entire house. Whether you’re limited on space and choose the dining room or opt for the spare bedroom, try your best to find a spot with lots of natural light. Natural light is beneficial for your child’s learning because it promotes productivity and boosts mood.
If you’re having trouble finding a well-lit space for your at-home classroom, learn how to brighten a dark room in our blog post!
Establish Designated Work Stations
When you visit your child’s school classroom, you’ll see that they have their own seat and work area. This principle should translate over to your at-home classroom as well. Create or pick a designated work station for each one of your children.
For young students in elementary school, you’ll want to create a space where you can easily oversee them throughout the day. Buy them their own desk, build a DIY desk, or simply set them at their own spot where they aren’t crowded by their siblings.
If you have teenagers or older children capable of working independently, there’s no rule saying you can’t establish a work space in their bedroom or another secluded area. Just make sure you check up on them periodically throughout the day.
Create a Reading Corner
This at-home classroom idea is targeted more towards little ones, but can be relevant for adolescents as well. Reading is a large part of school curriculum, so it’s ideal if you can include a reading corner within your learning space.
For young kids, choose a cozy nook and set up a table for them to sit with their books. Keep books in a bin or bookshelf that’s low to the ground and easily accessible to them. If you’re feeling extra creative, incorporate a chalkboard or whiteboard to supplement reading lessons.
Teenagers can also have a designated reading corner, but with a more mature theme. They can sit at a table or keep things more relaxed by sitting in their favorite bean bag or recliner chair. You can still use a whiteboard for reading discussions and include bookshelves too.

Choose Comfortable Seating
While it may seem insignificant, seating is a crucial consideration when it comes to creating a productive classroom at home. This is especially important for children around primary school age because any discomfort will make them fidget and become distracted from their work. Try your best to give them seats that allow their feet to rest flat on the floor. If they’re sitting at the kitchen table or in other adult-sized chairs, make them as comfy as you can by providing cushions.
Chair height may not be a problem for adolescents, but it’s still important to provide them with quality seating as well. Ergonomic office chairs are a great option because they provide support for your entire body.
Keep the Classroom Organized
Organization is key when you’re running a classroom at home. From your kid’s individual schoolwork to classroom supplies, your home can turn into a mess if you aren’t diligent. Luckily, there are fun and easy ways to keep things organized. Here are a few examples:
-
Color-Coded Bins: Use a different color for each child and categorize each bin into academic topics like math and science. These can house all of the paperwork and homework assignments.
-
Jewelry or Shoe Organizers: Hang clear, plastic organizers on the wall or door to keep classroom supplies like pencils, markers, and scissors nice and tidy.
-
Pencil Boxes: Have each child use pencil boxes, so they can be responsible for their own school supplies.
Create a Visual Timetable
Your days as a homeschool teacher are almost guaranteed to go smoother if you plan each day and stick to a general schedule. After you create your master plan, make a visual timetable that your kiddos can look at too. It’s just as important for them to be aware of the day’s activities as it is for you.
Since you’ll be using the table five days a week, buying a dry-erase whiteboard is a great option for quick changes and adjustments. If paper is more your style, there are plenty of free, downloadable time table templates online.
Tips for Homeschooling
Ease Into It
Homeschooling can be an overwhelming process, so don’t feel like you need to jump right into it all at once. When the school season starts back up, give yourself and your kids the chance to ease into it by slowly introducing curriculum. Add one or two subjects a week to ramp up the schedule and you’ll become a pro in no time.
Eliminate Distractions
Distractions are one of the biggest challenges you’ll face as a homeschooling parent. That’s why you need to establish a plan prior to the first day of school. The first step is clearing out any tangible distractions from your at-home classroom. Electronic devices should be put away unless used for learning purposes and the TV should be turned off. You may also want to separate your children and your pets for most of the day to avoid distractions.
While it’s good to reduce noise levels in the room, don’t be scared to incorporate some soft background music to break up the stark silence. Gentle music can be soothing and help calm the kids down as they work away.
Dress for Success
Make a point of getting your kids dressed and ready to go as if they were attending a normal day at school. This helps set boundaries for their new learning environment and adds an element of routine that is necessary for productivity. To reward them for good behavior throughout the school year, you can mix things up by incorporating Fun Fridays where they can wear pajamas or dress in their favorite costume.
Be Flexible
Even though routine and predictability are necessary when you’re teaching your kids from home, there is definitely room for flexibility. Know that not every day is going to go according to plan, and be okay with that. Cut yourself a break and try to focus on wins for the day. There’s always another day to catch up on assignments.
Creating the perfect at-home classroom looks different for every family, but these ideas should give you some great inspiration to work with! Combine a creative learning space with helpful tips for homeschooling, and you’re ready to take on the school year.
Of course, learning isn’t just for kids. If you’re also taking a course from home or looking to create a more productive workspace, take a look at our home ergonomics checklist!
Whether it’s a large abstract art piece or small family photo, hanging wall art can be a tricky task. Opinions come into play and the obvious questions of location and placement hang in the air. While there is no strict right and wrong when it comes to decorating your own home, there are certain guidelines that can help you through the process. Learn some wall art wisdom with these wall decor tips.
Hanging Wall Art: The Why
Before diving into the “where” and “how” of hanging wall art, it’s important to know the “why” that drives each decision.
Choosing the Right Size Wall Art
When it comes to arranging wall art, size is everything. You should choose the size of the art based on the amount of wall space you have to work with. If you’re looking to decorate a stand alone wall, you can follow the popular rule of thumb that says artwork should take up four-sevenths of the wall on which it is placed. Start by measuring the length and width of the chosen wall, then multiply each measurement by .571 (four-sevenths as a decimal) to get the appropriate size.
If you’re hanging wall decor behind a piece of furniture, you can be a little more liberal with your measurements. Simply eyeball the wall art against the furniture and look to see if it’s close to two-thirds the size. The general rule is that the art should be slightly smaller in length than the object you’re placing it behind.

Hanging Wall Art: The Where
Now that you know about appropriate wall art sizes, you can move on to the finer details of placement and location. Deciding where to hang wall art can be tough with so many walls to choose from, but here are a couple of wall decor tips to give you a better idea.
Find the Focal Point of the Room
Before making any rash decisions, take the time to find the focal point of the rooms within your home. Focal points are the part of a room that the eye is drawn to first, which makes it the perfect spot for hanging wall art. An example would be a fireplace in the living room. Find these focal points, and you’ve got yourself designated spaces to decorate.
While focal points are important, don’t feel limited by them. You can still hang wall art in other areas of the home, but this is a great place to start.
Hang Close to Eye Level
Although interior designers usually recommend hanging wall art at eye level, there is a new school of thought that says the center of artwork should be placed closer to 57 inches from the floor. The reasoning being that every person has a different definition of what eye level is.
Deciding which school of thought you’re in is up to you, but remember, it’s just a general guideline. Go with your preference and feel out the space of the room. If you have high ceilings, feel free to raise your art slightly above 57 inches to fill up the space more evenly.

Hanging Wall Art: The How-To
Once you have figured out the why and where of hanging your wall decor, it’s time to break out the hammer and nails to get it done. This is the part of hanging wall art that requires lots of patience and precision!
Rather than jumping straight into it, follow these steps to get a visual of the end product before it’s too late. Hanging wall art this way also allows you to do it alone, rather than with two people.
Step 1: Trace your wall art on a piece of paper.
Step 2: Cut out the tracing to use as a template.
Step 3: Make a mark on the template to show where the picture wire or hook will be by measuring out the same distance from the wire to the top of the frame.
Step 4: With the marked side facing out, match up the nail mark on your template to the nail mark on the wall and secure it in place with tape.
Step 5: Step back and take a look at the placement. Make adjustments as necessary and then you’re ready for the real thing!
Ideas for How to Arrange Wall Art
Depending on how many pieces you have, there are lots of options for how to arrange wall art. Depending on size, shape, and subject matter, you can group your artwork differently to achieve more or less balance. Get inspiration for your pieces by taking a look at these unique ways of arranging wall art.
Symmetrical Arrangement
Just as the name suggests, a symmetrical arrangement gives the wall art a visual balance that is uniform and consistent. This is a good option for pieces that are similar in shape, size, and subject matter. Place them over furniture collections or fireplaces to add depth to the focal point.
Keep in mind that a grouping of art pieces should be spaced no more than 6” apart, with 2” to 3” being optimum.
Asymmetrical Arrangement
Arranging wall art asymmetrically works best for pieces that have at least one element in common like color scheme or subject matter. You can stagger them by placing one lower than the other, or vice versa, to create an organic balance.
A wall decor tip to remember for these sorts of arrangements is to hang the largest pieces first and work from there. Don’t be afraid to group small with big, as well as vertical with horizontal. Combining pieces creates interest and energy.
Now that you know the why, where, and how of wall art wisdom, you can decorate your home with more confidence and expertise! Have fun with it and remember that these tips for hanging art are just guidelines, not steadfast rules. Be creative and do what you like best. Once you’re finished, learn how to measure furniture the easy way!
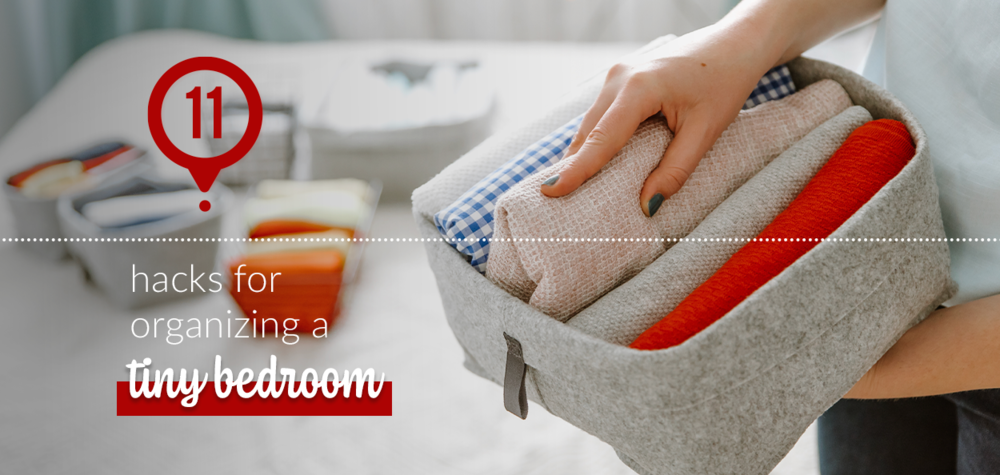
Moving into a tiny bedroom can become frustrating if you don’t feel like you can store your belongings and still move around the space freely. Between bedroom furniture, clothing, and decor, the space fills up a lot quicker than you’d think. Before you give up and start donating your favorite items, take a look at these small bedroom hacks that will help transform your room into a spacious oasis!
Arranging a Small Bedroom
As you begin your bedroom makeover, start working with the biggest items—your bedroom furniture. Your bed, dresser, TV, and nightstands eat up the most space, so you want to be strategic with your layout. Consider these small bedroom hacks when arranging a small bedroom.
1. Center It Up
First things first, center your bed in front of the most visible wall. This gives your small bedroom symmetry and helps to maximize the space. There should be at least a little room on either side of the bed, which is perfect for nightstands or floor lamps.
2. Forego Nightstands
Depending on the size of your space, this small bedroom hack may be necessary. While nightstands come in handy for lighting and books, they aren’t a requirement. This is why you may want to consider getting rid of one or both of your nightstands. This will free up more space to walk around your bed, or give you the opportunity to add in furniture that will be more useful.
3. Think Vertical
When it comes to arranging a small bedroom, you’ve got to switch your mindset from horizontal to vertical. Floor space is not your friend in this scenario; however, height is your best friend.
A tall, skinny bookshelf can make up for that nightstand you decided to eliminate. Put it next to your bed and utilize all the shelves for decor, along with typical nightstand items like iPads and books. If you have a dresser, you can place it across from your bed so that you can stack your TV on top and use it as a multi-purpose piece.
Organizing a Tiny Bedroom
After you’ve finished arranging a small bedroom, it’s time to hone in on small bedroom hacks that help organize all the other items in your room. From pictures to shoes and everything in between, try these tricks to declutter and streamline your bedroom.
4. Build Wall Shelves
The walls are probably the most underutilized storage space in bedrooms. You’ve got tons of square footage right in front of your eyes and all you need to do is take advantage of it. That’s where wall shelves come into play. Place them as high or low as you want and you’ve got yourself a place for books, pictures, plants, and more.
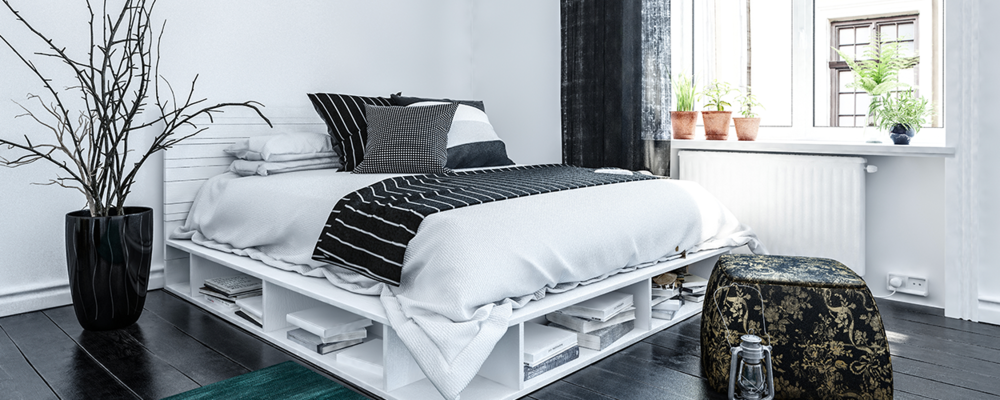
5. Use Bed Frame Storage
Organizing a tiny bedroom just got a whole lot easier with bed frame storage. Whether it’s shelving in the headboard or built-in drawers underneath, your bed is your golden ticket to maximizing space. Store your shoes and books beneath the bed, and place decorative items like plants and pictures up top.
Don’t worry If your bed doesn’t have built-in storage. You can buy some enclosed baskets or bins and simply place them under your bed for a cheap and easy substitute.
6. Hang Laundry Hampers
Dirty laundry piles up quickly throughout the week which is why laundry hampers are so important. Rather than shoving your hamper in the corner of your room, save the floor space and opt for hanging hampers instead. The back of your bedroom or closet door is a convenient spot to hang a laundry bag. It’s out of the way, but still easy to get to!
7. Store Shoes Above the Floor
This small bedroom hack ties into the vertical way of thinking that’s so crucial when you’re working with little space. Just like you can hang laundry up off the floor, you can do the same with your shoes. Install shelving, pegs, or plastic shoe organizers on the back of your doors to maximize your square footage and keep things tidy.
8. Add Closet Hooks
The closet is sacred space when it comes to organizing a tiny bedroom. Just when you think you can’t fit more, you can add closet hooks to the back wall. You can either place them below your clothing to hang smaller items like hats, or if you have enough closet depth, you can place them at eye level behind clothing.
9. Try a Hideaway Dresser
Lots of clothing items and accessories can fit into dressers, which makes them hard to live without. If your dresser is staying with you no matter what, try to hide it away in your closet to give your room more space. Understandably, this small bedroom hack can be difficult to pull off — your closet needs to be large enough and your dresser small enough. If it works, you’ll free up plenty of space and keep a handy piece of furniture. It’s the best of both worlds.
10. Decorate with Trones
Not sure what Trones are? Well, they’re an IKEA heavensend for people looking to organize a tiny bedroom! These cabinets are fairly shallow in depth, so you don’t need to worry about them sticking far out from the wall. Simply mount them on your bedroom walls and you have shelves for pictures as well as cabinet space.
11. Install Picture Ledges
If you’re already missing your nightstands, you’re going to love this small bedroom hack. Nightstands are super convenient for holding your phone, glasses, and picture frames, but picture ledges do the same exact job while using barely any space. These small ledges or shelves can be placed on the wall right next to your bed and hold whatever small items you like. They’re inexpensive and easy to install, so they really are a win-win!
Having a tiny bedroom can feel limiting, but with a little creativity and lots of small bedroom hacks, you can maximize your space and make it into the cozy room you’ve dreamt of! After you’ve taken on the challenge of organizing a tiny bedroom, keep the trend going by following these neat and tidy ideas for organizing your kitchen.

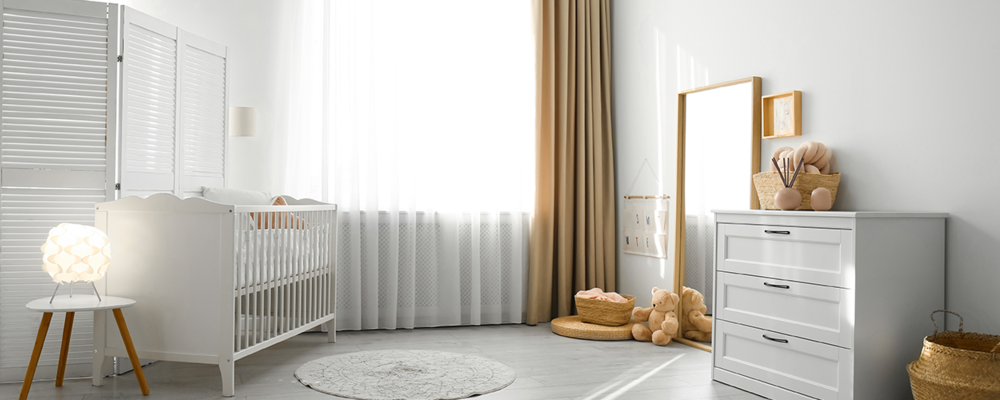
Just as other home decor styles change over the years, so do nursery styles. Get all the nursery inspiration you need with these top nursery trends in 2020! You’ll be able to create a comfortable space for you and your baby that reflects your unique parenting and decorating styles.
Nursery Trend 1: Cozy Spaces
You may have chosen a home with a spacious room for your nursery, but that’s not a prerequisite for today’s stylish modern nurseries. No matter whether your nursery is taking over a small spare room or even a corner of your own bedroom, there are plenty of nursery trends to keep your family comfortable and on trend.
Choose multi-purpose furniture and smart storage to make the most of your space. You can also opt for a lighter color palette to create a bright and airy feel. By prioritizing function and comfort over clutter, you’ll be able to enjoy your nursery style and have everything you need for Baby within an arm’s reach!
Nursery Trend 2: Classic Decor
Traditionally, nurseries are decorated in bright colors and with large illustrations. This can be a lot of fun to design, but may not match your interior design style — or your child’s tastes once they get a little older.
If you’re looking for nursery inspiration to suit the overall decor of your home and stand the test of time, then look no further than the classicism nursery trend. The idea behind this nursery style is to create a simple, subtle, and elegant look that will be calming for the early years and beyond. Choose light colors and a few high-quality decor pieces to get this classic look.
Nursery Trend 3: Personalized Details
Another nursery trend for 2020 is the use of your baby’s name throughout your nursery decor. Think personalized wall art, door signs, plaques, and bookends. You can also get blankets and cushions that are customized with your little miracle’s special name.
Remember that it’s not just Baby who will spend a lot of their time in the nursery. You will probably be in your baby’s room more often than your own bedroom! For this reason, it can be helpful to personalize your baby’s space with a few of your own favorite things. From artwork and inspirational quotes to some of the toys you loved as a child, adding some personal touches to your nursery style can help you relax and feel more comfortable as you look after your new baby.
Nursery Trend 4: Gender-Neutral Designs
Forget blue nursery styles for boys and pink nursery styles for girls. Modern nurseries are now more understated and gender-neutral than ever before.
When it comes to this nursery trend, the focus is on functionality, relaxation, and comfort above all else. This versatile approach ensures a welcoming space for your child, no matter their age — or whether any siblings come along and join them later. Choose soft tones and add different textures throughout the room. You can also opt for a nursery style that complements the rest of your home interior design for a more cohesive feel.
Nursery Trend 5: Indoor Plants
Your new baby will keep you very busy so you’ll probably spend more time in the home. A thoughtfully decorated nursery will provide a pleasant environment for you and your child, but you might still miss the outdoors. Indoor plants are a great nursery trend that can add some freshness to the room.
While plants can help boost your mood and purify spaces, it’s essential to choose non-toxic plants for your nursery to keep your little one safe. Parlour palms, English ivy, and blue echeveria are especially effective at removing toxins from the air, while spider plants, ponytail palms, and Christmas cactus plants are easy to care for, so they won’t add to your workload.
Nursery Trend 6: The Statement Wall
Looking for something different to make your baby’s nursery stand out? Consider the statement wall. This is a great option for modern nurseries and can even help create a designated nursery space if you’re sharing your own bedroom with your baby.
Statement walls can work with any nursery style depending on how you choose to add the focus. If you love wallpaper, there are a ton of prints that can really make an impact in the space. Floral, foliage, and ocean themes are trending in 2020. You can also use dark-colored paint to make your child’s nursery more unique. Moody green, matte black, and simple geometric designs are some of this year’s top choices.
Nursery Trend 7: Relaxing Vibes
An atmosphere of relaxation is key to any nursery style and can help you and Baby bond together. Modern nurseries are embracing cozy designs to create a welcoming environment. The one you choose all just depends on what allows you to relax and unwind in your home.
Warm colors and earthy textures are some of the most popular nursery trends of 2020. You can try a Bohemian interior design style by incorporating rattan furniture, chunky knits, and eco-friendly wicker changing baskets into your nursery.
Scandinavian design is also serving as nursery inspiration this year. You can adopt this style with simple furnishings and wooden flooring combined with sheepskin rugs and woolly throw cushions.
Nursery Trend 8: Timeless Furniture
There’s no doubt about it: Tiny furniture is a cute addition to any nursery. The trouble is, it won’t take long before your baby gets too big for that beautiful bassinet. As well as having a more versatile decor, modern nurseries are moving away from baby furniture that only lasts for a year or less and turning to timeless pieces instead.
To get the most out of this nursery trend, invest in practical furniture that your child can keep in their room as they get older. You can buy a dresser with a removable changing table to store your baby items and nurse your child in a high-quality armchair. Both of these pieces will be useful and look great for years to come. Just remember to get your furniture in kid-friendly fabrics, as children can still make a mess long after they’ve grown out of diapers!
To get more nursery inspiration, take a look at Fusion’s stylish furniture and kid-friendly collections.

Although travel vans have been around for decades, they’re now seeing a resurgence with the younger generation of millennials looking to explore the country more easily. Along with being a budget-friendly option, the van life has gained so much traction because it’s convenient, comfortable, and customizable. Get ready for an adventure on the road with these camper decor ideas and tips on how to live a successful van life.
Camper Decor Ideas
Now that you’ve decided life on the road is your destiny, it’s time to get down to business with the nitty gritty details. Personalizing your van and transforming it into a vacation home follows the same monetary guidelines as any other home makeover. You can make the process as cheap or as expensive as you want. Here are some trendy camper decor ideas that give your van the stylish yet functional feel you’ve been looking for.
1. Light It Up
If your travel van doesn’t have windows, lighting is going to be extra important to avoid having a space that feels like a dark cave. To keep things on budget, opt for simple lighting options like LED fairy lights or strip lights. They add the cozy ambiance you need all day and night. For a more expensive alternative, look into back lighting and recessed lights.
2. Convenient Cabinetry
Getting used to the small size of a travel van will take some time. Make it a little bit easier on yourself by installing convenient storage like overhead cabinetry. This allows for more space in your living area, as well as the chance to pick out cabinets that fit your van decor style.
3. What About the Walls
While this isn’t the most mandatory camper decor idea, dressing up your walls is a fun and relatively easy way to transform your regular travel van into an Instagram-worthy vision. Dedicate a weekend or two to a DIY plywood panel installation. Adding these panels to your van’s walls will give it a custom look, almost like a regular house. Paint the panels with light, neutral colors like white or beige to make the space feel brighter and bigger!

4. Bedding is Big
Choosing your travel van’s bedding is another key decision you want to put serious thought into. While throwing a mattress in there and calling it a day sounds like the easiest option, there are much smarter ways that are worth the effort.
A Murphy bed is one of them. These movable beds fold up into the wall of your van to create maximum space when you aren’t using it. Move around the van freely during the day, and pop it down for bedtime!
If you don’t need the extra square feet from a Murphy bed, consider a platform bed with storage underneath. Create custom under-bed shelving to give you more room for household items and clothes. This camper decor idea also gives you more opportunities to style your van to your liking. Keep the shelves retro or make them more modern!
5. Privacy is Practical
While some travelers may have an open-door motto for their van life, you may want some privacy during your time on the road. Luckily, there are simple ways to escape from the outside world when you’re living in a van.
Curtains are key when it comes to privacy. Not only do they block you from the view of passersby, but they keep out sunlight, too. Hang curtains in front of windows, kitchen storage spaces, or even as a make-shift shade when the van doors are open. Keep costs low with a DIY curtain or get fancy with some drapes from your fave home decor store.
6. Pretty Prints & Patterns
The van life is all about less is more, but that doesn’t mean you can’t spice up your space with items you would normally have in your house. Adding prints and patterns is an affordable and chic camper decor idea that personalizes your travel van. Whether it’s patterned pillows, a wall tapestry, or a floral wallpaper, there are plenty of ways to dress up your space simply and cheaply.

Tips for a Successful Van Life
As you’re decorating your travel van and throwing together all of your favorite camper decor ideas, it’s easy to get caught up in the fantasy of van life. Even though having a gorgeous travel van is exciting, there are lots of practical elements to keep in mind. Here are a few tips that will help your van life go off without a hitch.
Carry Basic Tools
Van life comes with unexpected problems that can sometimes be fixed with a good set of tools. Always bring a toolbox, along with a headlamp, duct tape, electrical connectors, wire strippers, and fuses on all of your trips.
Have Emergency Items
Make sure you have emergency items like fire extinguishers and a first aid kit. You never know what situation will pop up during your trip, so it’s better to be safe than sorry. Some countries even require you to have certain emergency equipment by law, so do your research prior to departure, especially if you’ll be traveling outside of the States.
Get the iOverlander App
One of the most freeing elements of life on the road is the spontaneity that comes with it. You live as you go and that’s what people love about it. No matter how awesome it is to be free and easy, there’s a necessity for a basic level of planning. For example, choosing your camping spot for the day is something you’ll want to plan for before heading out.
The iOverlander app is a popular app amongst travel van experts. All the camping spots in this app are added by other overlanders along with detailed reviews on cost and experiences. The camp spots range from free to “luxuriously” expensive, which translates to about $20 per night and includes electricity hookups, WiFi, and showers.
Pack the Right Clothing
Do your research and plan for weather throughout your whole trip. Just because it’s warm in the first few states you drive though doesn’t mean it will be like that everywhere. Packing the right clothing is crucial if you want to be comfortable and avoid unnecessary expenses at the nearest clothing store.
Deciding to pack up and hit the road in your travel van is an exciting and adventurous decision. With the right camper decor ideas, lots of research, and the proper packing list, you’re in for the trip of a lifetime. In the meantime, think about adding a kitchen to your travel van and incorporating some of these neat and tidy ideas for organizing the space.