5 Kid-Friendly Fabrics for the Home
Having kids in your home means a lot more messes and spills to clean up. That’s why choosing furnishings with the right fabric is vital to preventing your house from looking like a stain sanctuary. Fight against icky stains and come out winning with these 5 kid-friendly fabrics.
Choosing a Kid-Friendly Fabric
Before deciding on your kid-friendly fabric, there are a couple features that you should make sure to look for. The first is that the fabric is made of sturdy synthetic fibers. Synthetic fibers are known for their resilience because of the way they’re made. When they’re combined into tight, flat weaves, they resist the usual snagging and pilling that affects other materials.
The second element you should consider is high rub counts. The Martindale Test measures durability by how many times a fabric can be rubbed before showing wear. If you have kids, you will want your fabric to score in the “heavy duty” category that equates to 25,000 to 30,000 rubs. If you can, find out this information before purchasing your furniture to feel extra confident in your choice.
5 Kid-Friendly Fabrics
1. Microfiber
Microfiber is a great fabric to use for kid-friendly living room furniture because it’s stain resistant and comes in different textures that match any interior design style. From smooth weaves like suede to denser options similar to corduroy, microfiber has an abundance of kid-friendly choices that keep your style as fresh as your furniture. Most microfiber textures can be easily cleaned with water, but you should double check your manufacturer’s tag first because some require cleaning with a compatible solvent.
2. Wool
Incorporating wool into your family room ideas is a good decision when kiddos are in the mix. This kid-friendly fabric works perfectly for sofas and cozy chairs because it’s less susceptible to pilling, snagging, and wrinkling than other fabrics. Forget spending hours trying to get stains and messes out of your furniture because wool is super easy to spot-clean. Polish it off by vacuuming with a hand-held vacuum attachment to remove dust.
3. Leather
If your family room idea is to combine elegance with kid-friendly fabrics that stand the test of time, leather is a solid option. Its slick surface makes cleanups relatively easy and a quick treatment with leather conditioner once or twice a year is sure to keep the sofa soft and supple. One thing to keep in mind is that pets will reap the most harm on this fabric. You may be able to remove some scratches from your pet’s claws with certain solutions, but depending on the severity, others may not be fixable.

4. Vinyl
While leather usually comes with a big price tag, vinyl is a much more affordable option that achieves the same effect. This kid-friendly fabric is just as versatile and offers the same refined look. To make it even better, vinyl is easy to clean with a quick spray of water and the wipe of a cloth. It’s the perfect playroom addition!
5. Denim
Even though the word denim automatically sparks images of pants and jackets, this material can be used for so much more. One huge pro to this kid-friendly fabric is its durability. Think about how long a pair of denim jeans lasts. For most people, the answer is years. The same goes for denim furniture. Sold in a variety of colors, denim seamlessly blends in with any family-friendly interior design style you’re looking to create.
Smart Solutions Fabrics
If you want to purchase all of your furniture from one supplier you can trust, Southern Motion has a whole line of nine different Smart Solutions fabrics. These fabrics encompass all of the characteristics mentioned above: they’re durable, stylish, comfy, and available on all Southern Motion furniture products.

Helpful Tips for a Family-Friendly Interior Design
The Touch Test
If you don’t have access to the Martindale Test results for the furniture you’re interested in buying, don’t worry because there’s a quick touch test you can do instead. Simply run your fingers over the fabric. The more noise it makes, the higher its durability and the lower its maintenance requirements. Doing this will give you a general idea of how kid-friendly the fabric really is.
Stain-Resistant Finish
When ordering your upholstery, don’t forget to ask for a stain-resistant finish to give it more protection. This finish works by preventing liquids from being absorbed and fine particles from adhering to fabrics.
Scotchgard
Scotchgard is a good, do-it-yourself preventative measure for furniture you buy off-the-shelf. It protects fabric and upholstery from staining by repelling whatever particles it comes into contact with. All you need to do is spray the product onto your new sofa or chair and voila! It’s a must-have for any family-friendly interior design.
While kids may be messy, your furniture doesn’t have to be. Laugh through the spills and everyday wear and tear knowing that your kid-friendly fabrics can take the hit. Dealing with a difficult stain on an existing piece of furniture? Take a look at our stain removal guide here!
Being energy efficient is not only good for the environment, it’s extremely beneficial for homeowners and their finances. While some choose to spend thousands of dollars on an energy-efficient home, there are much more affordable options that any homeowner can implement. Start saving money and the environment by checking out these 7 easy ways to incorporate energy-efficient home design into your life.
How to Create an Energy-Efficient Home
Lighting
One of the easiest ways to start designing an energy-efficient home is by carefully choosing your lighting source. Forget incandescent light bulbs because today’s biggest trend is LED lights. The excitement over LED started for good reason. It’s been shown that switching from incandescent to LED light bulbs can save you 40 percent or more on energy costs. Who wouldn’t want that?
LED bulbs have come a long way since their first debut and now offer warmer tones rather than harsh white colors. They are also much cheaper to buy than they used to be. Pop these bulbs into every light source and you’re on your way to creating a more energy-efficient home.
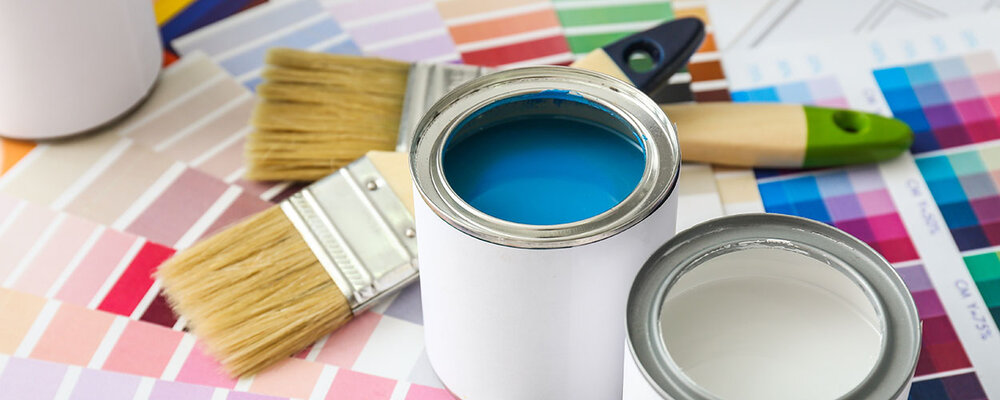
Paint Colors
Break out your paint rollers because it’s time for a color makeover in your home. We don’t usually think of wall paint as being particularly beneficial from an energy standpoint, but it actually works just as well as fluorescent bulbs when it comes to energy-efficient home design. Dark color paints absorb more light which means they absorb more heat. On the other hand, light colors reflect heat which keeps your home cooler. Whites, oranges, and yellows are just a few examples of light shades that help keep your house cool in the hotter months. Blues and browns are best for winter months when you need to absorb as much heat as possible to stay nice and cozy.
Area Rugs
Installing energy-efficient flooring is a great way to make your home more eco-friendly, but not all of us want to empty our wallets getting it done. A simple and affordable alternative is incorporating area rugs wherever you can. Homes with hardwood or tile flooring can feel cold and sterile, especially during the colder months. Rather than hiking up your utility bill by blasting the heater, buy some area rugs to make the space feel cozier. They’ll not only make your room look more stylish, but will also help you design an energy-efficient home in a flash.
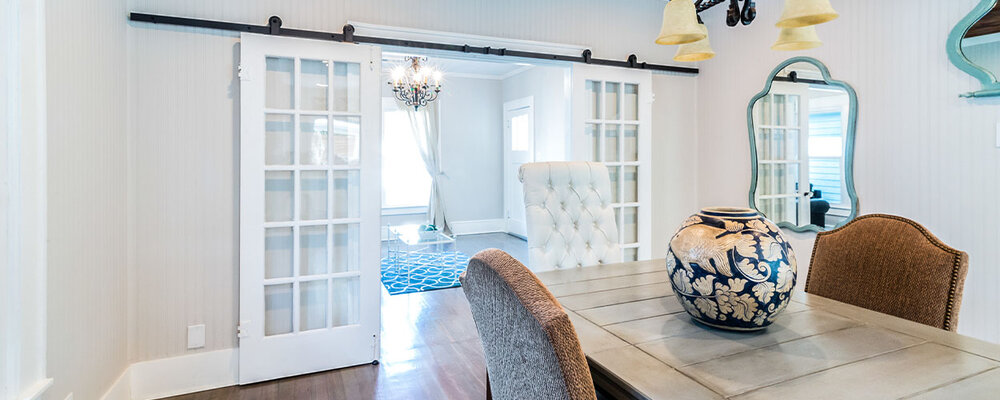
Sliding Doors
Barn doors, also known as sliding doors, have become a huge trend in the interior design world and we’re loving it. Even though the name suggests a country theme, barn doors can be used in any style home. As far as energy-efficient home design goes, barn doors work perfectly for containing cool or warm air in specific areas. For large homes, this can be very beneficial. Lots of space means lots of wasted energy. This simple solution offers a quick remedy.
Get crafty with a DIY barn door project or buy a ready-made door online. Either way, the end result will be a trendy, energy-efficient home that’s fit to be shown in this year’s interior design magazines.
Ceiling Fans
Ceiling fans are a common interior design fixture that often gets overlooked when the topic of energy efficiency comes up. Because most homes already have ceiling fans, this idea is one of the easiest ways to create an energy-efficient home — especially on a budget.
During summer, make sure to have your ceiling fans running as much as possible to circulate cool air. If need be, run your air conditioner to initially lower the temperature, but be frugal. The ceiling fans will do the rest of the work. Fast forward to winter and ceiling fans are still super useful. Flip to the reversible setting and the blades will spin in the opposite direction. This helps to recirculate the warm air that has risen to the ceiling. No matter which season you’re in, this energy efficient home design idea will have you feeling just right!
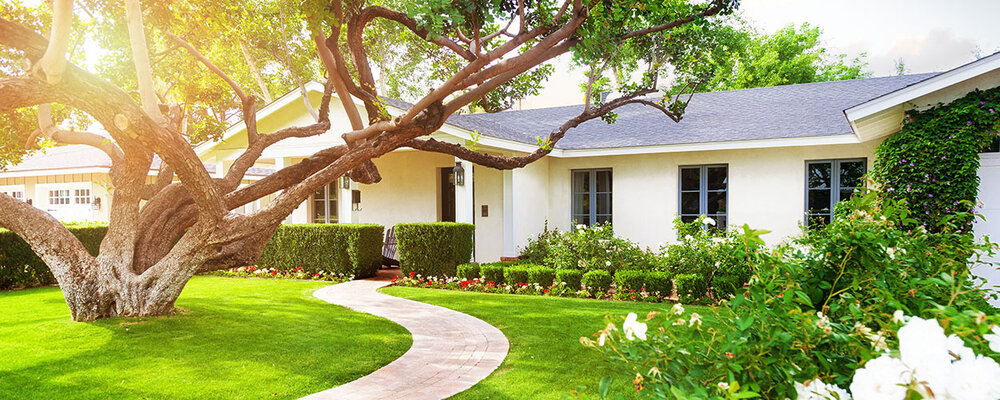
Landscaping
Don’t leave out landscaping when you start creating your energy-efficient home. Plants are an aesthetically pleasing addition to any property and they have a practical value as well. Trees, in particular, are not only a source of oxygen or decoration, but are also wonderful for shielding your house from the sun. In winter, they save you money in heating costs too. The branches that are stripped of their leaves let the sun into your home and keep it toasty!
Windows
Be wise with your windows and you’ll notice a difference in energy costs throughout the year. Windows are a common source of drafts, and the sun’s heat can make your air conditioner work overtime in the summer. Luckily, window treatments can minimize these effects for a fraction of the cost of window replacements.
There are a couple other ways you can take advantage of windows to create an energy-efficient home. During cold weather, heat things up by letting the sun stream in through sun-facing windows. For hot weather, bring out the thick shades to prevent too much warmth from entering your home.
And there you have it! Follow these 7 energy-efficient home design ideas and celebrate the transformation they bring to your home and your bank account. Once you can sit back and enjoy your energy-efficient home, gather more inspiration for future home improvements by reading about our 2020 interior design predictions.

Home renovations can be extremely stressful, especially for first-timers that are not familiar with the process. Whether this is your first space remodel or you’ve been working on a big home renovation project for years, these 6 home renovation tips will outline the do’s and don’ts to help you save your money, time, and energy while renovating any area in your home.
Home Renovation Dos
Do Create an Ideas File
Find inspiration for your home renovation online, in print, and in person. Search sites like Pinterest and home interior blogs for design trends and color schemes. Attend multiple showrooms where you can gather samples of fabrics, tiles, and paints. You can also keep a file of photos or magazine ads of any appliances you might want to upgrade to.
This file should also be where you store all your measurements. It’s important to include accurate drawings and take precise measurements for floor plans, furniture sizes, and elevations. Don’t forget to measure items such as door sizes, stairwells, and oddly-shaped spaces in your home as you scope out your project.

Do Plan It Out
Create a home renovation guide to help you stay on track at every stage of your project. By creating a plan of action you will be prepared for when things change and challenges come up. Your plan should map out all the steps necessary to achieve your ideal renovation based on the decisions you make from your ideas file.
Stay organized throughout the process by having a checklist for renovating your house. Decide where items from each room will go during the renovation. For example, if you’re doing a closet and bedroom remodel, consider purchasing rolling racks to store your clothes and linens. Putting things away can keep renovation areas cleaner and eliminate hazards and unnecessary stress. Make a note of what furniture and home goods will live in each room once the remodel is complete. Map it out with paper or tape so you can get a real idea of how much space an item will take up in a room.
Do Interview Your Contractor
Assess your options for contractors and conduct a thorough search in your area by pricing and service options. It should be simple to research this background information through websites, online resources, or by going to the contractor’s office. Your contractor should be licensed, insured, and qualified to do the job. You can figure out their reputation through reviews. Word-of-mouth recommendations are often fantastic resources when initially looking to hire a contractor. Make sure to compare not only their prices for service, but also their service quality.
Once you’ve narrowed down your search, meet up for an interview or a discussion with potential contractors so you have the chance to share your thoughts and ideas before a formal agreement. You want to find someone who you not only get along with, but who understands the vision you have for your space. Listen to what the contractor suggests to get their expert insights. If you can follow their home renovation tips right away, you may be able to save money, time, and energy and avoid having to redo projects.
Home Renovation Don’ts
Don’t Forget to Make a Budget
No home renovation guide would be complete without mentioning budgeting. Items tend to cost more than we anticipate and it’s important to find a happy medium between your dream design and your practical design in terms of price. By listing the items you need, how many of each item, and the price, you can ballpark a number that your whole renovation might cost. Decide which items you will splurge on as these items often end up being the things you use in your home most frequently. You can then see how money you can allocate to later additions, such as paint or furniture.
Before you dive in, have your contractor take a look at the budget you’ve created to make sure everything checks out. Once you start to make your purchases, don’t forget to save all your receipts. Store them somewhere safe and memorable, such as your ideas file. You never know when you’ll run into an item you want to return or if you’ll need the receipts for possible tax purposes.

Don’t Get Stressed Out
It’s easier said than done, but try not to become stressed out during your project. Frustration may lead you to cut corners, make rash decisions, or skip important steps in the renovation process that can then lead to unnecessary work later down the line. Instead, focus on staying positive and collaborating with everyone involved. Following these other home renovation tips can certainly help.
Even though home renovation projects aren’t always rainbows and blue skies, they can still be fun and rewarding. It is natural for you to want things to go perfectly according to your home renovation guide. Chances are, they will not as things will always change. Just remember that these changes are opportunities for different approaches that may result in an even better outcome.
Don’t Make Assumptions
Don’t assume you can do any kind of renovation to your home, especially when you’re forced to deviate from your original plan. Existing house conditions can drastically shift the budget and scope of a home renovation. While you may have seen a similar DIY project on TV go off without a hitch, that doesn’t mean it will work in real life for your property. Sometimes even adding in something small may require a major shift of pipes or rewiring your entire house. The best person to help you work through your plans and any changes is your contractor.
Remember, all projects take time. Start your home renovation with a thorough plan, lots of ideas, and a budget. Make sure you know who you’re hiring to help you out and start getting excited. By keeping these home renovation tips in mind, you can keep your dream project as stress-free as possible!
Can’t decide how you’d like to update your home? Get inspiration for your next home renovation from these interior design trends from around the world.
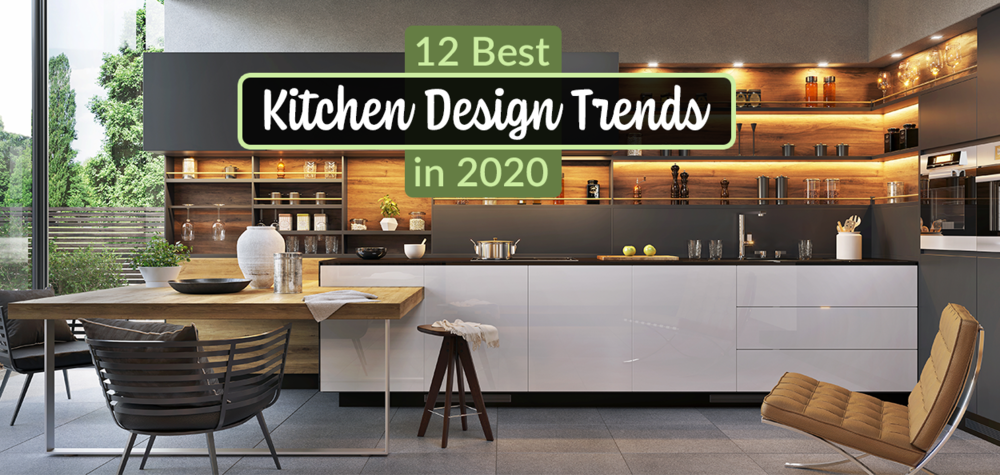
With the new year just beginning, we’re on the lookout for the hottest interior design trends to keep our homes stylish and up-to-date. From small accents to bigger kitchen makeovers, these are the 12 best kitchen design trends of 2020.
12 Best Kitchen Design Trends in 2020
1. Crafty & Concealed Storage
Forget showcasing cute little cookie jars and fruit bowls, our first kitchen design trend is minimalistic with concealed storage. Not only is your kitchenware out of sight, but the storage spots are cleverly hidden within sleek cabinet doors that blend into the space.

2. Signature Shelving
If concealed storage isn’t your favorite, this kitchen design style is meant for you. It focuses on contrast and practicality by incorporating open shelving against your backsplash. While the contrasting element is great for drawing attention to your backsplash, this trend also allows for more storage and decor. Bowls, pictures, or plants are just a few items you can use to fill up the shelves.

3. Pops of Color
While bright colors may seem like an intimidating kitchen design trend to try, 2020 is your time to shine. Pops of color are a great way to brighten up your kitchen and give it some personality. Start with a couple of colorful chairs for the island and once you feel comfortable, purchase vibrant appliances too.

4. Wood Galore
Wood is another popular kitchen design style we’ll be seeing this year, as it truly is a timeless trend. This material is perfect for those that want to feel in tune with nature as it creates a calm and light environment.

5. Bold Backsplash
While rectangular subway tiles are the usual go-to for a backsplash, it’s time to branch out with unique patterns and shapes. Hexagon, herrington, and floral designs are just some ideas that can make your kitchen transform from ordinary to distinctive.

6. Light It Up
Many kitchen design trends require a substantial budget and time frame, but this kitchen design style is a much simpler option that goes a long way. Swapping out your light fixtures or installing under-cabinet lighting can modernize your kitchen in a flash. In 2020, statement light fixtures like hanging pendants will be something to look out for.

7. Double Islands
Although this kitchen design trend is on the list for 2020, you can’t ever go wrong with more counter space and seating areas. Having two islands helps make your kitchen more functional. You can use one island for meal preparation and the other for serving and gathering. Add in sinks on both and washing the dishes just got a whole lot easier!

8. Warm & Cozy
Instead of cold and metallic, think warm and natural for this kitchen design style. By decorating your space with soft-colored countertops (like honed quartz), tumbled stone floors, and wood cabinetry, you’ll create a warm kitchen you’ll want to spend more time in.

9. Transcend Into Technology
As we start the new decade, technology remains king and that means in your kitchen as well. If you’re lucky enough to have a high budget, jumpstart your kitchen into the digital age with this kitchen design trend. You can invest in Wifi-enabled espresso machines and modern wine fridges that excel in efficiency and convenience.

10. Larder Love
Larder cupboards (also known as pantry cupboards) have become increasingly popular over the past few years, and in 2020, they are a must-have item. This kitchen design style is not only trendy and modern, it’s also a smart way to organize your food in one place. You can skip the extra wall cabinets and enjoy more free wall space to do whatever you want with. Why not put up a bold backsplash or hang your favorite art piece!

11. Gold and Glam
When you walk into a kitchen, you see the islands, cabinets, and big appliances first, but 2020 is all about paying attention to the smaller details. Sinks and taps are coming into focus this year and we’re going crazy for gold. Gold sinks and matching taps are the kitchen addition that will elevate your design into a stylish and modern statement.

12. Bye Bye Handles
Much like Trend #1, this kitchen design style follows the minimalist theme with handleless cabinets and cupboards. Push-open cabinets are the next best thing because they help create a seamless, flowing space that appears sleek and modern. If you’re not ready to say goodbye to handles, an easy alternative is recessed handles. They have the same sleek style and you can even choose materials and colors to create a striking contrast.
And that’s a wrap on the 12 best kitchen design trends of 2020! Whether you want subtle, modern touches or a complete kitchen overhaul, these kitchen design styles are your ticket to transforming your space into a magazine-worthy masterpiece. After you tackle the design, take a look at our ideas for organizing your kitchen.

Our pets fill our lives with happiness, so there’s no better feeling than treating them with your own unique pet crafts. Whether you’re looking for fun DIY dog toys to save some pennies or personalized cat accessories to improve your kitty’s lifestyle, there’s something for every pet owner in this top 10 DIY projects for pets.
10 DIY Pet Crafts
1. DIY Dog Toys from T-shirts
Do you have a ton of old t-shirts lying around in one of your drawers? Instead of letting them collect dust, try making some DIY dog toys. By braiding together strips of t-shirt fabric, you can quickly create a colorful chew toy. This tutorial includes two braiding patterns to choose from, so you’ll be a whiz at pet crafts when you’re done.
2. Cat Litter Station
There’s simply no way around it. If you have a cat, you also need to have a litter tray. Fortunately, there are DIY pet crafts that conceal where your cat goes to the bathroom while giving them the VIP treatment. This DIY cat litter station uses an inexpensive cabinet with two sections. All you need to do is cut out a couple of entryways and your cat can access their litter tray and reduce the amount of dirt they walk around your home. If your cat still gets a stain on your furniture, we’ve got a handy guide for dealing with it.

3. Homemade Dog Treats
Most dogs just love to eat but how can we make sure our pets get the most nutritious snacks? The answer is to make our own dog treats with kitchen-themed pet crafts! These easy-to-make apple crisp crackers allow your dog to enjoy a healthy dose of fiber and vitamin C in the form of a delicious treat. Just be sure to remove all the seeds from the apples you use, as they can be harmful to dogs.
4. Cat Window Seat
If you know your cat, you know how much they enjoy sunbathing and birdwatching. With this DIY project, you can easily make them the perfect window perch. Get your hands on a shallow basket, a comfortable cushion, and heavy-duty suction cups. Then, choose a sunny window to set up the seat. Once you’re done, you’ll have a hard time getting your kitty to sit anywhere else in the house.

5. Sweater Pet Bed
Searching for easy DIY projects for pets? Look no further than this cute sweater bed for your cat, dog, or bunny. All you need is an old sweater, a pillow, and a baby blanket to create a snuggly spot that reminds your pet of you when you’re not around. If you already have a sweater that your pet likes to cuddle up on, that’s even better.
6. DIY Pet Stairs
As our pets get older, it becomes more difficult for them to jump up onto higher surfaces. Of course, that shouldn’t put an end to cuddles in bed and on the couch. This simple pet staircase takes only a few hours and less than $30 to make. It’s a great way to try your hand at woodworking while providing your pet with a helpful leg up. Cats, dogs, and house bunnies alike will love how easy it is to get to their favorite spots.

7. DIY Cat Toys from Socks
Playful cats are big fans of colorful toys with interesting textures and sounds. There are so many different DIY cat toys you can make, but our top pick requires nothing more than an odd sock and crinkled packing paper. This is one of the best pet crafts to work on with a young child, who will really enjoy creating a fish-shaped toy out of these everyday items. You can put your finished toy on the end of a string and add ribbons, feathers, and bells to make playtime extra fun.
8. Scratch Board Solution
Your cat needs a spot to scratch their claws; and this usually goes one of two ways. Either you sacrifice your furniture or you buy a scrappy-looking cardboard scratchpad. Well, now there’s a third option with this stylish framed scratch board. Use a sturdy frame and a patterned door mat to create an attractive scratch board solution that matches your decor. Of all the pet crafts, this may just be the easiest one and it could save a ton of destruction.
9. Personalized Pet Name Tag
Creating a custom name tag for your pet doesn’t just show them how much you love them. These adorable tags make your dog or cat look even cuter, and they couldn’t be easier to make. Take a small piece of leather and use a stencil to cut out a shape like a circle, heart, or bone. You can easily find a metal letterpress at your local craft store or even among your crafting supplies. Once you’ve added your pet’s name, simply punch a hole in the name tag and add a finishing spray. Your pet will be proud to add this craft to their collar.

10. DIY Dog House
A wooden dog house will look fantastic in your yard while offering your dog plenty of shade in the summer and warmth in the winter. This structure may take a little bit longer to put together than other pet crafts, but it isn’t too difficult. Designed for small to medium-sized dogs, this dog house can be made from a single sheet of quality plywood. Paint the dog house as creatively as you like, just be sure to use a stain that’s low in VOCs for your dog’s safety.
And there you have it, our top 10 pet crafts for a fun weekend with your favorite animal. Most of these DIY projects for pets use everyday items so there’s no reason not to get started right away. Your pets are sure to love the results! Check out these woodworking projects for more DIY fun.
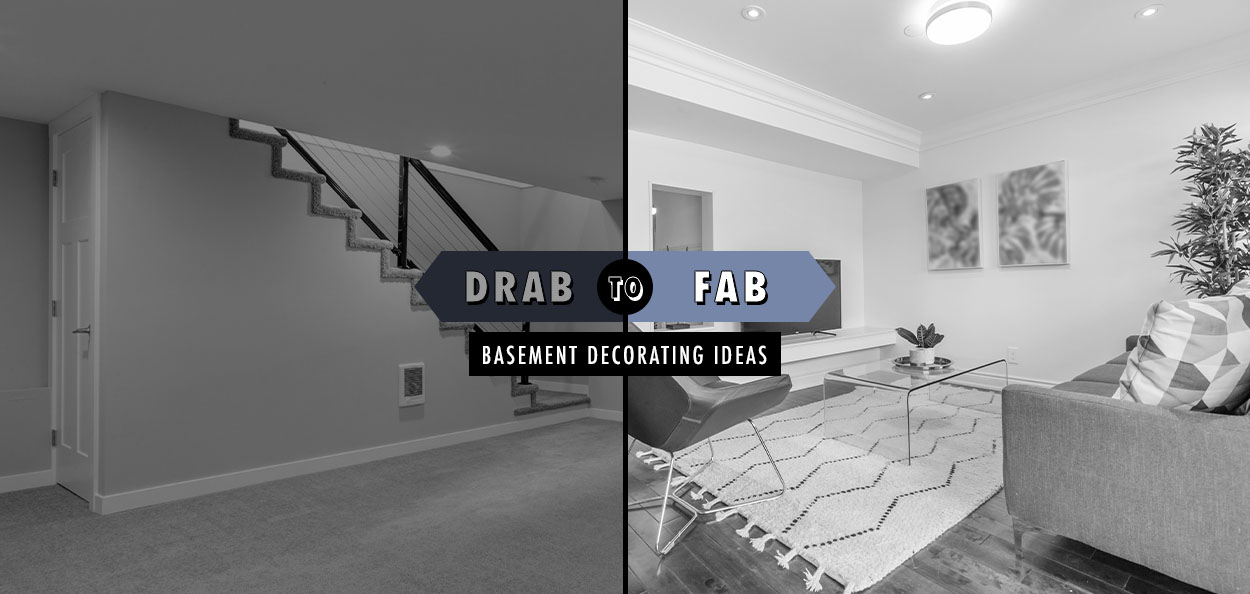
We get so caught up in furnishing and decorating all of the rooms in our homes that we often forget about the basement. Basements can begin as extra space, but with a little planning, these blank canvases can be transformed into almost anything! This blog will give you tips, tricks, and ideas on how to transform your unfinished basement with some savvy decorating.
Unfinished Basement Tips
Safety First
Check in with your local building department before you make any commitments to decorating an unfinished basement, as you may need a permit. Other safety precautions may include having a safety exit in your basement or a minimum ceiling requirement. Be sure to check for water damage and any foundation issues before you start redesigning so you don’t have to tear anything down in the future.
Air Purification
Because humidity and condensation can be serious concerns for a basement, seal any air leaks and consider investing in a dehumidifier. When choosing flooring, keep in mind that non-wool carpet tiles are easier to replace and trap moisture and humidity. For walls and ceilings, consider using drywall or sheet rock, as they have similar anti-humidity properties.

Unfinished Basement Tricks
Once your basement is safe and sound, you can start thinking about colors, layout, storage, and lighting. Here are a few unfinished basement ideas to help you create a more welcoming space.
Neutrals
Light neutral colors such as gray, taupe, and white are easy to complement and can make your space feel more expansive. Stick to neutral color palettes when brainstorming basement decorating ideas. You can use bursts of bold and vibrant colors to add character to your room through accessories such as throw pillows, curtains, and rugs.
Open Concept
Keep smaller basement areas open to maximize space and make them feel larger. Avoid adding walls and decorating around any columns that create the foundation for your home. Instead, designate different areas of your basement by switching up the color.
Storage
Most basements serve as general storage areas. Incorporate shelves and cabinets that go from floor to ceiling to give the impression that the room is larger and to maximize the available space. Furniture that also acts as storage space is a plus. Think ottomans with hidden compartments, murphy beds, staircase storage, or side tables with drawers.
Lighting
Basements are usually underground, which means they often lack natural lighting. By adding in lighting strategically, your basement will feel bigger and you will easily make up for the lack of windows. Use string lights, table lamps, and floor lamps and place mirrors to reflect any light in the room.
Finished Basement Ideas
Ready to decorate and furnish your basement? Take a look at these cool basement ideas and get the inspiration you need to choose how to use your space.

Extra Guest Space
Ideal for families who love to host guests or anyone looking to generate a little extra money by renting out the space, guest bedrooms can be a great basement idea. One thing you may want to consider for your basement bedroom is the bathroom. You can incorporate either a full bathroom or a half bathroom so your guests don’t have to venture upstairs and lose out on any privacy.

Work and Play Areas
At-Home Office
The basement can be the perfect escape from distractions, while allowing you to clearly define your workplace as a separate area from the rest of your home. Make sure to think about the noise level above and consider adding sound-absorbing panels to your basement walls for peace and quiet.
Craft Corner
As far as unfinished basement ideas go, craft nooks are a simple yet rewarding option. Create individualized craft stations for the kiddos or set up your own personal space and let the glitter fly! Your basement storage will be ideal for organizing all your supplies.

Entertainment Space
There are so many different basement ideas that revolve around entertainment, from having a pool or ping-pong table to a dart board or karaoke area. You can transform your space into an at-home theater with just a projector and bean bag chairs. Add in a mini-bar and a few cabinets of snack foods and your friends and family will be begging to come back!

At-Home Gym
A more ambitious unfinished basement idea is to build an at-home gym. No matter whether you want a space for your free-weights or a comprehensive gym complete with machines, you can eliminate the monthly membership costs and the time you would normally spend traveling to and from your workouts. Set up your equipment just the way you like it and blast your favorite tunes for your best and most convenient gym sessions yet.

Personalized Spaces for Him, Her, and the Kids
Man Cave
No space is too small for your perfect man cave and there are a bunch of cool basement ideas to consider. Cheer on your favorite sports teams from the comfort of your own home by designing your ideal sports-themed man cave, complete with jerseys, logos, flags, and themed furniture. A video game room will allow you to focus and enjoy your experience without disrupting others. Another basement decorating idea is a lounge space filled with comfortable furniture, a large television, a full bar, a poker table, a dart board, or a pool table.
She Shed
Live out your wildest Pinterest dreams with one of these unfinished basement ideas for her. Create your own reading nook with ample lighting, cushions, and bookshelves. You can take advantage of your extra storage and build a personalized fashion studio complete with a tri-fold standing mirror. Thinking of creating a lounge space? Find some comfy, bold-colored furniture and complement it with simple throw pillows or a soft rug. Text the girls and get ready to host a wine night (or two).
Kids Cave
By creating a kids cave, you’ll give your children ample room to slay dragons and live out their fairytale dreams in a designated space. Transform any dull basement into a wonderland by filling it with lots of lighting, bright colors, and, most importantly, your children’s favorite toys and games. Other items to incorporate include soft flooring, easy-to-reach toy storage, and versatile furniture.
Finishing up your basement may seem like a time-consuming task, but it is well worth it. Finished basements provide you with extra living space and increase your home’s resale value. Consider all of these basement ideas as you create and execute a decorating plan for your unfinished basement! You can also check out our home renovation tips here.
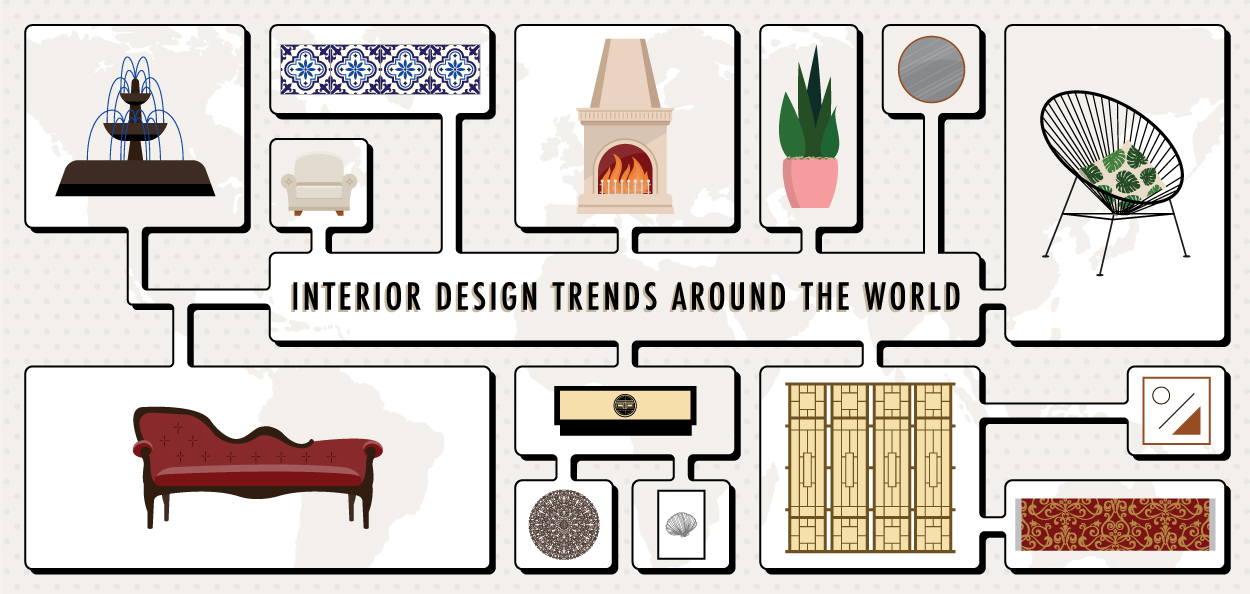
While most people think of art as paintings, drawings, and sculptures, there is yet another form of art that combines all of these facets and strategically uses them as decor. Decorating our homes is a very personal, unique outlet for art expression and there isn’t one universal style. Instead, there is a wide array of interior design styles spanning across continents like Africa, Europe, Asia, and America.
As we begin the new year and freshen up the decor in our homes, create your own individual style by taking a look at these interior design trends from around the globe.

Asia
For those that love simple, clean interior design style, Asian culture is meant for you. Oriental design reflects predominant cultures in the region, like those of Japan, China, and India. Japanese interior design trends follow a pattern of clean-lined furniture, natural materials (bamboo), subdued colors, and simple floral arrangements and bonsai. Chinese culture takes a more bold approach by incorporating ornate furniture with hand-painted details, bright colors, and animal motifs. Moving south in the continent, Indian interior design style is full of spice-inspired colors, rich patterns, heavy wooden furniture, and religious pieces.
Africa
The raw, wild beauty of Africa is not only seen in its beautiful grasslands, but also in the culture’s interior design trends. Countries like Morocco and South Africa largely represent the interior design styles of this continent, reflecting a nature theme with earthy, neutral tones and decor characterized as minimalistic, yet dynamic. If you take a trip around the globe and find yourself in Morocco, you will see decorative tiles, colorful cushions, skylights, as well as arches and domes. South Africa dives deep into nature with interior design trends full of animal print accents, traditional wood carvings, and handmade sculptures.
Europe
While Asia and Africa keep a similar interior design style throughout the continent, Europe and its 44 countries are constantly fluctuating. Two stylistic regions that highlight the continent are Mediterranean and Russian. Countries located north of the Mediterranean Sea generally follow a Mediterranean style characterized by the warm climate. Travel to Spain, Italy, or Greece and the interior design trends incorporate outside patios, deep hues, marble or tile flooring, and mosaic elements. Fly northeast to countries such as Russia and the experience is completely opposite. Russia’s interior design style is fit for royalty with its gold and silver details, velvet and satin fabrics, chandeliers, and luxurious colors.
South America
From Europe, fly west across the Atlantic Ocean to reach South America, the home of the Amazon rainforest. Across this continent, Latin American interior design styles of countries such as Brazil and Peru, are symbolic of their strong respect for nature. Organic materials are often used and recycled, as well as traditional flair and flamboyant colors. Brazil is characterized by strong lines, simple aesthetics, indigenious Brazilian materials (reclaimed hardwood and stone), and curvy shapes that exude elegance. Experience Machu Picchu and herds of llamas in South America’s other region, Peru. Peruvian interior design incorporates bright colors, stone floors, and geometric patterns.
Australia
Put another shrimp on the barbie mate! Australia is one of the leaders in the interior design industry and its trends are perfect for people who prefer a relaxed, authentic interior design style. Australian style can also be characterized as reflecting nature with its native botanical prints, natural light, pops of color, and playful furniture that highlight home decor. New Zealand’s Oceania interior design style has its own unique characteristics. A typical home here will feature vibrant colors, subtle quirks, and personalization (photography, collector pieces, repurposed wares) that mesh together to create a relaxed atmosphere like that of Australia’s homes.
North America
Considered to be a melting pot of cultures, North America is full of interior design trends that have inspiration from around the globe. Within the United States a few interior design styles continue to stand out over the years and are popular choices for decorating the home.
Contemporary Design showcases the ample space in a room, over actual items. Interiors feature monochromatic color palettes and chic pieces of furniture. Country Chic Design is often categorized by white spaces with reflective surfaces, symbolizing a clean feel. Heirloom hand-me-downs are often spaced sporadically throughout the room with flashes of traditional Gingham print furniture. Coastal Design is known for its open layouts that utilize natural light and layered neutrals. Rooms often have driftwood furniture pieces and a few pieces of art that represent the ocean such as a clam shaped bowl or seashell shaped plates.
Move south of the United States and you’ll see that Mexico has an interior design culture similar to South America. Mexican interior design trends include a wide range of materials (metal, glass, ceramic, and wood), geometric designs, neutral walls, vibrant colors, and golden solar symbols.
Benefits of Designing Your Own Space
Comfort
Even though it takes more work and time, designing your own space is full of benefits that make the end product worth it. We each have our individual requirements of how our home decor needs to fit into our life. Designing your space allows you to meet these needs and make your home as comfortable and convenient as possible.
Personality
After designing your own space, your home will have a personal touch that is unique to YOU. Personal mementos and individual flair can’t be beat because it truly makes it your one-of-a-kind home.
Mood Regulation
The colors of your space can play a huge role in affecting your moods. Choose your own color palette and this gives you the opportunity to regulate your moods and the overall atmosphere of your home.
Accomplishment
Just as you feel happy and satisfied after finishing a hard task at work, the sense of accomplishment you feel after designing your space is hard to beat. Not only are you left with a personalized home fit for you, you can revel in the fact that it was your hard work that made it happen.
After taking a trip around the globe, you now have plenty of inspiration to go and enjoy the process of decorating your own space. Remember that you don’t have to be an interior designer to create a beautiful work of art in your home. Find your own unique interior design style and the final product will be a masterpiece. For more international inspiration, take a look at our user’s guide to Feng Shui design.

Buying new furniture for your home is a great way to mix it up and stay up-to-date with interior design trends. Picking out your furniture is the first and arguably most exciting step, but don’t get your wallet out just yet. Measuring your furniture before you purchase is crucial if you want to find the perfect piece. Learn how to measure your furniture the easy way and make the most of your space with these furniture arrangement tips.
First off, measuring your furniture to guarantee it will fit requires more than a couple measurements. Let’s break the process into steps.
Step 1: Measure Your Space
Get an idea of the space you have to work with by measuring the room your furniture will be put in. This step is the easiest because all that you’re concerned with is the length and width of the room.

Step 2: Measure Entries, Passageways, and Stairwells
Now on to the most time consuming part. This step is absolutely crucial, but is often forgotten because people get caught up in simply measuring the room to see how to arrange the furniture. To ensure your furniture delivery goes smoothly, take the time to measure the height, width, and diagonal width of every doorway, hallway, elevator, and staircase you’ll be moving the furniture through. Don’t forget to make note of fixtures and architectural design because those can cause major obstacles! Here are some extra tips when measuring each area.
Doorways and Hallways
-
Consider handrails, doorknobs, trim, and hinges that can’t be removed and include those in your measurements.
-
Measure the entry clearance of all doors (the space between the door and the nearest wall or immovable object). Interior doors can be removed and reattached if needed.
Stairways
-
Start with the width of the stairway, then measure the width and depth of any landings.
-
Lastly, measure the ceiling height in three locations:
-
From the bottom step to the ceiling
-
If applicable, from landings to the ceiling
-
From the top step to the ceiling
-

Step 3: Measure Furniture
After that lengthy second step, break out that measuring tape again and measure the furniture pieces that you’re considering buying. Measure the length, width, and height, as well as the diagonal depth of sofas, chairs, and desks. For bookcases, entertainment centers, armoires, and other tall pieces of furniture, measure the diagonal height (from the bottom left corner to the top right corner).
Step 4: Compare Dimensions
As soon as you’re sick and tired of seeing measuring tapes and numbers, muster up your last ounce of energy to compare all of the dimensions you’ve recorded. Take all of the measurements from your space, entries, hallways, and stairways to see if they work with the furniture pieces. While you go through this step, determine whether the furniture will be able to fit through the space straight, at an angle, or on its end.

General Tips
If you follow these steps and understand how to measure your furniture accurately, you should have a solid foundation for deciding which furniture pieces will fit into your space. Before you make the final decision and get that credit card out, go through these general tips to be extra prepared:
-
Any furniture you buy should have clearance around it and be at least 4 inches less than the passage measurements.
-
During your measuring frenzy, remember to account for any obstacles (movable or immovable) that may cause issues when the furniture is being delivered. Light fixtures, wall art, and area rugs are some examples of obstacles you can easily move out of the way. Fire sprinklers, angled or low ceilings, and handrails aren’t going anywhere, so plan ahead for that!
-
While you record your measurements, keep them tidy and organized. Make sure they’re in an easily accessible spot so that you can reference them quickly!

Arrange Your Furniture Like a Pro
Now that you have your brand new, stylish furniture bought and delivered, you may be wondering where to place it in your home. Check out these tricks on how to design your living room to make the most out of your space:
-
Visualize the Flow. Take a walk through of your home and get a feel for how your guests will travel through each room. Make your entry path obvious and arrange your furniture in a way that makes transitioning from room to room effortless.
-
Create a Focal Point. Each room should have a focal point that draws people’s attention and centers the room. Consider what the space will be used for to make the decision a little easier. A seating arrangement or home entertainment section are just a couple examples of focal points.
-
Mix Up Sizing. To add depth and interest to a space, arrange your furniture in a way that mixes up sizes. For example, include a large sofa with small chairs and side tables.
-
Social Spaces. In a room meant for socializing, arrange your furniture away from the walls to create a cozy, intimate atmosphere. This can be a few feet or a few inches.
-
Tame Tall Rooms. Make large, tall rooms more comfortable and appealing by compensating with similar sized furnishings. Chairs with tall backs, big sofas, long vertical drapes, and long tables will help fill the space to make it more cozy.
With all of these tips and tricks, you’re now ready to bust out that wallet, buy your furniture pieces, and arrange them in your home with confidence. For other tips on how to freshen up your home’s interior design, learn how to make your home more energy-efficient in this blog post.
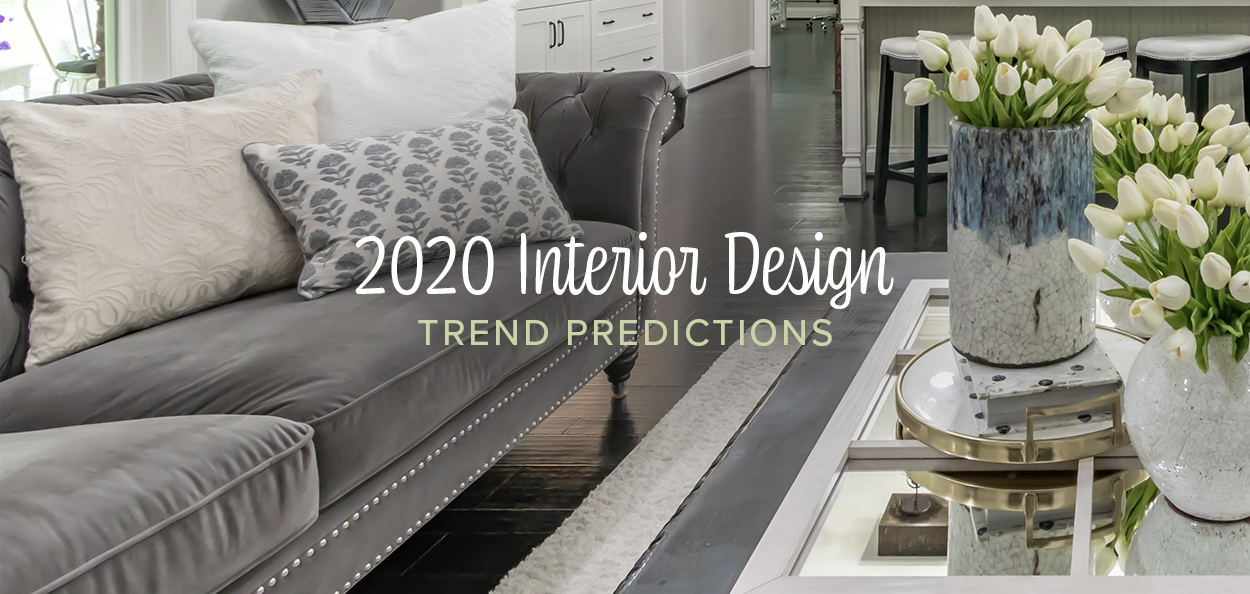
New year, new interior design! As we ring in the New Year (and new decade!), let’s take a look at the interior design trends that are sure to take the home decor world by storm. From the annual Pantone Color of the Year to fun new textures and lighting styles, we’re excited to see what 2020 brings for our homes.
It would be impossible to list all of the 2020 interior design trend predictions that the year has in store, but here are some of the highlights to consider when ramping up your space in 2020:

Pantone Color of the Year: Classic Blue
Every year, Pantone names a Color of the Year. They determine this color through thoughtful consideration and trend analysis. The Pantone Color of the Year for 2020 is Classic Blue, an “endearing blue hue” that “highlights our desire for a dependable and stable foundation on which to build as we cross the threshold into a new era.” Classic Blue also instills calm, confidence, and connection which many of us are craving in a time of ever changing trends, technology, and a new decade.
According to Pantone, the color is “suggestive of the sky at dusk” and can be incorporated into many areas of your home. From adding new accent pillows and throw rugs to changing out your bedding or adding new wall art, the best thing about Classic Blue is that it can be applied everywhere in your home tastefully.

Bouclé
Bouclé (pronounced boo-clay) is a texture made out of a series of looped pieces of yarn. In fact, the name comes from the French word for “to curl.” This texture rose to fame when fashion designer Coco Chanel debuted her bouclé jacket.
But, bouclé can be used in interior design as well and in 2020, texture is everything. Varying textures can give an otherwise flat room life and add hints of cozy, homey elements. Keep your eye out for bouclé throws and blankets. You may even notice it adorning sofas, footstools, and recliners this year.

Coordinated Color Palettes
This year, expect to see more and more coordinated color palettes, even from interior design newbies. You don’t have to be a professional to tie together the perfect living room color palette. Understanding the color wheel, the psychology behind certain colors, and how to warm up or cool down your tones will help you rock a new color palette in 2020. Gone are the days of throwing together whatever you can find in the clearance aisle at your local interior design store. Make it your goal in the new year to create a color palette made for you.

Luxurious Fabrics
In addition to including textures in your 2020 interior design, consider including luxurious fabrics like suede, leather, and velvet. These decadent fabrics spruce up a room and even if you’re not planning a living room makeover, they can glam up any space. From velvet couches to suede rugs, these fabric upgrades will help you ring in the New Year in style.

Unique Lighting
If you’ve been dreaming of mixing up your lighting, 2020 is your year. Everything from natural chandeliers with wooden beads to clean, geometric shapes will dominate the lighting industry. If you want to try playing around with this 2020 interior design trend, start by choosing some new lamps you can add to your bedrooms. Then, if you really want to step it up, switch out your overhead lights for some trendy options.
The New Year is the perfect time to evaluate your interior design and make simple changes to ring in 2020. From switching up textures and fabrics to creating your own color palette, make it your resolution to do one or two interior design changes that you’re passionate about. For more inspiration, take a look at our infographic of interior design ideas from around the world.

Life gets messy and your furniture is no exception. From spilling wine on the couch to children tracking in mud after playing outside, we are constantly fighting a battle against a challenging opponent: stains. To help you go into battle fully-equipped, we have listed the most common stains and how to remove them from your furniture.
Pre-Cleaning Tips for Removing Stains From Furniture
Before you start the cleaning process, make sure to read through these important tips:
-
Read the manufacturer’s cleaning instructions. These instructions include crucial information that can help you remove the stain without having to research other remedies. If you don’t follow it, you can potentially void warranties and ruin your furniture instead of fixing it.
-
Take a look at the tags. Reading the tags on your furniture can simplify the process by answering questions about cleaning dos and don’ts for that item, such as if the material is water soluble. You’ll usually find one of four letters on the cleaning tag of your upholstered furniture. Here’s what they mean:
-
W — You can clean this material using water.
-
S — No water. You need to buy a special solvent-based cleaner.
-
WS — You can use water or a solvent-based cleaner.
-
X — Must be professionally cleaned. You can only vacuum or brush the material.
-
-
Vacuum before you start cleaning. This removes any residual debris from previous spills and messes so they don’t sink down into the fabric when you clean it.
-
If in doubt, test it out. If you can’t find instructions or aren’t sure which cleaning method will work for the stain, choose a hidden area to test it out and adjust the method as necessary.

Red Wine
Parties for Wine Wednesday or relaxing nights at home sometimes result in the dreaded wine spill on your carpet or furniture. When this happens, try your hardest to not go into panic mode. Quickly follow these steps on how to remove the wine stain from your furniture and get back to sipping and enjoying the night.
-
Blot the area with a clean, dry towel or cloth to pick up the remaining liquid. Do not scrub.
-
Pour a small amount of carbonated water directly on the stain. Blot dry. Repeat as needed.
-
Mix ¼ cup of baking soda and ⅛ cup of water to form a paste. Apply the paste to the stain and let it sit for several hours until completely dry. Vacuum it off.

Butter & Oil
Eating greasy and oily food isn’t just bad for your body, it’s bad for your furniture. Greasy hands leave a lasting mark if you don’t know how to remove the stain from your furniture. When you find yourself in the midst of an oily food mess, clean it up quickly and easily with these steps. Keep in mind, there are a few different ways to remove grease stains from furniture, so take a look at them all to see which one works best for your item.
-
Sprinkle the area with cornstarch or baking soda and let it sit for 15-20 minutes. This helps lift out the grease.
-
Vacuum the area using the upholstery attachment.
-
Use a little dish soap and scrub at the area with soft items like a toothbrush.
-
Blot it clean with a moist paper towel.

Ink
Ink stains may seem insignificant compared to a big red wine splotch on your couch, but they will slowly turn your furniture into an art piece that no one wants to buy. Whether the kids drew on the dining room chair cushions or your pen spilled ink on the sofa, keep your furniture looking as it did when you bought it with these directions.
-
Mix a solution of one tablespoon of white vinegar and ⅔ cup of rubbing alcohol.
-
Dip a clean towel or cloth into the solution and blot the stain.
-
WARNING: Don’t rub the stain because it will only spread it further.

Mud & Dirt
No matter what you do, mud and dirt will get tracked into the house year round. The goal is to keep that dirt contained in the entryway, but that doesn’t always work out like we’d want it to. With children, pets, and guests, it’s almost an impossible challenge to prevent mud from dirtying your home. Beat the challenge by removing the furniture stains with these tips.
-
Let the dirt dry. Scrape off the excess and vacuum any loose pieces.
-
Mix a solution of two cups of water and one tablespoon of clear dishwashing liquid.
-
Using a sponge, apply the solution to the stain.
-
Blot dry. Repeat as needed.

Beer & Coffee
The two staple drinks of most working adults are beer and coffee. These beverages are delicious and brighten up your day until they sadly darken your furniture with stains. Don’t remove the drinks from your diet out of fear of their staining power. On those messy days, simply use these directions on how to remove the stain from your furniture.
-
For beer stains, rub the stain with an ice cube.
-
Mix a small amount of liquid detergent (a teaspoon should be plenty) and warm water.
-
With a paper towel, use this solution to blot at the stain.
-
Coffee stains can be removed the same way, but you can skip the ice cube step and get right to the detergent solution.

Pet Stains
Our fur babies bring so much joy and laughter to our homes, but they also bring stinky messes. Don’t be distracted by those sweet “I’m sorry eyes” for too long because the stains your pets leave can turn your home into one big, smelly kennel. Keep your house fresh and clean by following these steps on how to remove the stains from your furniture:
-
Mix a solution of one cup of white vinegar and one cup of cool water.
-
Spray solution onto the stain (Be careful not to soak the area).
-
Use a clean towel or cloth to blot the stain. Work from the outside edges of the stain to the center.
And there you have it! With these tips and directions, you can win the battle against stubborn stains. From now on, you can go about your days in comfort knowing that life’s messes, spills, and stains are no match for you and your home. You can also check out the 5 most kid-friendly furniture fabrics in this blog post.