10 Ways You Can Use Wallpaper to Revamp Your Space
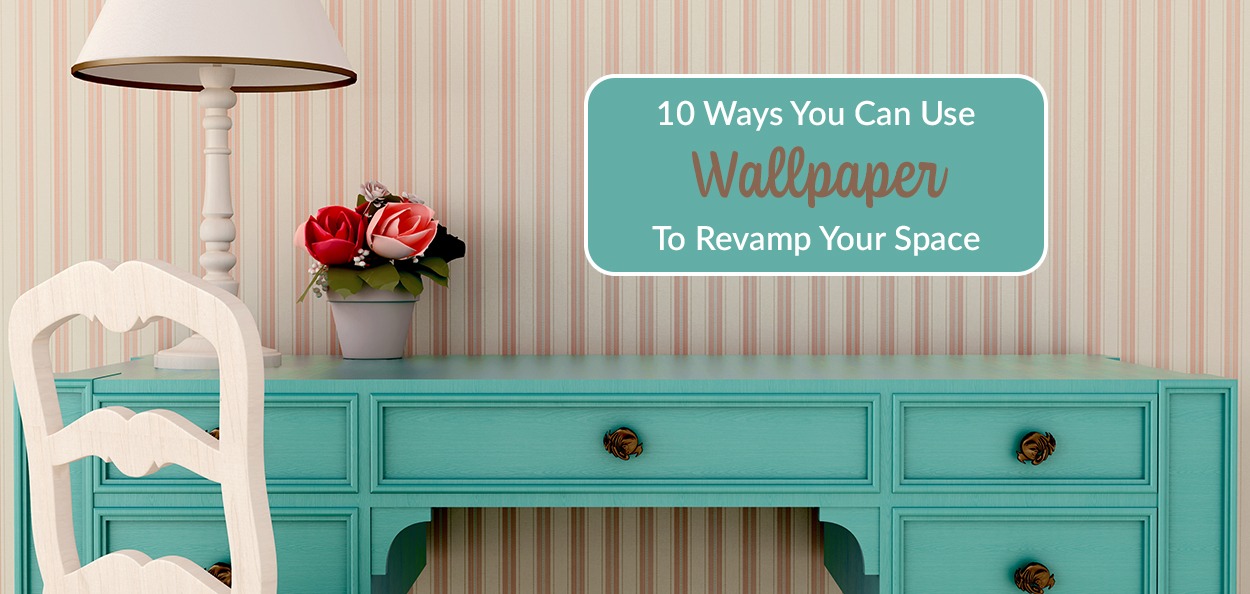
Do you feel like your living space needs some personality? Don’t be afraid to venture out from minimalist, bare walls to colorful focal points made with wallpaper.
Wallpaper has been around for ages and is currently a major trend in the interior design world. From floral prints to geometric masterpieces, check out 10 unique ways to use wallpaper throughout your space.
1. Mixture of Wallpaper
Having a hard time choosing between different wallpaper options? Try your hand at incorporating a mixture of designs. Mixing and matching wallpaper may seem like a risky route to take, but it can actually look quite cohesive if you stay within the same color palette and patterns. Here are a couple guidelines to follow:
- Stick to two different color options to avoid a messy design
- Use each wallpaper on different walls of your room or at least in different places like your accent furniture
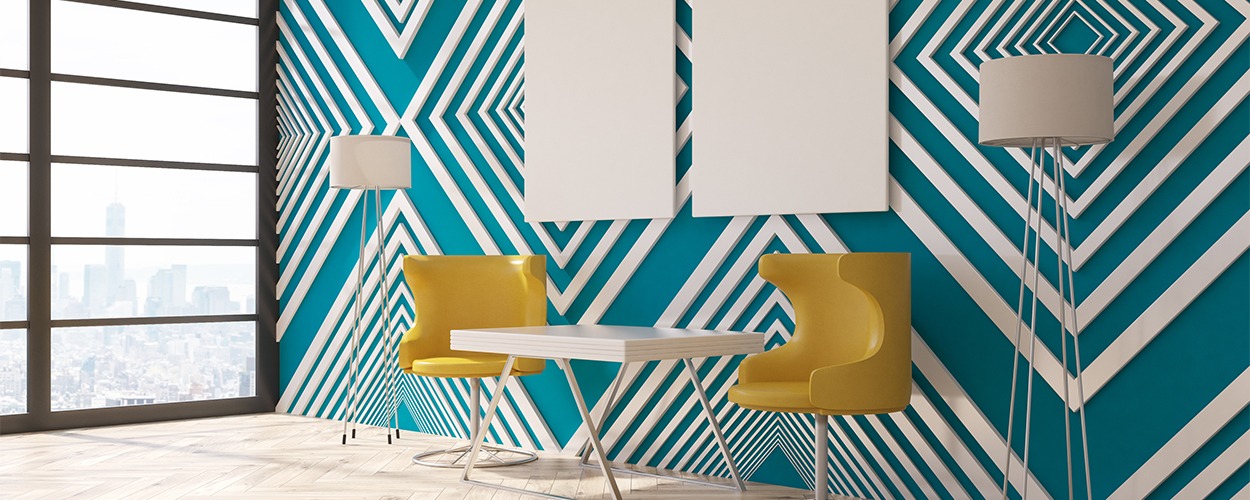
2. Statement Wall
Consider featuring a striking and colorful wallpaper within a single space to create a statement wall. A statement wall will most definitely catch the eye of your guests and can quickly transform your interior from bland to bold.
While it can look amazing to incorporate a vibrant jungle print or floral design, remember to keep in mind your interior design style as you try this wallpaper idea for your home. Stick with your theme and remember that even the slightest change in color or pattern can go a long way.
3. Wallpaper on the Ceiling
Give your guests a reason to look up and enjoy every corner of your room by adding wallpaper to the ceiling! By using this technique, you can create a really dramatic look in a small space.
This is one of the most unique ways to use wallpaper, so it’s no surprise that the process can be a little tricky. Do your research on papering ceilings to ensure the project goes smoothly and you don’t have to re-do anything. Once you see the outcome, you’ll realize it was well worth the extra effort!
4. Decoupage Furniture
Do you have furniture that has seen better days? Rather than toss it in the trash or go through the hassle of painting, use peel-and-stick wallpaper instead. Simply place your wallpaper on the surface of your furniture to create stand-out items that make for fantastic room accents.
An easy DIY project to try is adding wallpaper on the faces of dresser drawers or your nightstands. You can even add wallpaper to the top of your desk as well.
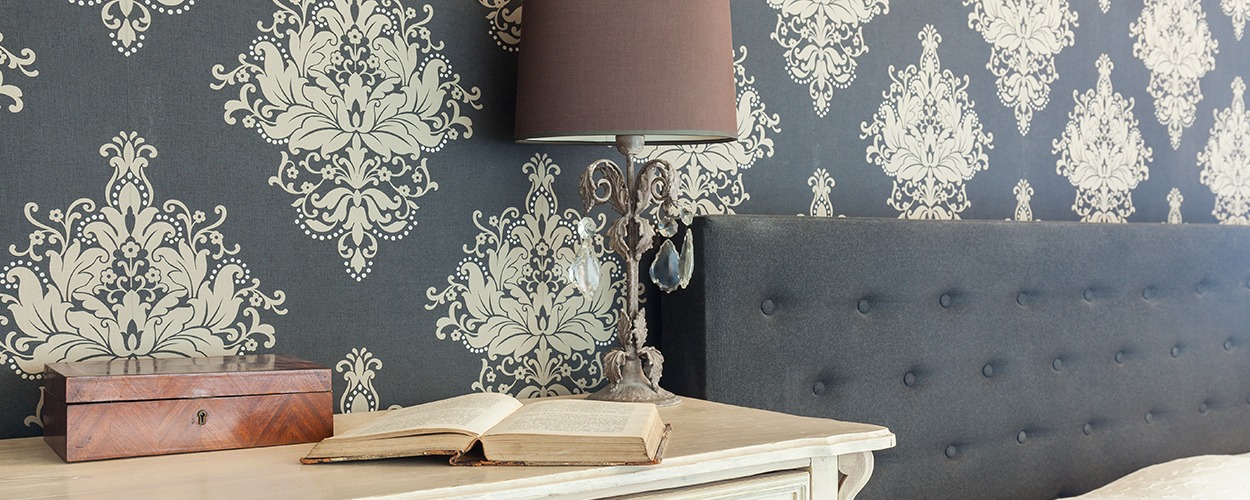
5. Colorful Headboard
The bed is typically the most significant piece of furniture in any bedroom, so why not give it the “wow factor” that packs a visual punch? Add wallpaper to your headboard to give your space a more modern feel.
If you don’t have a headboard, don’t worry! You can still mimic this wallpaper inspiration for the bedroom by creating the illusion of a headboard. Grab some peel-and-stick wallpaper and cut out the shape of a headboard. Stick your template on the wall behind the bed and enjoy the finished product.
6. Back of the Closet
Show off your personality and have a little fun with your home by updating your coat closet! Apply wallpaper to the back of the closet for a subtle, yet vibrant design addition. This wallpaper idea for your home will surely catch the attention of your guests as they hang up their coats.
If you’re looking for wallpaper inspiration for your bedroom, this idea works well too! Complement your wardrobe by adding wallpaper to your own bedroom closet.
7. Back of Shelves
Add depth and charm to your living space by incorporating wallpaper into your bookcase or shelving. This idea is handy if you rent a smaller home with little room to add personal touches.
Take your favorite peel-and-stick wallpaper and add it to the back of your shelves. Not only does this wallpaper idea for your home bring bookcases to life, it also helps give them a high-end look.
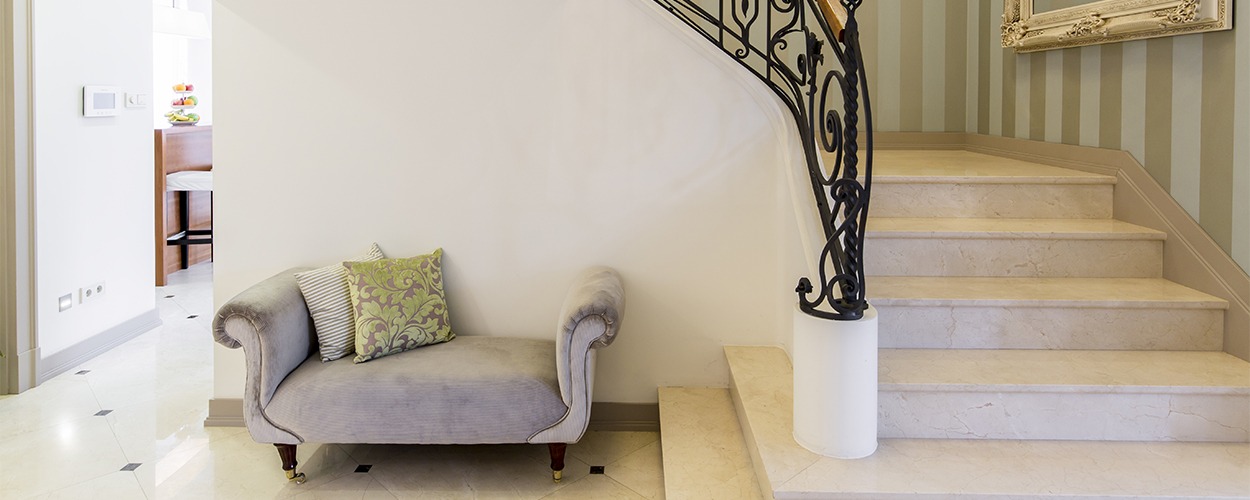
8. The Stairs
Step up your interior decorating by giving your staircase a makeover. Apply wallpaper to your stair risers to add texture and depth. Along with wallpaper on the stairs themselves, you can also try applying wallpaper to your staircase wall. This will transform your staircase into a beautiful focal point in your entryway.
9. Doors
If you’re looking for unique ways to use wallpaper, this one is definitely it! Transform your home’s doors with the addition of wallpaper. Believe it or not, there are hundreds of wallpaper designs especially made for doors. From three-dimensional nature scenes and murals to realistic wood patterns, there are lots of options to fit your preferences.
10. Accent Artwork
Buying designer artwork can be very expensive, so why not get your creative juices flowing and make your own? All you need for this DIY project is a few frames, wallpaper, and a couple hours of free time!
This wallpaper idea for your home is budget-friendly and a perfect way to make art pieces that compliment any room. Along with DIY frames, you can make DIY canvas art by simply sticking wallpaper onto a wooden sheet.
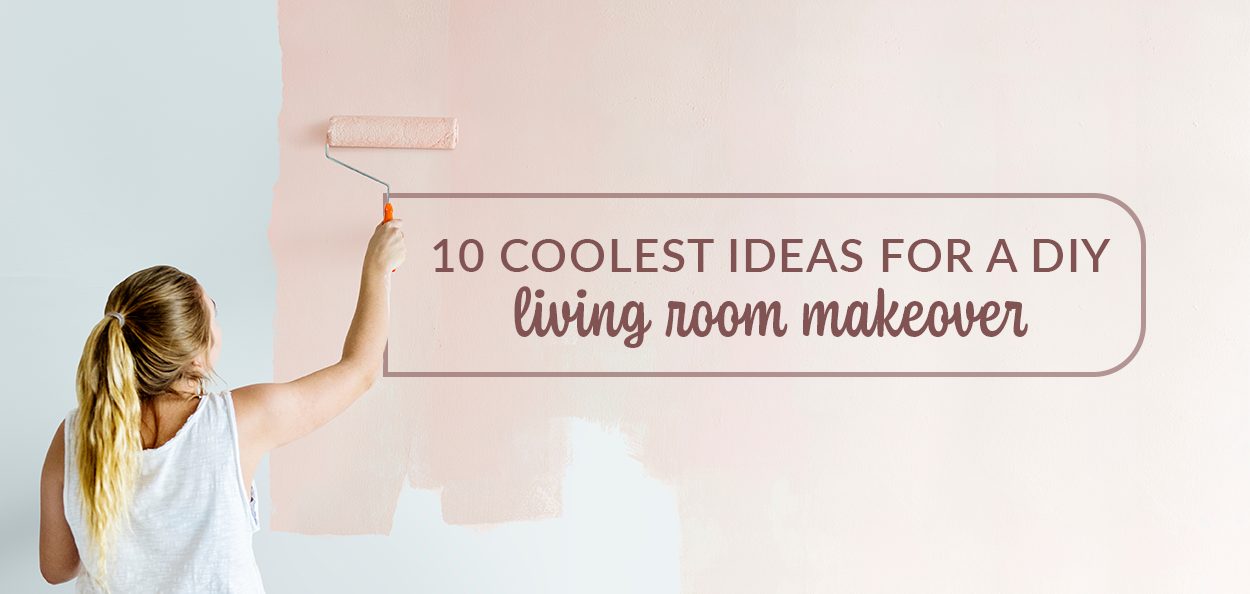
Now that you have some ideas on how to incorporate wallpaper within your home, check out our 10 coolest ideas for a DIY living room makeover!
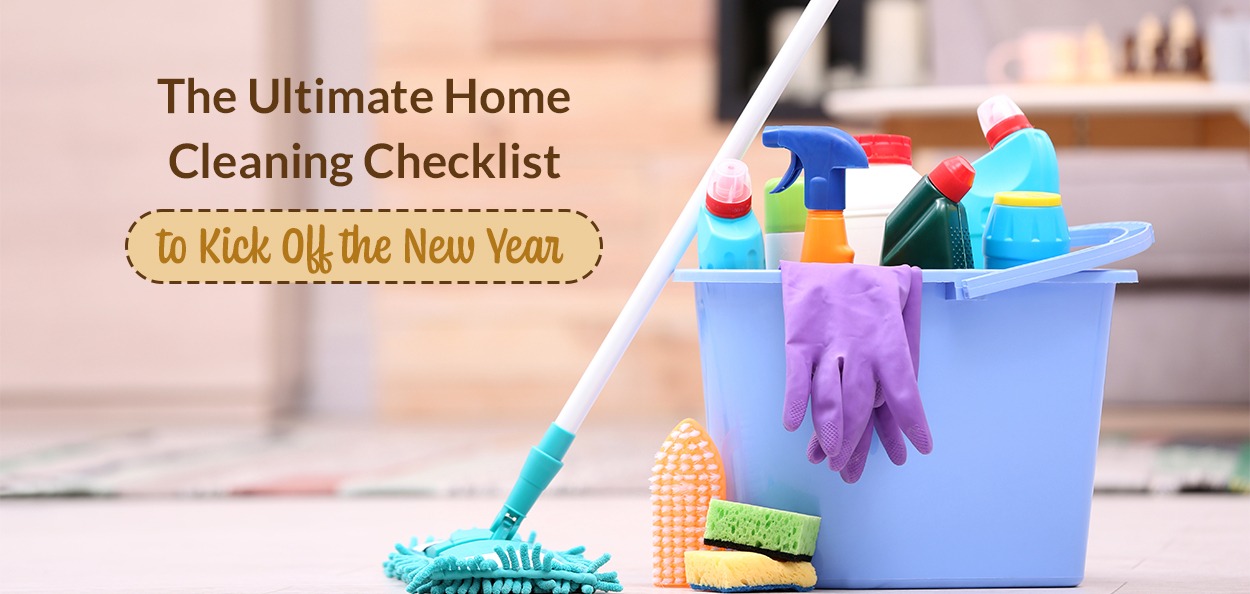
With the holiday season behind us and a brand new year just beginning, it’s the perfect time to check off some tasks on your to-do list. Cleaning your home may be a daunting project to think about, but the end result is always well worth it. Set aside some time to tackle a New Year’s cleaning by following our home cleaning checklist and household cleaning tips!
Home Cleaning Checklist
All Rooms
When it comes to a New Year’s cleaning or any routine deep clean throughout the year, it’s helpful to assign tasks to specific rooms whenever possible. Some tasks; however, should be done around the entire house. Start with the ideas below and add any other tasks you can think of as you move throughout your space.
- Dust light fixtures, ceiling fans, and corner cobwebs
- Clean door handles and dust door frames
- Dust window sills, blinds, picture frames, lampshades, and furniture
- Dust knickknacks, books, and other decor accessories
- Shake out and/or wash throw rugs
- Sweep, vacuum, and mop floors
- Donate or throw away unused items
- Clean upholstery on furniture
- Wash throw pillows and blankets
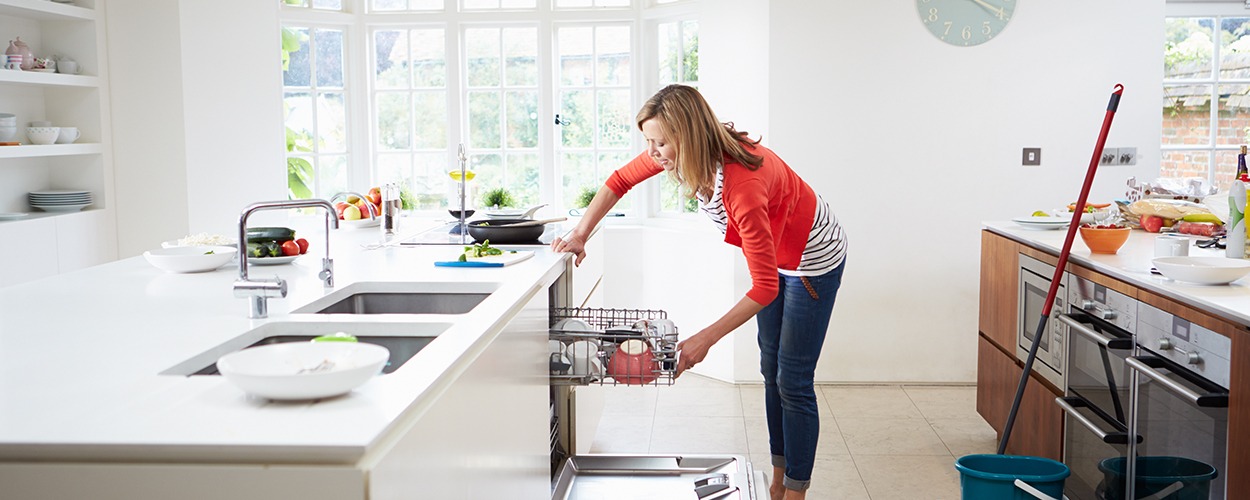
Kitchen
From greasy stove tops to dirty cabinets, the kitchen quickly builds up lots of grime and bacteria from daily use. As you complete your home cleaning checklist, pay special attention to this room and give it a thorough wipe down.
- Clean and sanitize counters and sinks
- Clean stove, oven, and range hood
- Clean microwave inside and out
- Wipe down cabinet fronts and appliances
- De-funk your dishwasher with baking soda or vinegar
- Clean and organize your refrigerator
- Sanitize your garbage can
- Deodorize the garbage disposal
Bathrooms
Fight every urge to walk past your bathroom as you undertake your New Year’s cleaning! It may be the yuckiest room in the house to clean, but it’s a must. Prioritize sanitation and work from there.
- Clean mirrors
- Clean and sanitize counters and sinks
- Wipe down cabinet fronts
- Clean and sanitize toilet
- Clean and sanitize shower, shower door, and tub
- Scrub away mold on shower tile and grout
- Wash bathroom mats
- Unclog your shower drain

Household Cleaning Tips
While there’s no right or wrong way to clean your house, there are a few things you can keep in mind as you begin the process. Think about using these tips to help establish a cleaning routine that’s organized and efficient.
Do a Walk Through First
Grab a paper and pen and take a quick walk around your home to get a better understanding of what needs your attention. This household cleaning tip is great for helping you prioritize tasks if you aren’t too sure where to start.
Clean with Everyday Items
There’s no need to run to the store to buy a cart full of cleaning supplies! Get creative and survey the everyday items you already have sitting around your house.
- Brillo Pads – Great for cleaning shower doors
- Toothbrushes – Ideal for nooks and crannies in the kitchen
- Lint Rollers – Perfect for removing hair, fur, and lint on furniture
- Socks – Use them to dust blinds, baseboards, and other wooden furniture
Think About Your Cleaning Style
Do you prefer a “one and done” cleaning style where you clean the entire house in one day? Are you a fan of timed cleaning sessions or do you like cleaning one or two rooms at a time?
Think about your ideal cleaning style and make a conscious effort to follow it each time you give your home a wipe down. As with anything else, having a plan that fits your preferences will give you a sense of ease and make the project feel much more manageable.
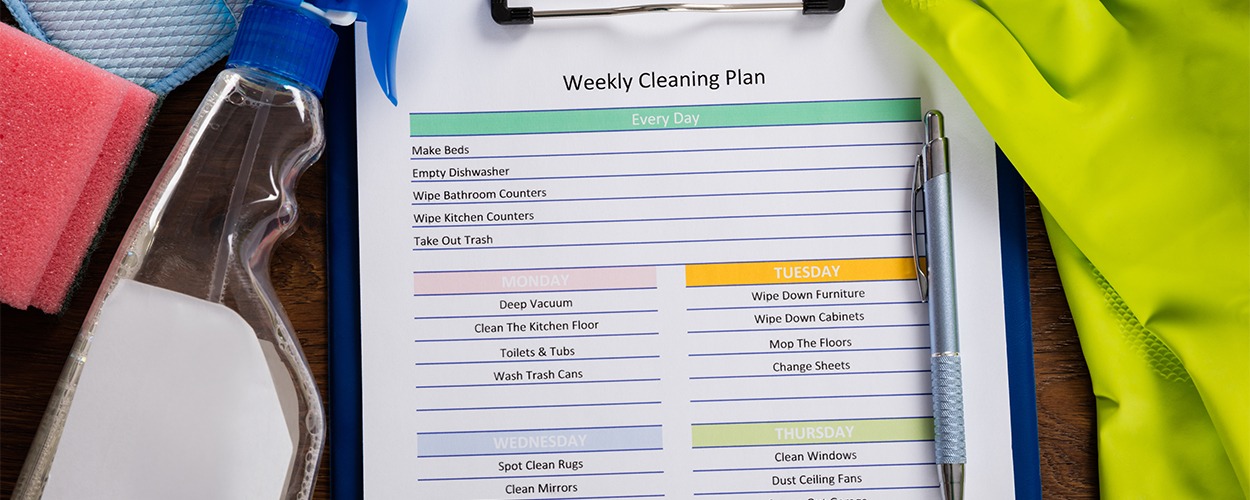
Create a Cleaning Schedule
After you finish your New Year’s cleaning, pat yourself on the back and keep up the momentum by creating a cleaning schedule! If you make house cleaning a normal part of your routine, the process will be much quicker and easier each time you do it.
Now that you have a home cleaning checklist and household cleaning tips, you should feel confident and prepared to put in the work! If you happen to run into any nasty stains during your house cleaning, check out how to remove 6 of the most common stains from your furniture.

From scratches on the hardwood floor to paint blemishes on the wall, it’s almost impossible to have a home that’s perfect from floor to ceiling. Fixing these blemishes can be both time consuming and expensive, so it’s smart to have a simple back-up plan. Discover creative ways to hide common eyesores with these helpful decor hacks.
Wires, Cords, & Electronics
Between iPhone charging cables and WiFi modems, there are so many electronic knick knacks to keep track of in today’s society. You can stop wondering how to hide plug sockets and wires and start tidying up with a couple easy decor hacks.
Decorative Baskets and Boxes
Baskets and boxes are budget-friendly, multi-functional, and stylish. Depending on the amount of space you need, you can get larger baskets to place on the floor, or smaller baskets to place on countertops and consoles. The bigger the basket or box, the more coverage you get to hide plug sockets and dangling wires. If you feel up to it, you can even create your very own DIY box as a fun weekend project.
Strategic Decor Placement
Sometimes placement is key when you’re brainstorming ideas on how to hide plug sockets and wires. If you’d rather not toss cords and devices in a basket, you can simply cover up the eyesore with home accessories. Stacks of books, houseplants, art pieces, and shelving are a few decor items that can disguise unsightly electronics.
Everyday Pet Supplies
With the sweet cuddles and playtime that comes along with pets, there is also the hassle of dealing with pet supplies. Litter boxes, food bowls, and play toys are a must-have, but they don’t need to be a must-see. Stash away your fur baby’s necessities by trying a couple different pet supply storage ideas.
Table Curtains
Do you have a corner table or console that is rarely used? If you do, consider adding stylish table curtains to create a concealed space for pet supplies. This pet supply storage idea works especially great for litter boxes because it provides easy access for your kitty. You can also tuck away toy boxes, as well as food and water bowls.
As an alternative to table curtains, you can use a decorative table cloth to achieve the same result.
Sleek Cabinet
If you don’t have any leftover cabinet space to hide pet supplies, this pet supply storage idea could be a lifesaver. Build or buy your fur babies a sleek cabinet to house whatever you want to hide from guests. Some even come with a pet door that allows cats to use their litter box. Once you have your litter box or dog food stored in the cabinet, you can slide it into the corner of the room where it’s almost unnoticeable.
Closet Space
It’s time to put that empty closet space to use! Assuming that visitors don’t have access to your closet, you can transform it into a concealed space for all of your pet supplies. For litter boxes, be sure to put down a mat or towel to keep the floor relatively clean. Other supplies like food bags can be placed in a bin within the closet to avoid messy spills.
Unsightly Flooring
From nasty scratches to outdated material, it’s common to have at least one room with flooring that looks less than presentable. Rather than tear it all up and endure a pricey home renovation, try these decor hacks.
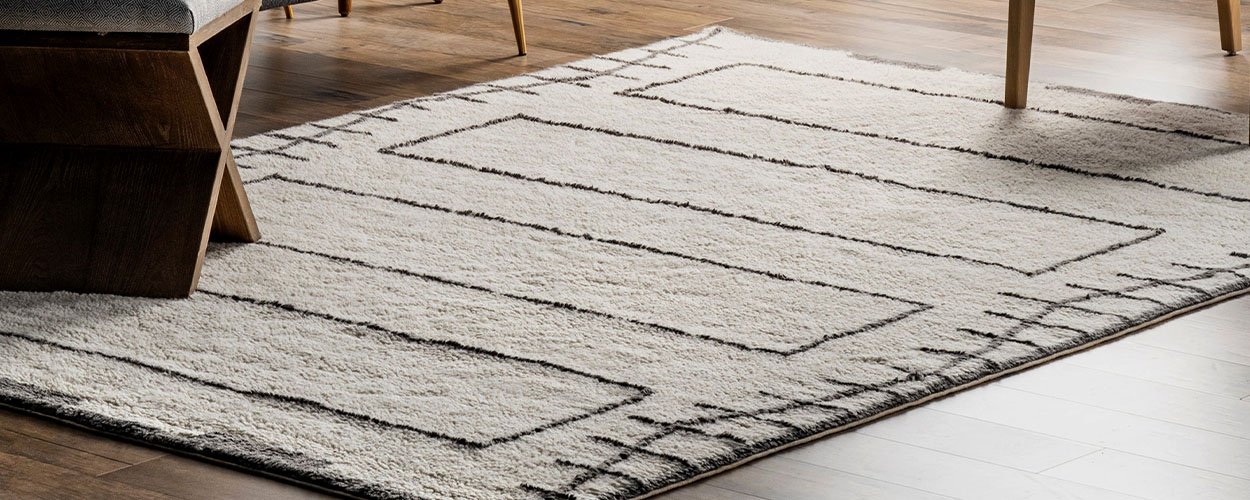
Rugs
Area rugs and runners are a major trend in interior design right now, so why not take advantage? This decor hack not only answers the question of how to hide scratches in wood floors, it also gives you the chance to spice up your living space. As you browse rug choices, pick options that complement your home’s design style and give it that extra touch of personality.
Peel-and-Stick Flooring
While it may not be the most permanent solution, peel-and-stick flooring can be a stylish alternative to replacing your unattractive flooring. Whether you’re looking for ways to hide scratches in wood floors or need to mask the ugly 1950’s-style tile in your bathroom, there are plenty of peel-and-stick varieties that can give you the fresh look you need.
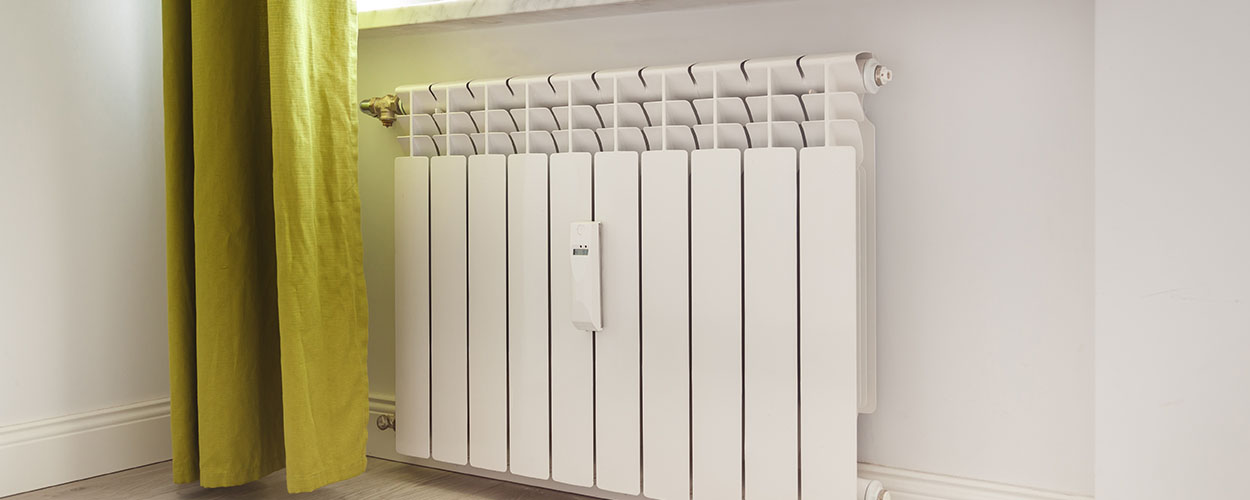
Rusty Old Radiators
There’s nothing like an old radiator to completely distract from your home’s beautiful aesthetic! In the summer months when it’s not being used, experiment with creative ideas to conceal your radiator from view.
Long Drapes
Knock out two birds with one stone by using this decor hack! If your radiator is right in front of your window, hang long drapes to hide it from sight. Not only will the drapes take care of your home’s eyesore, they will give you a chance to display beautiful drapes that accentuate your other decor.
Keep in mind that this decor hack is only safe when your radiator is not in use. During winter months when your radiator is on, switch out your long drapes for shorter alternatives.
Radiator Cover
Put your DIY cap on and build a stylish cover for your radiator. Whether you opt for a rustic cover made of stained pallets or choose a more modern look, you won’t be disappointed with the end result!
Unattractive Wall Space
From chipped paint to scratches and discoloration, it’s difficult to keep all of your wall space pristine. Camouflage the imperfections and elevate your home’s interior design with a few tips and tricks.
Gallery Wall
Need ideas on how to hide bad walls without paint? Gallery walls are here to save the day! Gallery walls are an especially great decor hack if you need to cover up a lot of space because they can quite literally take up your entire wall.
Precision and measurement are key to a beautiful gallery wall, so make sure you do your research before you start the process.
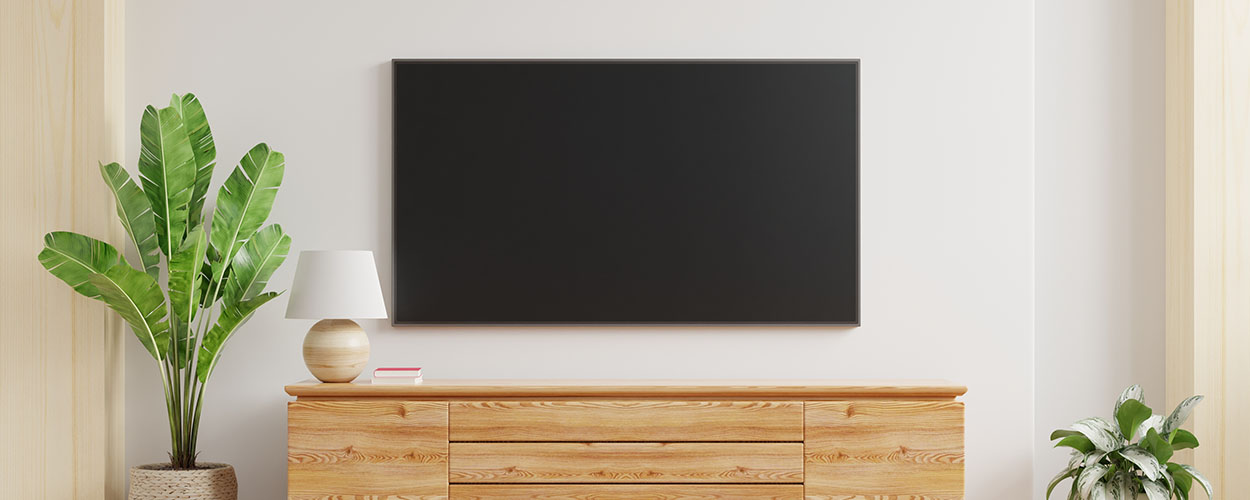
Mounted TV
Mounted wall TVs have become more and more popular over the past few years. Not only do they have a sleek look, they also help to save precious space on your floor. If your wall blemish is in a spot that makes sense, take the time to mount a TV in front of it.
Other Wall Decor
Along with mounted TVs and gallery walls, you can strategically place any other type of decor in front of your most hated wall blemishes. Shelving, hanging plants, tapestries, signage, mirrors, and framed photos are just a handful of ideas to consider.

Smelly Trash Cans
No matter how new and shiny your trash can is, it’s not ideal to have it sitting out in the open in your home. Stash away this eyesore and bury the odor by creating a designated hiding spot.
Trash Cabinet
If your home doesn’t have a built-in trash drawer, there’s no need to worry! A stand alone trash cabinet gets the job done and has the added benefit of being mobile. Move it to a convenient spot in your home and now you have easy access to your trash can.
Instead of leaving your cabinet bare, display a houseplant or decor accessory to help it blend in as one of your home’s stylish furnishings.
Slide-Out Trash Can
Are you limited on space within your home? With a few tools and basic handyman skills, you can easily build your own slide-out trash can. Choose any lower cabinet in your kitchen and drill in the basic hardware. The entire process shouldn’t take any longer than 30 minutes and the pay off is well worth it!
Every home has eyesores and imperfections, but with a little creativity and effort, you can hide them from sight! As you think of ways to improve your home’s appearance, read about 6 home renovation tips you should follow.
The living room is one of the most used rooms of the entire home, so why not give it a makeover every once and awhile? Instead of spending thousands of dollars on brand new furnishings and decor, try these DIY ideas for your living room that are both budget-friendly and beautiful for any home.
1. Update Your Furniture Upholstery
While it’s ideal to buy brand new sofas and accent chairs for your living room, it’s not always the most affordable option if you’re limited with budget. Even if new furniture isn’t in the cards for you, there’s no reason why you can’t give a little love to the pieces you already have.
Start off your DIY living room makeover by reupholstering your furnishings. Not only will new upholstery get rid of unsightly tears and scratches, it will also give you the opportunity to update the style of your furnishings. Think about the different types of fabric to choose from and pick one that gives your space a whole new look and feel!
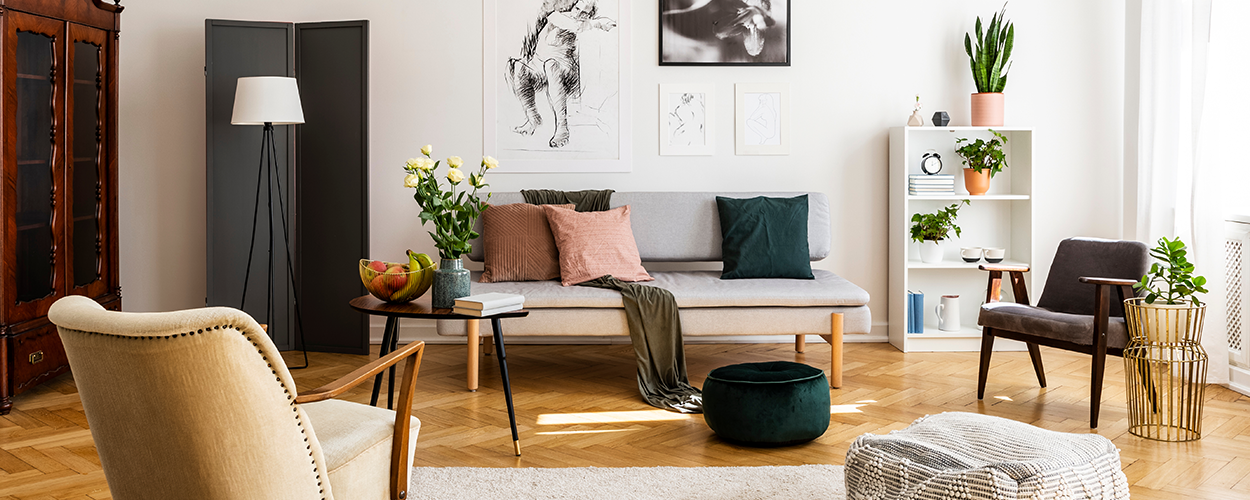
2. Hang an Art Gallery
It’s time to get your creative juices flowing! Wall art galleries are a popular trend in interior design, so why not make your own? Depending on your commitment level, there are a couple different ways you can go about executing this DIY idea for your living room.
You can either create the art pieces on your own or buy them. Before you rule out purchasing art, remember that there are budget-friendly options like thrift stores, estate sales, and flea markets that offer unique art at lower prices.
Keep in mind that your gallery wall can include more than just your typical painting as well. Incorporate framed pictures or hanging plants for a little variety.
3. Build a Faux Fireplace
No fireplace, no problem! Transform your living room into a cozy den with the addition of a faux fireplace. With a small budget and a handful of supplies, you can install your fireplace in just a couple of weekends. Even though you won’t be able to experience the crackling of a real fire, this clean and affordable option is perfect because it gives you the freedom to design the fireplace you’ve always dreamed of!
4. Create a Sofa Table
Need more room to display framed pictures and other home accessories? Sofa tables aren’t the most common DIY living room furniture, but they are certainly worth your consideration. Not only are sofa tables stylish, they are multifunctional too.
This DIY idea for living rooms works especially well in open floor plans. Use your table as a divider to create distinct zones from your living space to other areas like your dining room and kitchen.
5. Install a Wood Pallet Wall
Are you a fan of rustic interior design styles? What better way to create dimension in your space than by building a wood pallet wall? Wood accent walls are another current trend that can take your space from bland to bold.
While wooden accent walls can be built on top of any wall in your room, this DIY living room makeover idea looks particularly stunning as a backdrop for your entertainment center. Frame the wall with bookcases, mount a TV, and you’ve got yourself a unique focal point.
6. Paint Your Own Abstract Art
Gather together painting supplies and a canvas for this fun DIY project. Give a little facelift to your living room wall by creating your own abstract art piece to put on display. Not a professional artist? Don’t let that stop you! Let your creativity guide you and remember that it’s called “abstract” art for a reason. There are no rules, so paint whatever comes to your mind.
Place your masterpiece above your sofa or fireplace mantel and use it as a conversation piece whenever guests visit.
7. Decorate with a DIY Mantel
If you don’t feel up to renovating your entire fireplace, start with just the mantel! There’s lots of different ways to breathe new life into this part of your fireplace, so it’s really up to you which way you want to go about it.
For a quick project, simply paint your mantel to introduce a new accent color to your space. If you want to challenge yourself a bit more, you can take out your mantel altogether and install a new one that better aligns with your current interior design style.
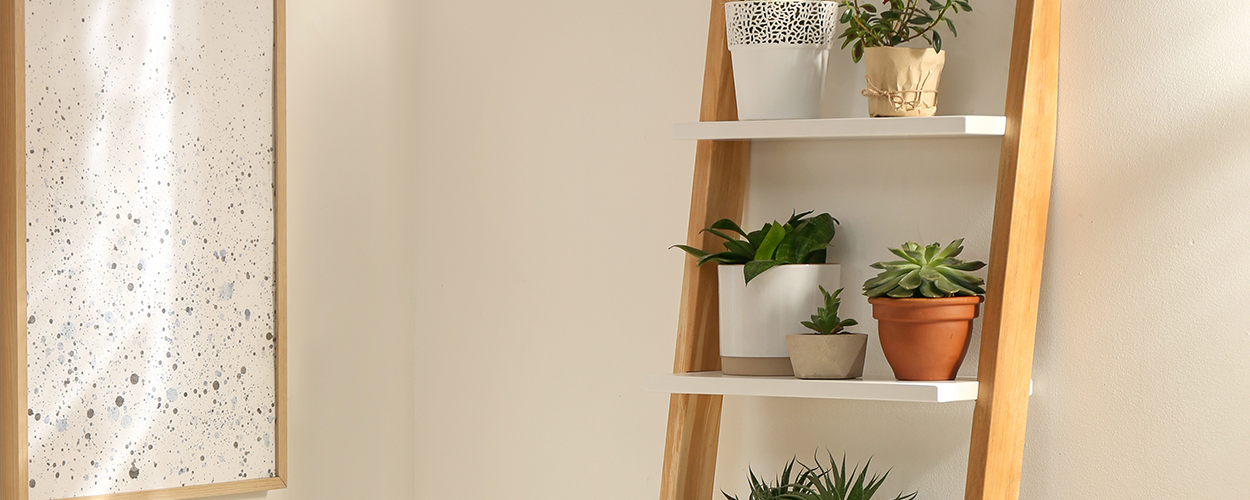
8. Build a Ladder Shelf
Perhaps one of the most simple DIY living room furniture ideas is building a decorative ladder. They’re trendy, functional, and take up very little space which makes them a great addition to almost any home.
This particular project takes a cool twist on the typical decor ladder by incorporating shelves instead of rungs. By adding shelves to your ladder, you give yourself more space to display home accessories like candles, plants, ceramics, and more.
As an alternative, you can build or renovate a traditional decor ladder and use it as a blanket holder.
9. Spruce Up Your Coffee Table
From scratches and cracks to those frustrating water rings, it’s hard to keep a coffee table in perfect condition throughout the years. Before you drop a pretty penny purchasing a new table, give your old one a second chance with handy dandy contact paper. Opt for a sleek marble pattern or wood-imitation paper that will transform your coffee table and make it look brand new!
10. Play Around with Floating Shelves
If you haven’t already hopped on the floating shelves bandwagon, there’s no better time to do it than during a DIY living room makeover. Floating shelves bring a modern and fresh look to your space and provide a great opportunity to showcase decor of all kinds. For large shelves, display impressive paintings and other art pieces. Smaller floating shelves work well for framed photos, candles, sculptures, and plants.
Sprucing up your living room is only one of many DIY projects to tackle around the house. As you brainstorm more ways to liven up your space, gather inspiration with these DIY woodworking projects.

Temperatures are dropping, leaves are turning, and festive fall decor is sweeping the nation! As you celebrate the fall season and all of the holidays that come with it, don’t forget to spice up your letter board for the occasion. From spooky Halloween letter board quotes to Thanksgiving letter board ideas, here are the top 40 sayings you should try this year!
Fall Letter Board Ideas
While it’s fun to get creative and come up with fall letter board ideas on your own, it’s always nice to get a little inspiration. Here are some of the most corny and cute fall letter board sayings that are perfect for the season:
- ‘Tis the season to be fall-y
- Happy Fallidays
- Fall, flannels, football
- Pumpkin spice & everything nice
- Oh my gourd, it’s fall!
- Leaves are falling & coffee is calling
- I love fall most of all
- Sweater weather
- Pumpkin spice, spice baby
- Hello, gourdeous!
- Leaves are falling, autumn is calling
- Pumpkin kisses and harvest wishes
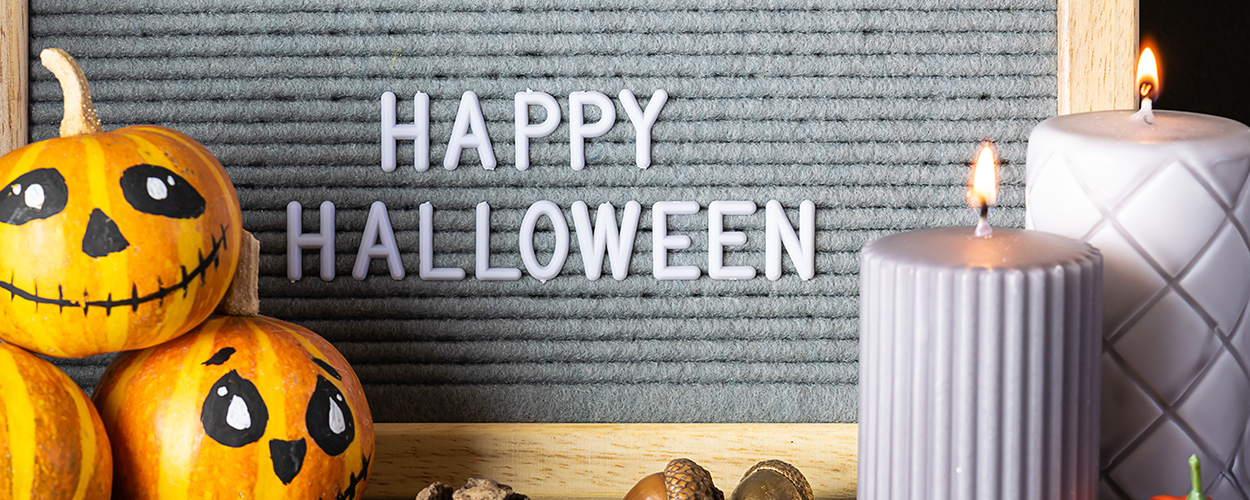
Halloween Letter Board Ideas
Fall isn’t just about pumpkin spice and everything nice! Pay tribute to the spooky season with these Halloween letter board quotes that add a wicked touch to your home decor.
- Trick or treat yo’ self
- Give ‘em pumpkin to talk about
- Creep it real
- Happy howl-oween
- If you got it, haunt it
- Cheers, witches!
- You’ve got me under your spell
- Something wicked this way comes
- It’s just a bunch of hocus pocus
- Hey boo-tiful
- Let’s have some skele-fun!
- Ghouls just want to have fun
- Eat, drink, & be scary
- Spooky!
- Trick or treat
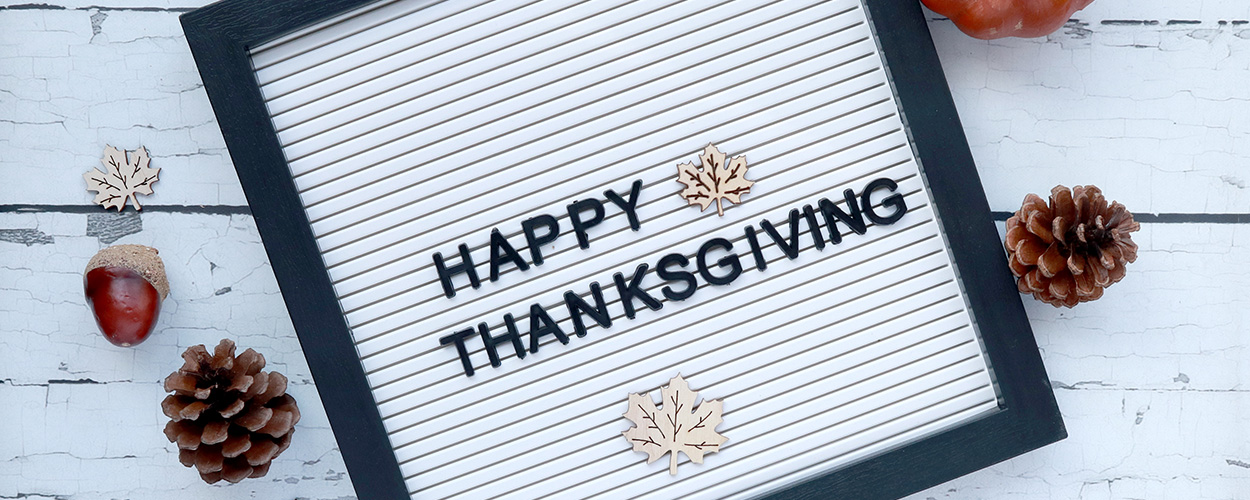
Thanksgiving Letter Board Ideas
In between the party planning and food preparation, remember to try these Thanksgiving letter board ideas that remind you of one of the best parts about the holiday—delicious food!
- Leftovers are for quitters
- Whatever floats your gravy boat
- Thanksgiving rule: no talk, just gobble
- Count your blessings, not your calories
- Thankful for oversized hoodies and leggings
- Thanksgiving: cook, eat, nap
- Alexa, make Thanksgiving dinner
- Sorry, I’m occu-pied
- Give thanks, eat food
- Gobble, gobble
- It doesn’t get any butter than this
- Stop, drop, & pass the rolls!
- Feast mode: activated
Now that you know the top 40 fall letter board ideas, check out these 9 fall decor trends!

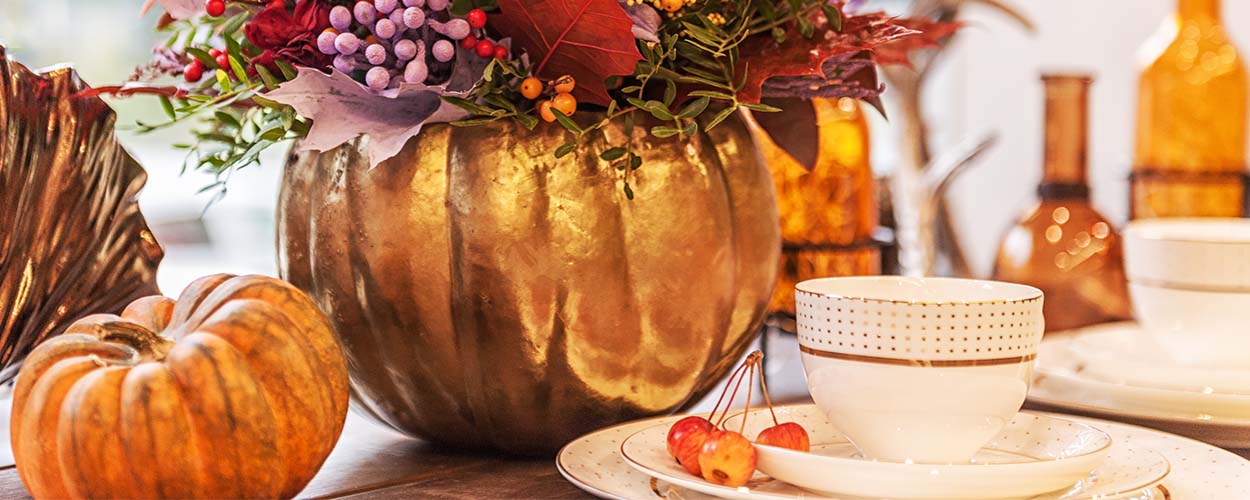
What better way to get into the fall spirit than by diving into some festive fall decor crafts? Not only do you save money with DIY fall room decor, you also get the chance to create personalized decorations that match your design taste. Whether you’re new to the crafting game or a seasoned veteran, let your creativity run wild with these easy fall decorating ideas.
1. Pumpkin Barrel
Looking for a cute way to show off your apple-picking treasures this season? A DIY pumpkin barrel is the way to go! Head to the store and pick out your favorite pumpkin (the bigger, the better) and hollow it out as if you’re going to carve it. Once your pumpkin is clean and empty, fill about three-fourths of it with Poly-Fil. Place burlap fabric over the top opening and attach it over the sides with upholstery tacks.
After you have your burlap secured, dump in your apples and enjoy! Place your barrel on your front porch to welcome guests or leave it in the kitchen for when you need a tasty snack.

2. Fabric Pumpkins
Take your pumpkins to the next level with this fall craft for adults! The best part about this idea is that it’s simple and requires very few supplies. Old quilts or fabric scraps and dried stems are the two main items you need to turn your ordinary pumpkins into farmhouse-style fabric pumpkins.
Once you’ve hot glued your fabric and faux stems to your pumpkins, display them along your dining table runner and add seasonal greenery like fall leaves for a final touch.
3. Corn Husk Candles
While pumpkins tend to steal the show during fall, there are lots of other seasonal motifs you can use for your decor. Corn husks, for example, can give your home a little bit of seasonal texture.
For this easy fall decorating idea, you need a few glass votive holders, moistened corn husks, raffia, Spotted Guinea feathers, and battery-powered candles. Wrap your glass holders with a few overlapping layers of corn husks, secure them with raffia, and slip in one Spotted Guinea feather per candle to finish it off. You can easily knock out this craft in 30 minutes or less which makes it a must-try this season!
4. Autumn Bouquet
As the seasons change, so should your home’s greenery! Take a different approach to autumn bouquets by mixing in more unique ingredients like veggies, fruits, berries, and a variety of flowers.
If you aren’t too sure where to start, try cabbage heads, gourds, and pears within your DIY fall room decor. After you see the striking colors of your autumn bouquet, you’ll want to make tons more!
5. Decoupage Pumpkins
It’s decoupage time! Transform basic pumpkins into colorful masterpieces with seasonal scrapbook paper, Mod Podge, acrylic paint, and pumpkin stems. After you’ve decorated your pumpkins and feel happy with your collection, place them in a wooden barrel or tin bucket and show them off! Your entryway or front porch are a couple ideal spots to display them.
6. Seasonal Vases
Bring the harvest to your home with seasonal vases full of golden wheat and nuts! This fall craft for adults is simple, sophisticated, and great for your mantel or tabletop.
To get the complete look, use cylinder vases and fill them about three-fourths of the way with nuts. Slip in decorative cuffs made of scrapbook paper to give them a more professional feel and then add your bundles of wheat. These seasonal vases are well worth the 15 minutes it takes to make them!
7. Sunburst Wreath
You can’t say you’re done decorating for fall without hanging a seasonal wreath on your front door. Say goodbye to spending a pretty penny on store-bought wreaths because this sunburst wreath is absolutely stunning!
Grab a bundle of Indian corn, fold out the husks so they point straight up, and hot glue the ears to a straw wreath. Once you’re done piecing it together, you’ll see that this fall decor craft certainly lives up to its name.
8. Colorful Acorns
Who said DIY fall room decor needs to be complicated? For this project, all you need is a pile of acorns, acrylic paint, and a decorative bowl. Paint your acorns until your heart’s content and display them in your bowl for a subtle seasonal touch.
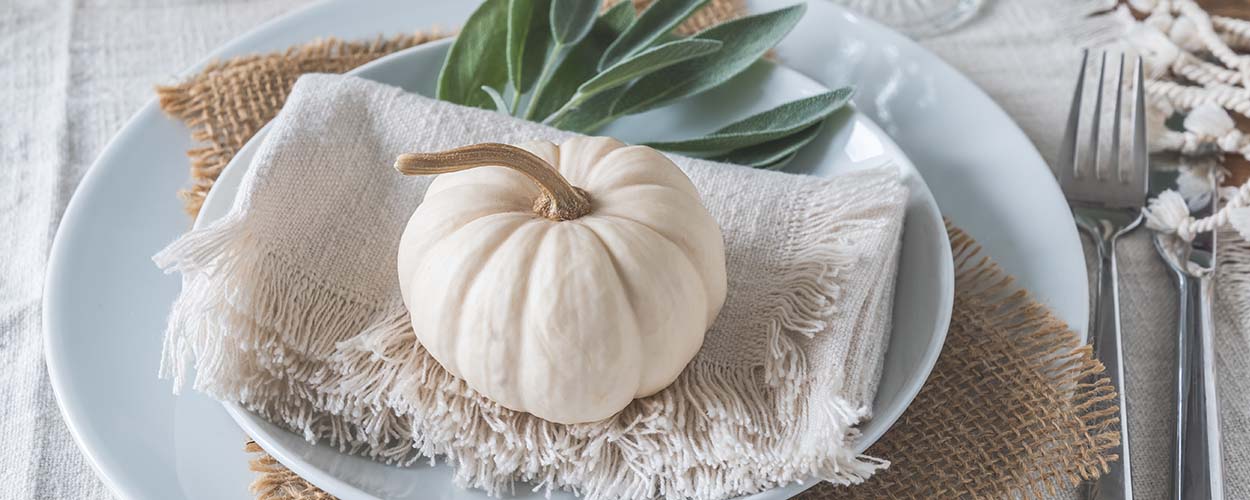
9. Mini Pumpkin Blooms
Get ready for family gatherings and holiday parties by spicing up your dining table place settings. Along with autumn-inspired tablecloths and runners, you can make your dining experience even more festive with mini pumpkin blooms.
For this fall decor craft, you have the option to use live or faux mini pumpkins. Make sure the inside is hollowed out enough to fit a small votive candle holder. Place the holder in the pumpkin and fill it with vibrant dahlias in shades of orange, white, yellow, and more. Not only do mini pumpkin blooms dress up your dining table, they make for the cutest party favors!
A couple alternative options are leaving the mini pumpkins plain or painting them for an extra splash of color.
10. Fall Yarn Hanging
After you have your floors and tabletops decorated for the season, try creating a warm and cozy wall hanging made of yarn. This particular fall craft for adults is a beautiful option if you’re a fan of trendy boho wall hangings that are popular in stores today.
A branch or wooden dowel, several colors of yarn, felt flowers, and pom poms are the main supplies you’ll need to recreate this modern fall craft.
Want more inspiration for seasonal crafts? Check out 15 DIY Decor Ideas for a Spooktacular Halloween!

Springtime is finally here which means blooming flowers, warm sunshine, and one of the hoppiest holidays—Easter! Easter is the perfect time to bring out your art supplies and creative spirit to create fun decor for your home. Whether you’re planning a crafting day with your friends or want to get the kids involved, try these DIY Easter decor projects.
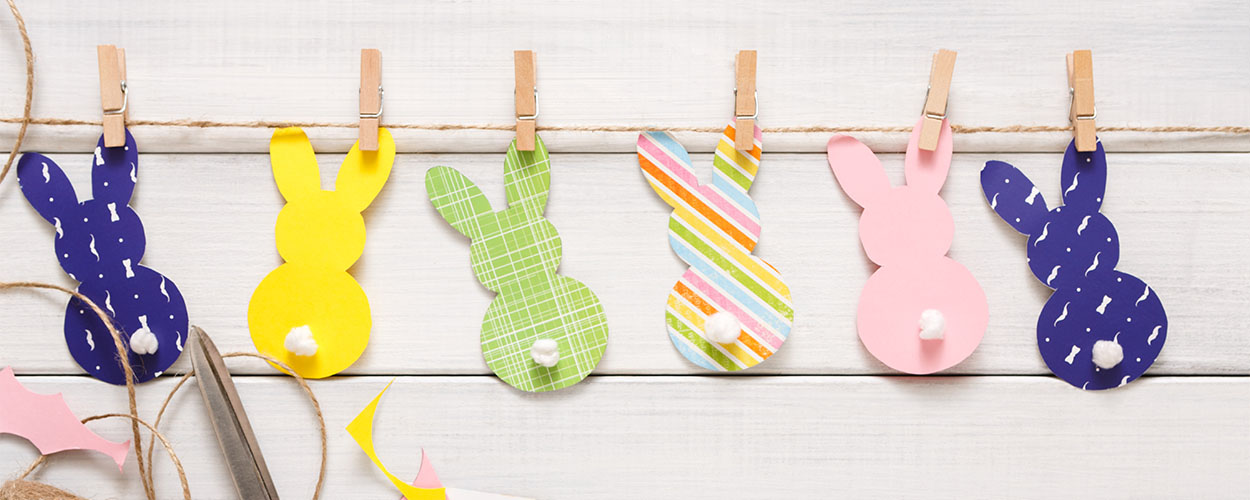
1. Bunny Garland
Nothing says Easter more than adorable bunnies! This easy DIY Easter decoration makes for a lovely addition to your mantle, staircase, or any free space along your walls.
No need to worry about your crafting skills either. All you need for this bunny garland is scrapbook paper, yarn, a bunny garland template, fork, and basic art supplies like scissors. The fluffy pom pom tails are a must for that extra touch of cuteness!
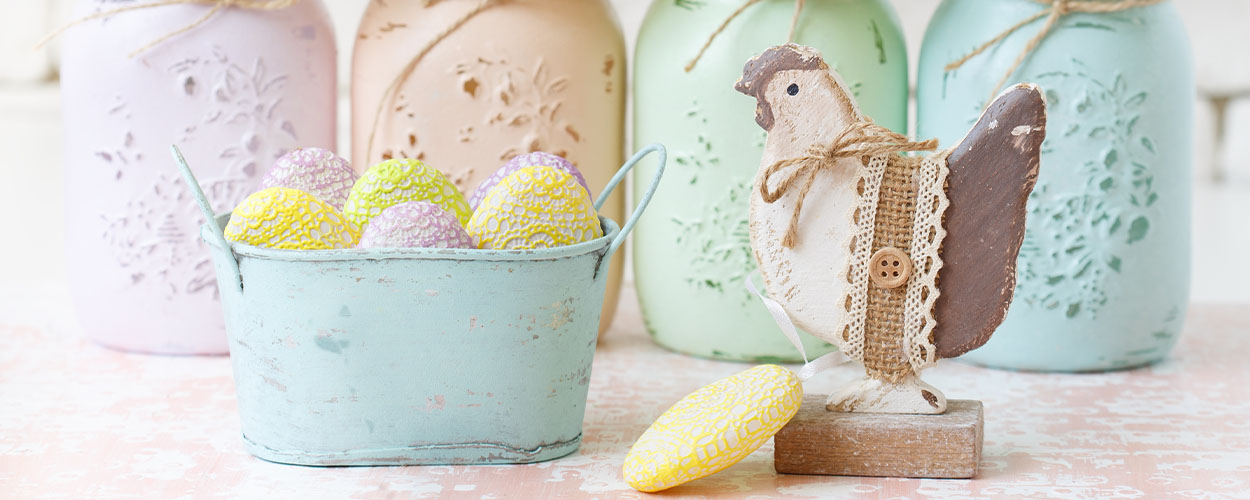
2. Vintage Egg Vase
Easter decor ideas not only work with the obvious holiday symbols like eggs and bunnies, but they also look gorgeous with flowers! Combine your favorite spring flowers with colorful Easter eggs to create a unique vintage vase.
In this particular DIY craft, use wooden eggs that are strong enough to support your flower bouquet. Pick whichever vintage egg basket catches your eye, dye or paint your eggs pretty pastel colors, and arrange your flowers.
Need inspiration for springtime flowers? Lilacs, anemones, allium, Scabiosa lavender, and ranunculus are some of our favorites.
3. Easter Flower Box
Don’t let the name of this DIY Easter decor project fool you—there aren’t any flowers in this flower box! Turn a typical floral decor piece into a festive holiday craft with just a few simple steps.
Whether you choose a milk glass dish like the one used in this DIY project, or opt for a different look, try to focus your color scheme around pastels and metallics.
Head to your local craft store to buy plastic grass mats, cut them to fit the size and shape of your dishes, and of course, remember to grab your vibrant Easter eggs. Arrange your supplies in your dishes and voila! You have yourself some fresh greenery with pops of color.
4. Bunny Mason Jars
Looking for farmhouse-style crafts for Easter? These bunny mason jars are sure to add a bit of country cottage magic to your home. Get the kids involved with this easy DIY Easter decoration that only requires a little paint, ribbon, and bunny stickers. You can even incentivize the little ones to help create these masterpiece mason jars by filling them with sweet holiday-themed treats.
5. Easter Egg Wreath
Are you really done decorating your home for Easter if you haven’t hung up a welcoming wreath? Rather than go to the store to buy a wreath, make your own with this Easter decor idea.
Let your creativity run wild with the supplies you choose or stick to the basics by using a grapevine wreath, moss, painted eggs, flower stems, and floral ribbon.
6. Egg-cellent Ornaments
Ornaments don’t just belong on Christmas trees! Branch out of your usual holiday routine to craft up paper eggs that can be used in more ways than one. String them up on twine to make a garland, give them to your kids to hand out as Easter gifts, or hang them on an Easter tree in your living room.
7. Rustic Wooden Bunny
Take your Easter crafting skills outdoors for this fun project! Invite guests into your home with a rustic Easter bunny sign made out of reclaimed wood.
Although this DIY craft does require some woodworking, don’t let that element scare you away. All skill levels can complete this project without professional help.
Some of the essentials you’ll need are reclaimed wood, a jigsaw, wood glue, white paint, a stain of your choice, sandpaper, and a bunny template. Sit outside on a warm spring day and enjoy the sunshine as you get to work on this Easter decor idea!
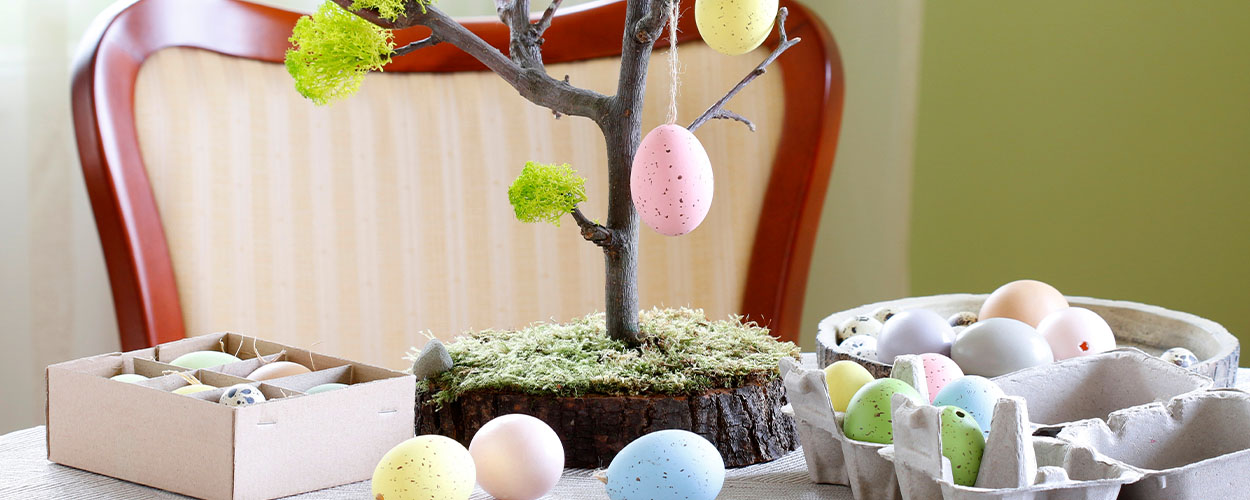
8. Mini Easter Egg Tree
Need a fresh centerpiece for your dining table? A mini Easter egg tree is the way to go! You have quite a bit of freedom with this Easter decor idea. You can either go to the craft store to pick up faux eggs and foliage, or you can use what you have at home. Put it all together in a weighted-down bucket, basket, or jar and you’re all set.
For a sentimental touch, get the entire family involved by having them place sweet notes of gratitude along the branches as well.
9. Peeps Sunflower
When you think of classic Easter candies, Peeps probably spring to mind. These fluffy marshmallow treats come in the shape of chicks, bunnies, and more. For the purpose of this DIY holiday project, you’ll want to get a pack of the yellow chick Peeps.
Use hot glue, a dowel, an embroidery ring, and a bright flower pot or vase to end up with a vibrant sunflower made of Peeps! Remember to mist the final product with craft sealer to preserve it and keep it out of reach of the kiddos.
10. Scrapbook Bunnies
The name of the game for this easy DIY Easter decoration is bunnies! Collect a few wooden bunny cutouts from the store or make some yourself if you’re feeling adventurous.
Once you have your furry friends, all you need to do is trace the bunnies onto your favorite scrapbook paper, paint the edges of the wood cutouts, and adhere your paper to the wood. You can also add a bow made of tulle or ribbon for an eye-catching finish.
No matter how much experience you have with DIY decor projects, these 10 Easter decor ideas are a great way to celebrate the holiday with friends and family. As you decorate your home for Easter, spring into the season with these living room makeover ideas.

The jolliest time of the year is here and that means gift shopping, party planning, and best of all, decorating. With so many festive activities on the table, your bills can start to skyrocket through the roof. Save money this season by creating your own DIY holiday decor that brings just as much Christmas cheer to your home.
Tree-Shaped Advent Calendar
Grab some wood, tin cans, spray paint, and lots of hot glue for this creative holiday craft idea! Make your very own advent calendar in the shape of a Christmas tree and add all of the fun goodies you can think of into the 25 tin cans. Candy, gift cards, and other stocking stuffers make the perfect surprises for each day’s gift unveiling.
As you go through the process of assembling the wood frame, think about the colors you want to incorporate. Stick with a classic snowy white or go all out with a multicolor pattern of red, green, and gold.
Wooden Spools Wreath
If you love DIY crafts and a charming vintage look, you’ll absolutely fall in love with this wooden spools wreath. The supplies and instructions are as easy as it gets which makes it even better!
Gather up a hefty amount of wooden spools, wrap them in a colorful assortment of thread, ribbon, baker’s twine, and rickrack and then hot glue them to a wreath form. Fashion on an elegant bow to hang the wreath and your simple holiday craft is complete.

Tiny Accent Tree
Sometimes having a big Christmas tree in the living room just isn’t enough festive cheer for the holidays. Sprinkle in an additional surprise with a tiny accent tree that fits practically anywhere in your home.
Venture to the outdoors and find any little tree branch on the ground to use for your DIY holiday decor. Once you find the perfect Charlie Brown tree branch, spray paint it white (or whichever color you fancy) and place it in a decorative glass vase or bottle.
The last step is decorating. Hang just a few mini ornaments on the branches and place a few candles next to the tree to round out the display. What a chic and easy Christmas decor idea!
Decorative Galvanized Buckets
Enjoy buckets of cheer this year with this quick, 10-minute holiday craft idea. Head to the store and get yourself a few galvanized buckets, chalk pens, greenery, vases for each bucket, and ribbon of your choice. Twinkling lights are a magical touch as well, but completely optional.
Fill each bucket with greenery, wrap with ribbon, and write out whatever message you like with the chalk pens. Cluster them on your porch or display them along your staircase and have a warm holiday greeting every time you come home!

Mason Jar Lanterns
Decorating with glowing lanterns is a fun way to get into the holiday spirit and you can make your own right at home! This particular holiday craft idea uses hanging lanterns, but you can always display your lanterns on your kitchen counters and tables instead.
LED string lights, spray paint, mason jars, tree trimmings, circle stickers, heavy-duty yarn, and floral wire are the main supplies you’ll need to make these lanterns come to life. If you do choose to hang them, consider your porch or backyard patio to light up the night.
Festive Lantern Display
Have tons of ornaments left over after decorating your Christmas tree? Put them to use with this festive lantern display. All you need is a lantern set (the bigger, the better), ornaments, ribbon, and decorative greenery.
Place the ornaments inside each lantern, filling them up about half way. Then, give a little love to the outside by tying a bow of ribbon on the top of the lantern with some greenery to boot. This is such a simple holiday craft, but the finished product looks like something you’d buy straight from the store.

Layered Garland
Garlands are a traditional Christmas decor idea that blend in well no matter what your taste is. Take a couple hours out of your weekend to fashion a personalized garland to place around your doorway, along your staircase, or across your mantle.
While the accessories are totally up to you, start with fresh cedar and grapevine twigs and use green metal wire to bundle them together. Add in pine cones and bright red berries for that festive touch of color and prepare to impress guests with a beautiful presentation that smells amazing too!
Birch Centerpiece
Take your centerpieces to the next level this Christmas season with this warm and cozy holiday craft idea! Skip the usual flower centerpiece and try out this birch-themed design.
A handful of birch stumps from your local craft store, candles, a table runner, and mini decorative trees are the essentials you need to complete this display. Glass figurines of deer are a magical touch too, but won’t make or break the centerpiece. Keep in mind a color theme like gold and white or blue and silver when you purchase all of your supplies.
Once you’re done shopping, simply arrange all of the items into a cohesive presentation on your dining table to show off to guests during holiday parties.
Decorating the house is a great way to get you and your family into the holiday spirit, so why not craft up your own designs while you’re at it? Save money and create precious DIY holiday decor with these simple and sweet projects. For more Christmas creativity, read through 7 holiday decorating ideas for your home.

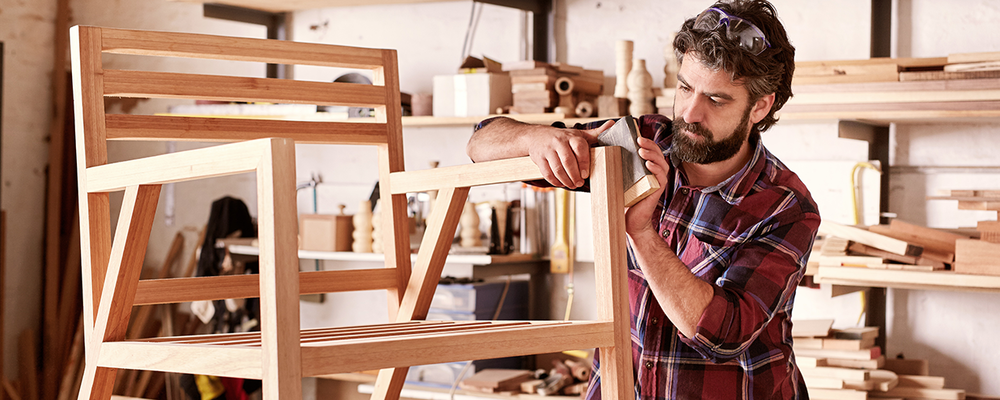
If you love learning new trades, saving money, and home decorating, it’s time you pick up a new hobby and test your creativity with woodworking! The art of woodworking combines craftsmanship, style, and functionality to create personalized items for decoration and use. Keep yourself busy at home by trying your hand at these DIY woodworking projects perfect for all skill levels.
Indoor DIY Woodworking Projects
Cool Cedar Bath Mat
Time: 1 hr or less | Skill Level: Beginner | Cost: $20-50
Tired of soaked bathroom mats after you hop out of the shower? Opt for this cedar bath mat instead and make it yourself with just three easy steps. Keep in mind that this particular DIY woodworking project uses cedar for its style and rot resistance, but you can use any wood that matches your preferences
Stylish Mudroom Cabinets
Time: Multiple days | Skill Level: Intermediate | Cost: $100-250
Whether you have kids constantly tracking in dirt or struggle to keep bags and backpacks organized, these mudroom cabinets are a heavensend! With lots of space and customizable design plans, you can create unique lockers to store everything from boots, coats, umbrellas, and more. Use plywood instead of stained wood to save extra money and apply a fresh coat of paint to bring some color to your home.
Trendy Floating Shelves
Time: Few hours | Skill Level: Beginner | Cost: $100-250
Floating shelves are one of the hottest design trends right now and for good reason! They complement your walls and provide much needed storage space off the floor. Rather than purchasing them from a store, take on this practical woodworking project and make them in just a few hours.
While this project may not save you money in the long run, it gives you the freedom to create shelves that meet all of your requirements. Choose the exact size, thickness, and style you want, and finish them to match your home’s furnishings.
Simple Side Table
Time: Full day | Skill Level: Intermediate | Cost: Free
Choose from pallets made of pine, oak, poplar, or maple for this practical woodworking project. Side tables aren’t cheap when you buy new, so this project definitely gives you the chance to save a pretty penny as you hone your skills in lumber preparation and simple joinery. This square-shaped, modern side table is a great furniture piece for your living room table lamp or decorative houseplants.
Industrial Serving Tray
Time: Few hours | Skill Level: Intermediate | Cost: $45 plus lumber
Need decor for your living room coffee table? This industrial-style serving tray is a stylish and functional DIY woodworking project that will garner many compliments from your guests! With some dark barnwood and black iron handles, you can create a vintage decor piece that doubles as the perfect tray for breakfast in bed.
If you use reclaimed wood for your rustic look, make sure to inspect the wood prior to starting. Check for nails and rot to ensure it is sound throughout.
Mid-Century Platform Bench
Time: Full day | Skill Level: Advanced | Cost: $50-100
Complete your entryway with a mid-century modern platform bench by trying this practical woodworking project. What makes this bench especially exciting is that its design is based on George Nelson’s iconic bench made in 1946. Rather than seeing it in museums across the country or buying pricey imitations online, create your very own replica!
Outdoor DIY Woodworking Projects
Beautiful Garden Arbor
Time: Multiple days | Skill Level: Intermediate | Cost: $100-500
Get your home ready for beautiful spring weather with this garden arbor! Complete with a swing as well, this DIY woodworking project is much easier to assemble than it may seem at first glance. For this specific project, the swing is store bought, leaving just the arbor as your main piece of work. If you can handle a saw and drive screws, you should be able to get this backyard seating up and running in just a couple days.
Relaxing Patio Set
Time: Multiple days | Skill Level: Beginner | Cost: $100-250
Transform your patio into a comfy entertaining area for family and friends by crafting up this relaxing patio set. The wonderful part about this practical woodworking project is that it can literally blend into any backyard. All you need to do is adjust the measurements of the sofa and chair to make them smaller or larger for your space.
Another convenient feature of this patio furniture is the wide arms that double as end tables for drinks and food. Kick back on your outdoor sofa and enjoy a peaceful dinner at sunset.
Functional Garden Closet
Time: Multiple days | Skill Level: Intermediate | Cost: $100-400
Not every backyard has room for a large shed, which is why this small garden closet is such a necessity for homes with limited space. Have a durable and convenient spot to place all of your yard tools and supplies by spending a couple of weekends on this DIY woodworking project. Attach it to the back or side of your house for discreet storage and save about $75 by using treated lumber, pine, and asphalt shingles instead of cedar.
Pedestal Picnic Table
Time: Multiple days | Skill Level: Intermediate | Cost: $100-250
Are you a fan of Craftsman-style furniture? If so, this pedestal picnic table is the ideal design for you! Great for dinner parties, morning mimosas, or a game of cards, this picnic table’s assembly is strong and simple with a long-threaded rod rather than complex dowels or joints. Plus, no one will ever need to complain about a table leg in their way when they sit. The pedestal feature is streamlined and optimal for comfortable seating.
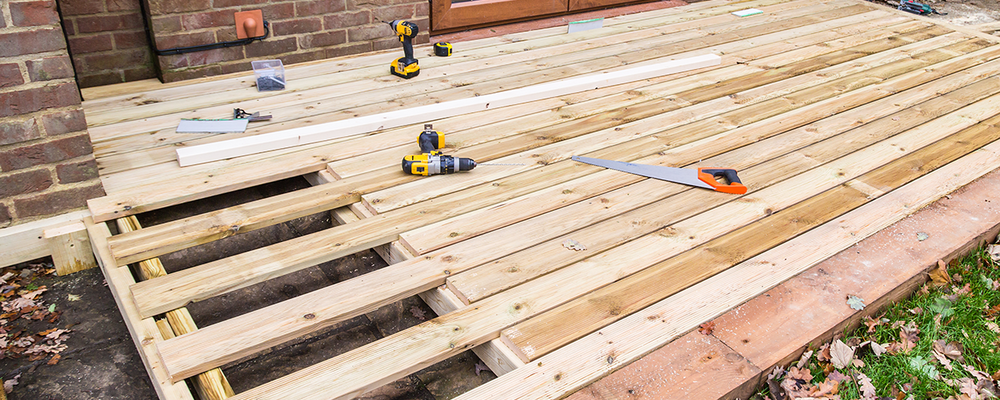
Ground-Level Island Deck
Time: Multiple days | Skill Level: Intermediate | Cost: $500-1000
Ask for a helping hand from a friend or family member and finish off your backyard with a ground-level deck. This practical woodworking project may be higher in cost, but it’s maintenance-free, easy to build, and a unique addition to display patio furniture. It’s also a creative way to cover up the less appealing parts of your lawn!
Petite Umbrella Table
Time: Multiple days | Skill Level: Intermediate | Cost: Varies
If you’ve ever owned an outdoor umbrella, you know the struggle of trying to keep it (and its holder) stable during blustery days. Luckily, you can put that problem behind you with this petite but sturdy umbrella table! With a distinct, tapered design, this DIY woodworking project is stylish, functional, and perfect for poolside lounging.
Grab your plywood, No. 2 cedar, and knot-free cedar to get things started. Keep in mind that experience with pocket screws and miter saws is preferred for a smooth and quick building process.
There’s a lot of work that goes into making your house a home, and you can get first-hand experience in the process by mastering the art of woodworking. Customize your home furnishings with these DIY woodworking projects and enjoy learning a new hobby along the way! If you’re looking for more ideas on how to decorate your home on a budget, check out 15 ways to decorate with what you have.
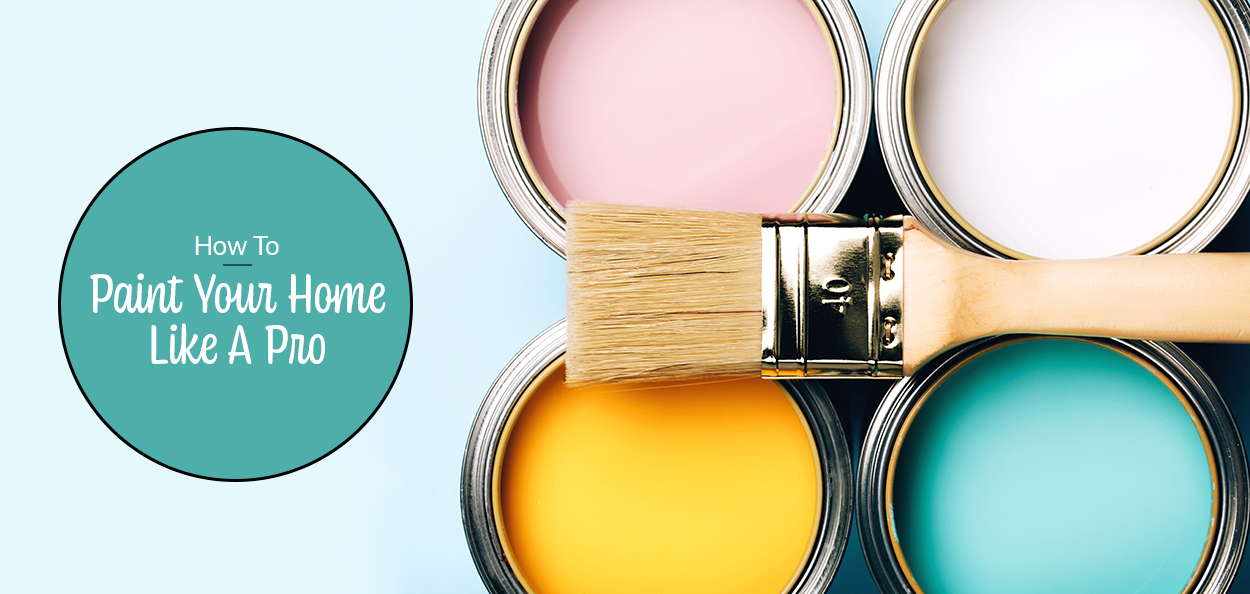
Painting is one of the most basic ways to renovate and refresh your home, but it can actually be the trickiest if you aren’t knowledgeable about technique and preparation. Before you begin the process of painting your home, check out these interior house painting tips to ensure a flawless finished product!
Step 1: Plan Your Approach
As with any home renovation, it’s most important to have a set plan before you begin. Follow these tips for a successful approach to painting your home.
Choose Your Paint Color
With hundreds of shades to choose from, it can be hard to decide what color you want for painting your home. A good strategy is to think of the big picture and slowly narrow down the options as you go. First, decide whether you want a cool, warm, or neutral shade. Consider your room’s furnishings and decor to make sure the color complements the space. Once you have a better idea, pick a few shades that stand out to you.
Don’t be afraid to try samples as well. Paint small swatches on your walls to give you an idea of what you like most. And remember that accent walls are a great way to bring contrast and interest to your room!
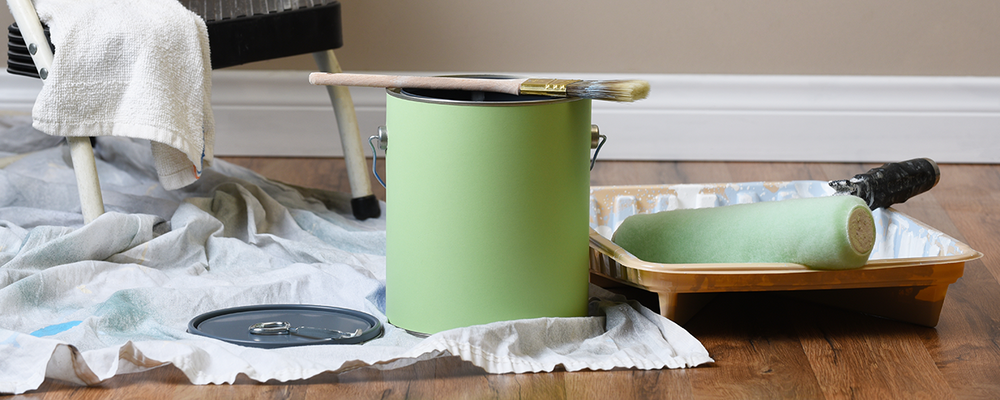
Step 2: Gather All of Your Supplies
While this step may seem obvious, it’s always nice to have a checklist to follow when you’re out shopping for your painting supplies. Here are the main items you’ll need:
-
Paint
-
Paint roller
-
Paint roller extension pole
-
Drop cloths
-
Paintbrushes
-
Paint tray
-
Sandpaper
-
Painter’s tape
-
Rags
-
Putty knife
Step 3: Prep Your Space
Remove All Furniture
After you’ve chosen your paint color, it’s time to prep your space. Begin by removing all of the furniture and fixtures you can to open up the room and give yourself plenty of working space. If you leave some furnishings in the room, make sure to cover them properly to avoid any paint stains.
As you clear out furniture, inspect each room and look for proper ventilation outlets to use as you paint.
Make Necessary Repairs
Nail holes and daily wear and tear are just a couple of reasons why repairs are necessary before painting your home. Inspect all of the walls and ceilings for cracks, holes, dents, and other flaws. Use caulk or a lightweight spackling substance with a putty knife to fill and repair as you see fit.
Make sure you let the repairs dry completely before moving to the next step. If you notice any bulges or rough spots, use fine sandpaper to smooth out those areas and make them flush with the wall.
Clean the Walls
You’d be surprised how dirty your walls can get with dust and spiderwebs. That’s why it’s super critical to wipe all of the surfaces clean with a damp towel or sponge and leave them to dry.
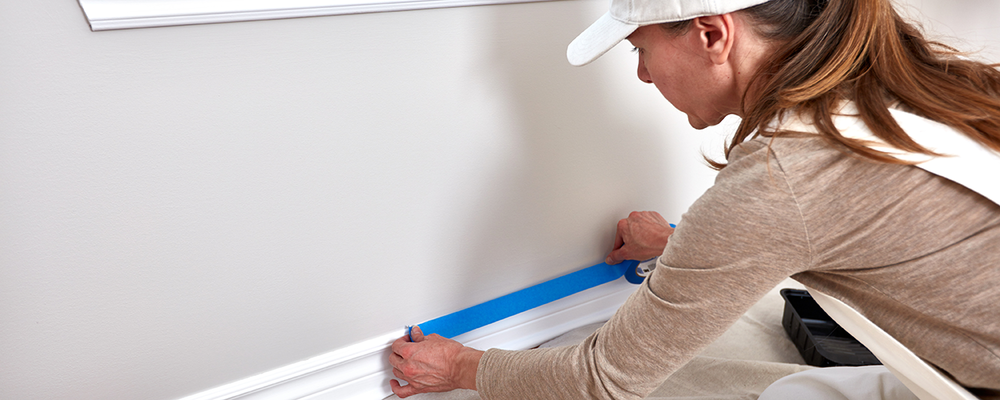
Apply Painters Tape
Perhaps one of the most important interior house painting tips is to use quality painter’s tape. Unless you have the steady hands of a surgeon and the talent of Michelangelo, this is going to be your savior when it comes to clean lines and a neat paint job. Use this tape to mask off your moldings, windows, and doors. Here are a few pro tips:
-
Always press the painter’s tape down flat and even to prevent bleed-through
-
Choose the right tape for your wall—some are best for textured or delicate walls
-
For accent walls, mask the inside edge from the rest of the room
Put Down Drop Cloths
If you’ve painted before, you know that it’s impossible to get the job done without creating at least some mess. Keep your floors protected from spills and splatters by putting down drop cloths across the room. You can even put them down near the entryway where you may be walking in and out.
Take note of the different kinds of drop cloths and what they are best used for:
-
Canvas drop cloths are extremely durable and absorbent, so they can be reused.
-
Plastic drop cloths are durable and less expensive but not absorbent, so spills are more likely to be tracked if stepped on.
-
Paper is the most economical but can tear easily on floors. It is better for covering light fixtures, cabinets, and furniture.
Step 4: Prime and Paint the Ceiling
Prime the Ceiling First
An interior house painting tip you may not know is that you should always start with the ceiling first, then tackle your walls last. While it’s tempting to jump right into painting with your chosen color, it’s crucial to use primer in certain situations. Not sure when primer is necessary? If your walls or ceilings fall under these categories, you need primer:
-
The surface is porous
-
The drywall is skim-coated
-
The previous coat is glossy
-
The paint colors are changing from dark to light
-
The surface is stained
If you don’t feel like spending extra money and time on a separate coat of primer, keep in mind that some brands offer paint and primer in one!
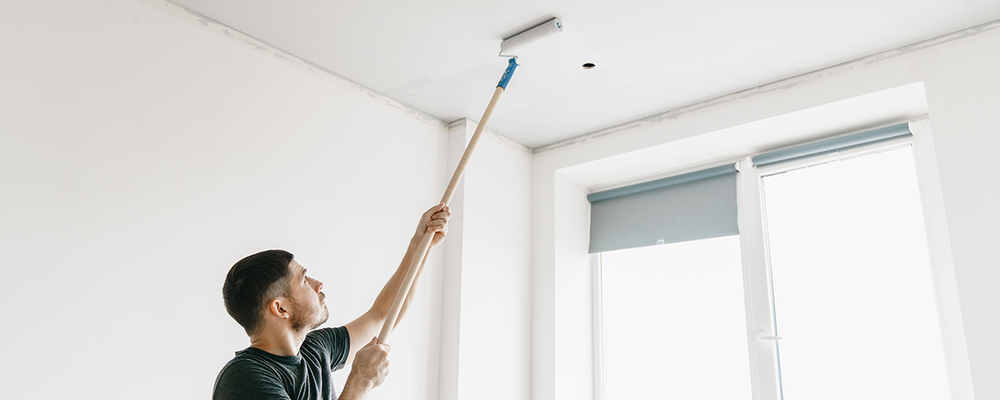
Paint the Ceiling
Once the primer has fully dried, you’re ready to paint! The best way to paint a ceiling is to use a paint roller and work in grid-like sections of 3×5 feet each. This method helps to keep edges wet and allows you to see your progress to guarantee an even coat. Here are some additional tips to ensure a perfect finished product.
-
For smooth ceilings, use a low nap roller. For a textured ceiling, use a roller with 1/2-inch or 3/4-inch nap.
-
Consistently use your paint tray to coat the roller with ceiling paint and remember to roll slowly.
-
Begin rolling when the paint cut line is still wet.
-
Start in a corner and roll in overlapping rows.
-
Do not roll directly over your head.
-
Slightly vary the direction of your rolling because straight lines can show overlap marks.
Step 5: Prime Your Walls
Follow a similar process to prime your walls just as you did your ceiling. Either use a separate primer or purchase a paint and primer combo to knock it all out at once.
As you begin painting your home with primer, use a paint brush to create 2-3 inch bands around the edges, corners, and frames of your room (this is also called “cutting in”). Next, grab your roller and paint the walls in 3×3 foot sections, remembering to work top to bottom. Roll back and forth across the wall in a series of V or W-shaped strokes. Always overlap areas of wet primer.
Step 6: Sand the Primer
While this step isn’t mandatory for painting like a pro, it’s a thorough method that eliminates any imperfections on your walls. After the primer dries, simply sand away bumps and ridges using fine grit sandpaper folded into quarters. When one section of sandpaper becomes covered with dust, switch to a fresh section and continue.
After you’re done, wipe the wall clean with a damp towel and let it dry. Now you’re ready for the paint!
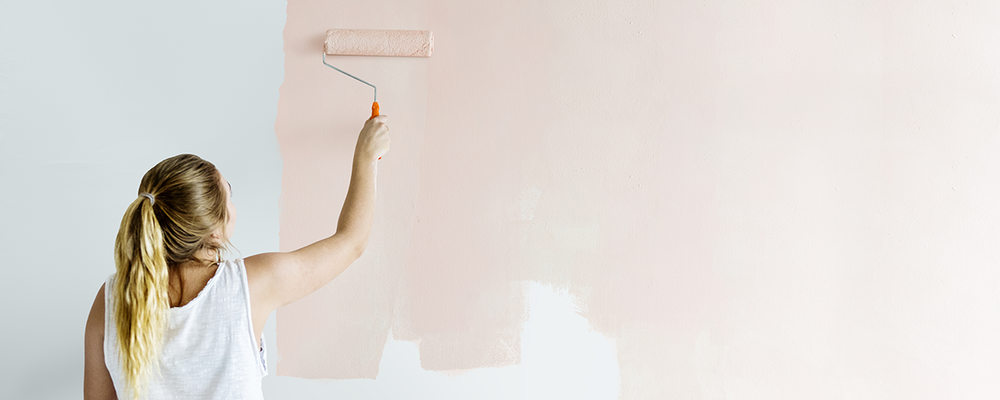
Step 7: Paint Your Walls
A basic interior house painting tip experts always follow is painting walls one at a time. This will give your walls a smoother look by blending wet paint you’ve brushed on with wet paint you’re rolling.
Make sure you follow the same method you did with your ceilings and use a paint brush to create 2-3 inch bands around the edges of your room. Use V or W-shaped strokes as well. To give you further guidance, take a look at these extra tips for painting your walls:
-
Before reloading your roller and moving to the next section, roll over the area you’ve just painted in a smooth, continuous stroke from top to bottom. These smoothing strokes help cover up lines and tracks and even out your coats.
-
Periodically remix your paint using a mixing stick. You should do this any time you leave your paint sitting for an extended period of time.
-
Wait 2-4 hours for the first coat to dry before applying a second coat. Follow the exact same process and techniques used when priming your walls.
Step 8: Clean Up
Once you’ve finished painting, your work is essentially done! The only task left is the clean up. Remove your painter’s tape before or right after the paint completely dries. It’s important to stay within this time frame because if left on for too long, the tape can tear and leave residue when removed.
Tightly seal remaining paint cans, thoroughly clean brushes and rollers with soapy water, remove drop cloths, and put your furniture back in place.
Painting your home is a fun and affordable way to freshen up your space and bring new pops of color into your rooms. The next time you feel like trying a DIY paint project, follow these steps and interior house painting tips to ensure a beautiful finished product you’re proud of! For more guidance on DIY projects, read through these 6 home renovation tips that’ll make the process easier.