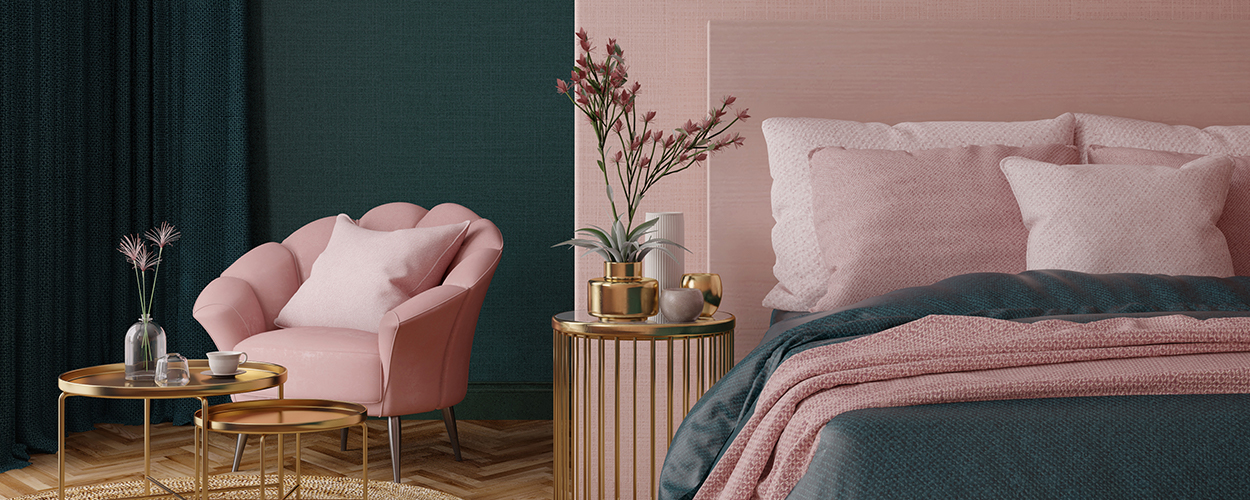
Creating a Smooth Work-From-Home Environment
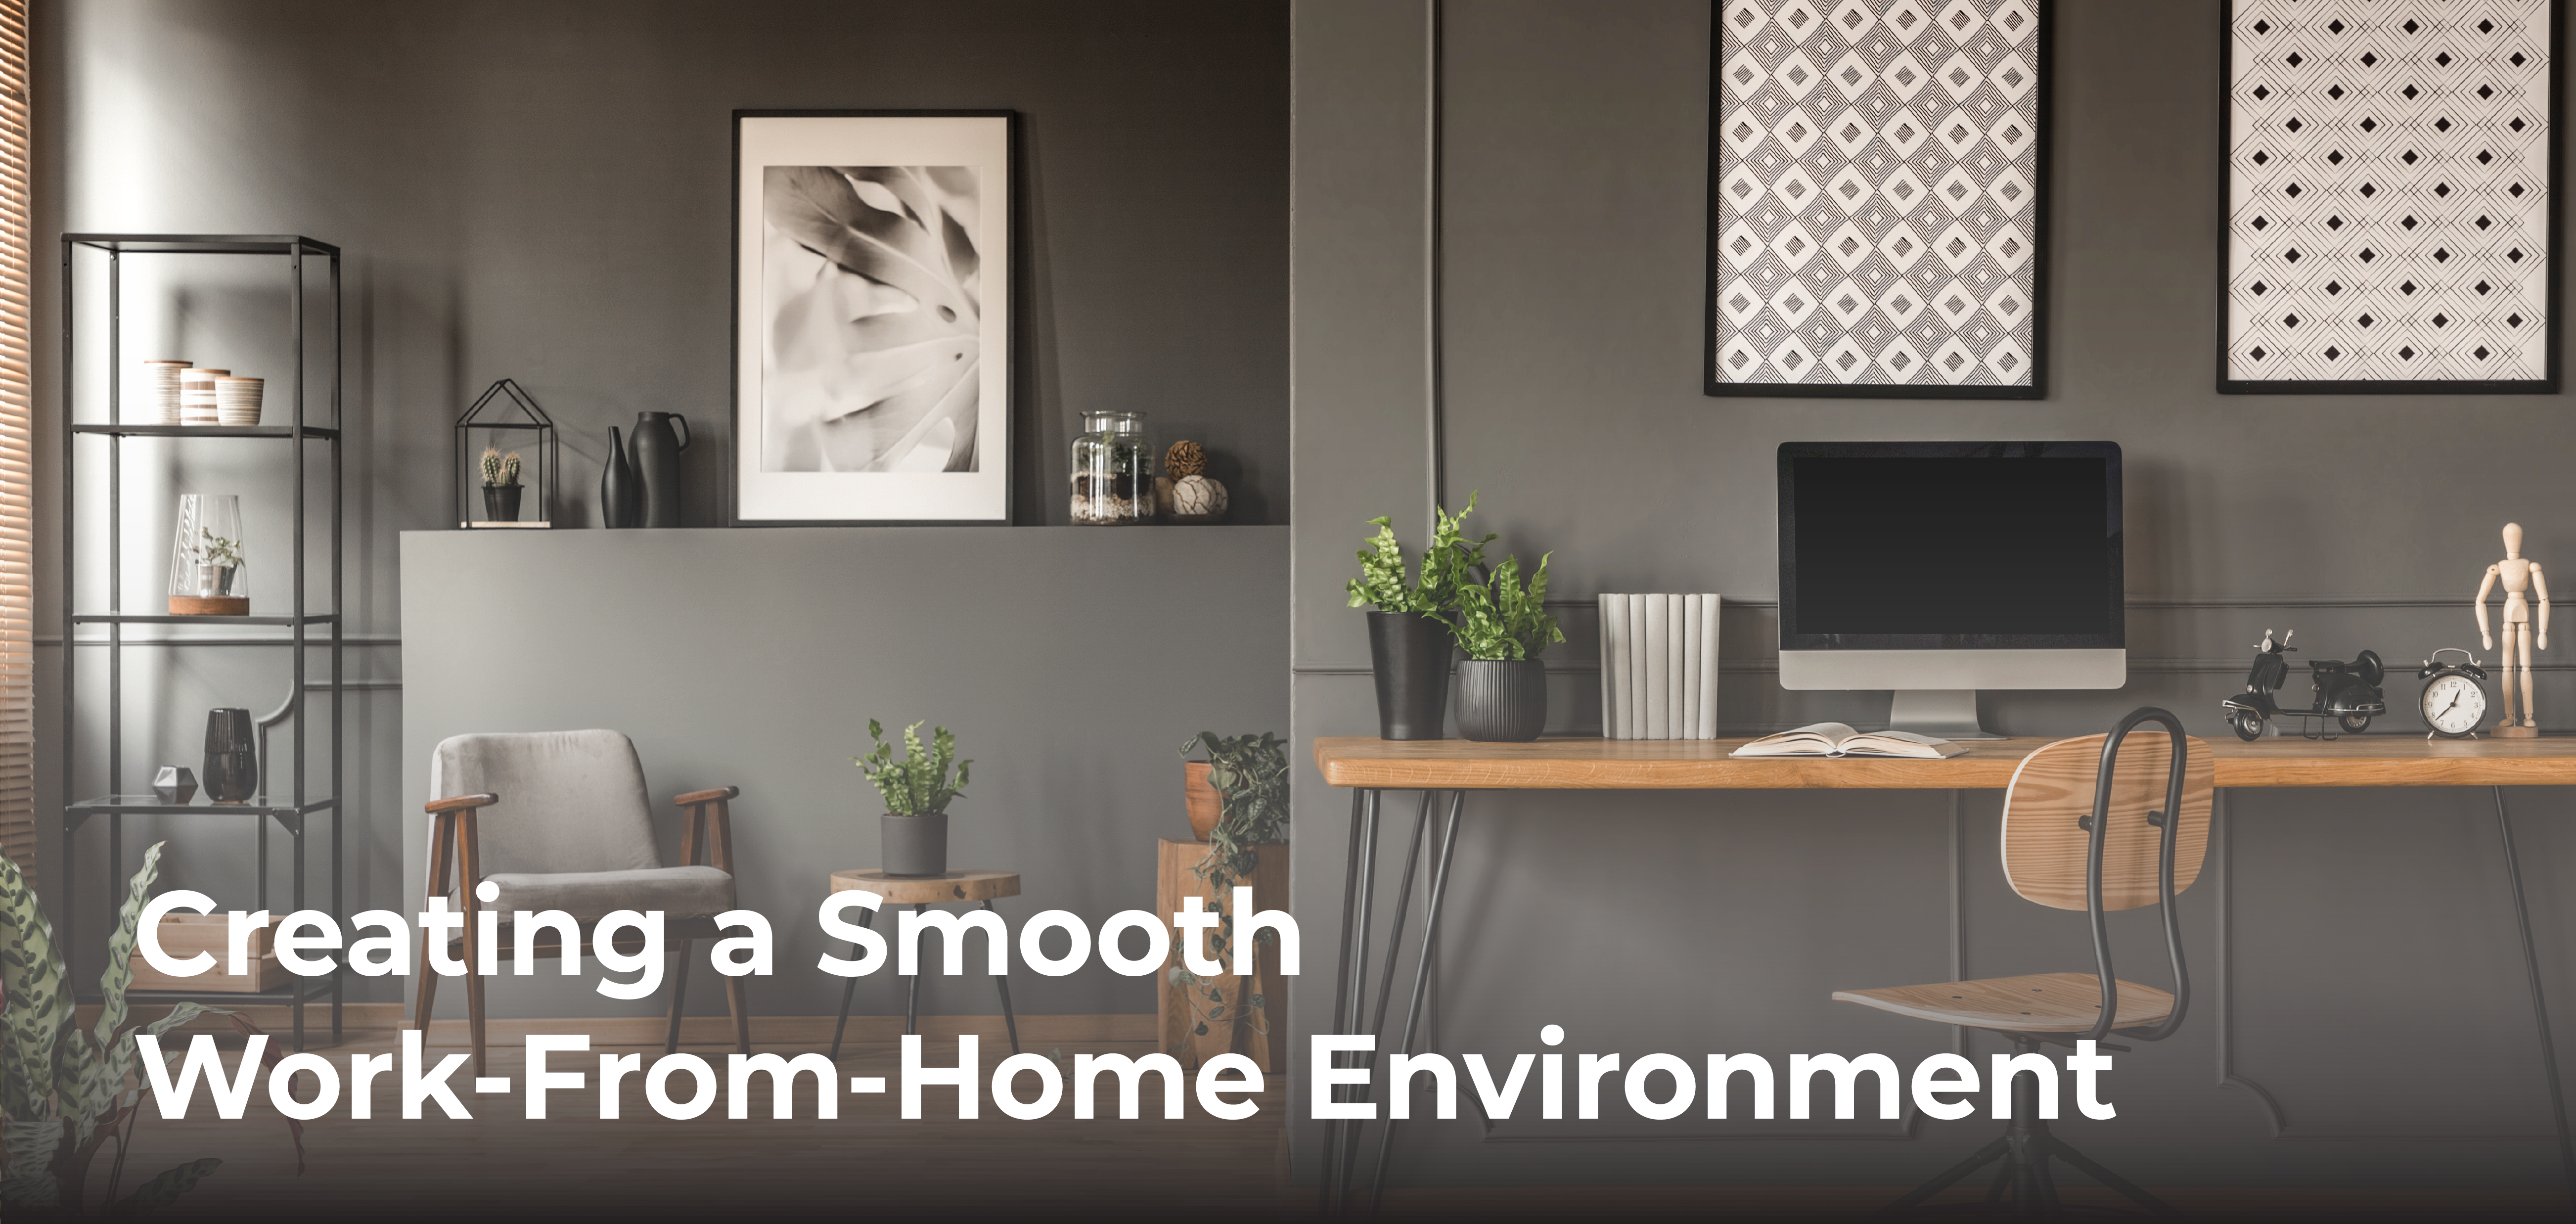
Your home should be a comfortable haven where you can rest and recover, but when you work at home, it also needs to be a place where your focus is high. Is it possible to reach both of these goals? The good news is that it is possible to balance relaxation and efficiency. Deliberately creating a work from home office setup that is exclusively for getting work done, can even increase your productivity.
Physical Separation and Boundaries
The first step is creating a distinct separation between your workspace and the rest of the home. The layout and décor in your office should be focused on your work goals. According to productivity experts, just stepping into your office should put you into a constructive frame of mind. Even if you don’t have an entire room to dedicate to work, use the same philosophy when sectioning off an area of a room.
Purpose-Led Focus
The second step is designing each environment with its purpose in mind. For example, choose stimulating décor for your office space and relaxing paint colors and embellishments for the rest of the home:
- Choose office furnishings based on functionality, such as storage and organization, as well as using accessories that prompt creativity.
- Consider the ergonomics of your office supplies and furniture.
- Pick lighting that is bright with cool colors for your office space and warmer lighting for the bedroom and other rooms where you relax.
- Cut down on clutter throughout the home. This will make your home feel less chaotic.
Design each room with goals in mind. Gather the tools for washing clothes in the laundry room. Store family activities in the family room. Choosing the right furnishings for each room encourages the appropriate mindset for the work done in that area. You can also designate a specific space for personal wellness, such as an exercise room or a place for meditation.

Rules and Habits for Productivity
The third step is establishing rules and habits for your workspace. When working at home, it is easy to become distracted by household chores, children, pets, and other home-based attractions. Avoid disrupting your productive flow state by clearly communicating that you must not be disturbed:
- Work in an area of the home that is least likely to be noisy.
- Close a door between your workspace and the rest of the home.
- Hang up a sign that you are working.
- Wear headphones that cancel out background noise.
- Keep a calendar and timer handy. It’s easier to stay on task when you have a concrete start and stop time.
- Don’t store distractions in your office. Some gadgets pull your attention away from work.
It’s equally important to maintain rules about the rest of your home, such as not answering work texts and emails when you’re not in the office. Be as clear about boundaries with your co-workers as you are with your family.
Limited Overlap
Your fourth step is preventing overflow from one space to the other. This does not imply you can’t have a cohesive decorating plan. Artwork, plants, flowers, and furnishings can follow an overall theme. Instead, this means that you don’t carry your work from the office into the rest of your home, and you don’t take laundry into the office. Even if your workspace is a corner of the kitchen, keep dishes and meal prep away from your designated office space.
Working from home offers many benefits, and it is possible to have a productive workspace while creating a relaxing environment in the rest of your home. With physical divisions, rules about disruptions, and clear boundaries separating work and home, you can enjoy productivity and peace by moving from one part of the home to another.
Spending more time indoors has forced Americans to re-evaluate the design and functionality of their homes. Indeed, lockdowns have spurred a home renovation trend. Homeowners spent, on average, $15,000 on minor and major home improvement projects in 2020, which was a 15 percent increase compared to previous years.
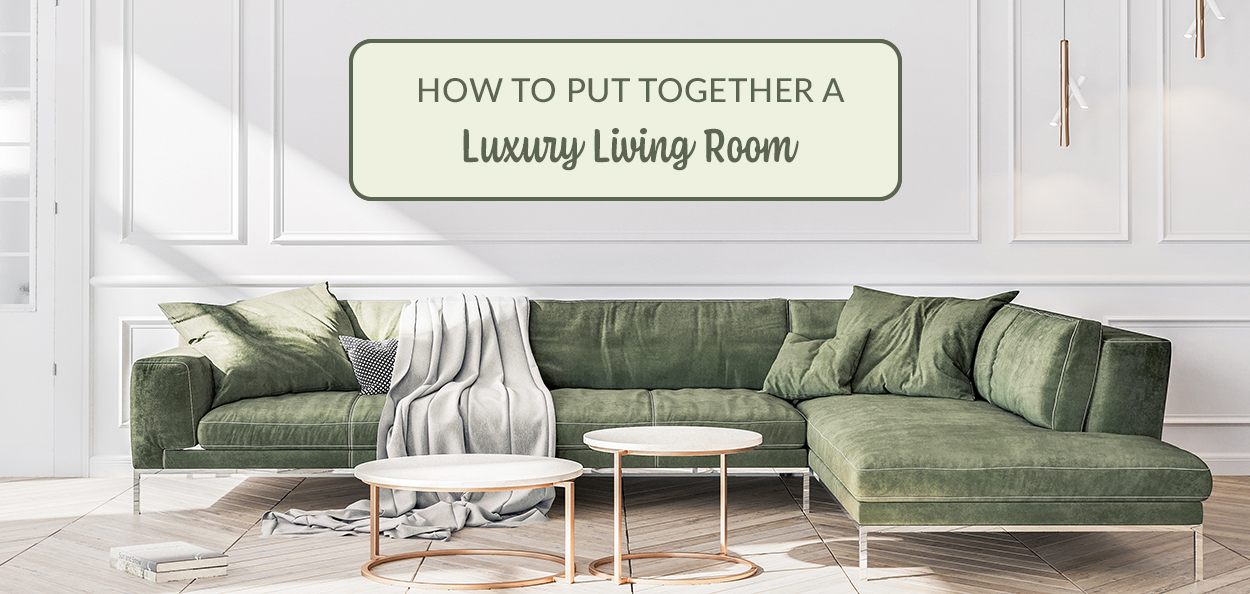
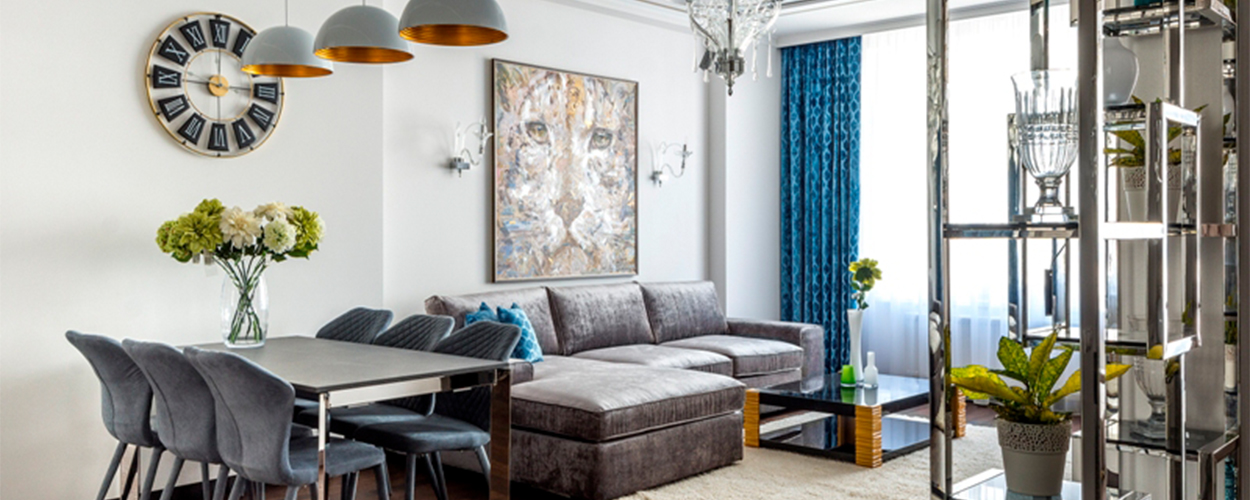
With this renewed appreciation for our homes, what better place to start than the living room. As a shared space, it is the room used to host guests or to simply relax as a family. The living room is a popular renovation, as people like to indulge and show off their personality through their choice of interior. If you’re considering making some luxurious changes to your living room, consider these helpful home improvement project tips.
Create a Budget
Before jumping into your makeover, you need to define what you consider a luxury living room idea. This will help you determine the scope of your project, the timeline, and, more importantly, the budget.
Not all customizations for luxury living rooms will break the bank, especially if you’re only adding cosmetic changes, such as high-end furniture or new window treatments. The price of home renovations averages around $10-$150 dollars per square foot. A luxury living room would probably require a budget around the upper end of that range.
According to homeowner surveys, 78 percent of people tend to miscalculate remodel costs due to unexpected mishaps or added shipping fees and taxes, so it’s crucial to include an additional 20 percent of your overall costs as a precaution.
Start Out Simple
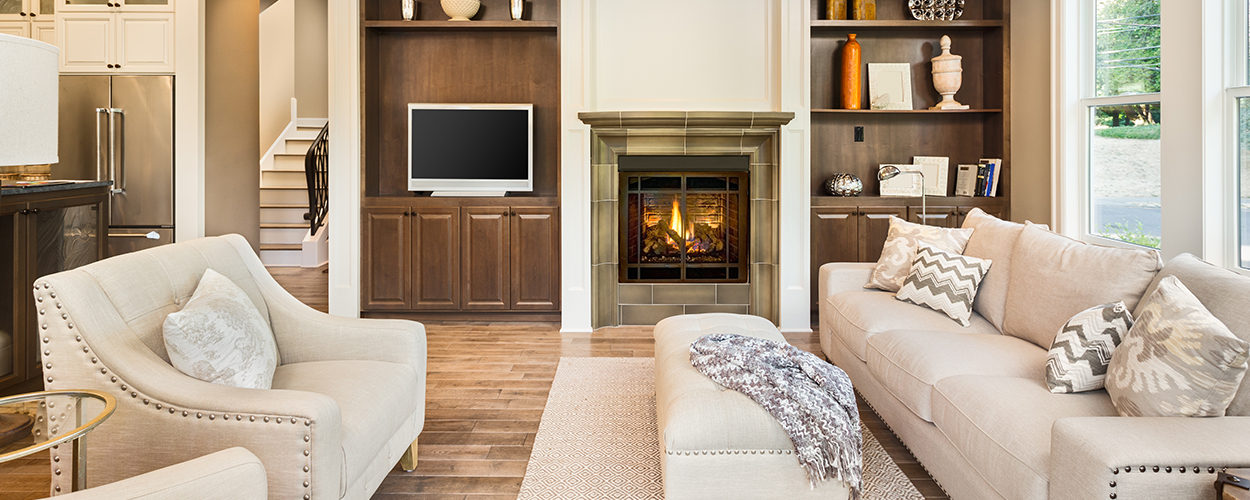
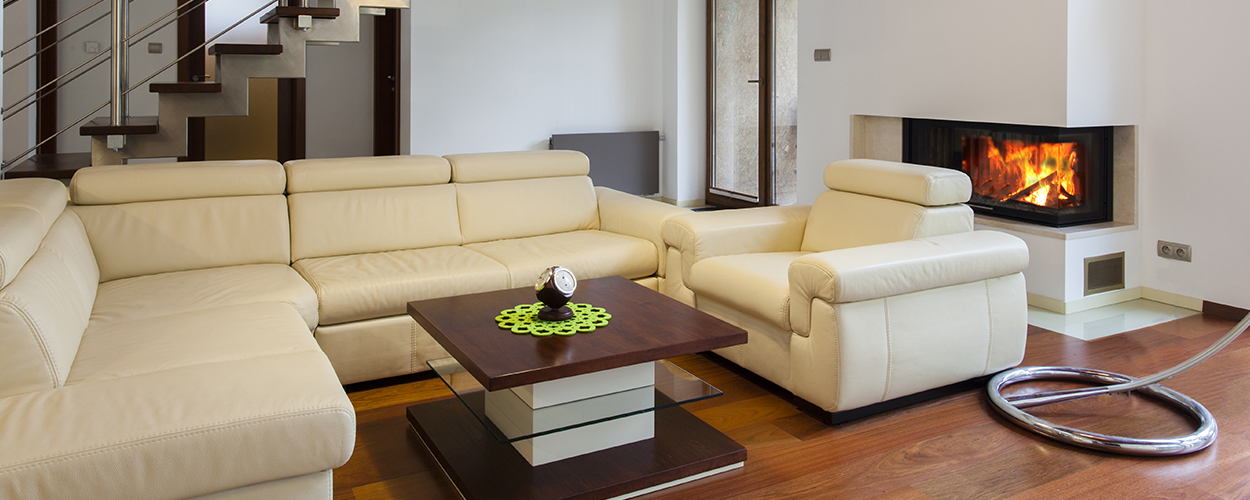
Rearranging your furniture is one of the simplest things you can do to change up your living room’s design. An important factor to consider when deciding on an appropriate seating arrangement is the focal point of the area. Orient your furniture towards any standout feature, such as a fireplace or a large window. If there doesn’t seem to be any focal point, you can add accents like art prints or a tapestry.
You can also change your room’s color palette by replacing decor such as rugs, cushions, vases, and throws. Soothing color combinations like forest green and earth tones never go out of style, and saturated, juicy colors like corals and creams are in trend this year.
Another easy living room design tip to try is adding greenery. Decorating with houseplants helps breathe new life into your space and transform it from dull to refreshing.
Working Your Way Up
If you’re willing to shell out more money, you can work your way up by changing your flooring and repainting your walls. Slate flooring works great for the industrial and minimalist styles that are very in vogue now. Wood flooring and tiles are more expensive, but these timeless options are well worth the steeper price.
You could also opt for the rising grandmillennial trend of floral wallpapers that evoke a nostalgic, granny-chic vibe. If you don’t feel like using traditional wallpaper, consider our living room design tip and buy peel-and-stick wallpaper instead. It’s an easy way to make a dramatic change and is a smart option if you like to switch up looks often.
Sitting on the Lap of Luxury
Investing in new furniture can be quite the splurge, but it’s worth the cost if you want a stunning living room. Along with larger furnishings like sofas and sectionals, it’s always a great idea to include an eye-catching accent chair for visual stimulation.
If buying brand new furniture isn’t a possibility with your budget, think about updating one or two of your current pieces by reupholstering..
Lastly, consider upgrading your light source. Artful chandeliers and bold, dynamic lamps have been the rage lately, and are an excellent way to turn a room from drab to fab.
Transforming your living room can be both a daunting and exciting process, but with the help of our living room design tips, your home will come together beautifully. For more inspiration on home improvement projects, check out the 10 coolest ideas for a DIY living room makeover.
Words by Vera Fowler
Written for fusionfurnitureinc.com

Now that Halloween and Thanksgiving are over, it’s time to switch focus to the jolliest time of year, the holidays! Gathering together with family and friends is one the best parts about the holiday season, but pulling off a flawless celebration requires lots of planning and preparation. Get a jump start on the process by following these tips for hosting a holiday party at home!
1. Make a List
First and foremost, you should definitely create a to-do list as you begin thinking about holiday party ideas. Even if you don’t end up following the list to the T, it will help you to organize your thoughts and prioritize tasks.
If you aren’t too sure where to start when making the list, break it down into questions instead. Here are some examples of questions you should ask yourself:
- Where should I hold the party?
- Who should I invite? How will I invite guests?
- Am I buying or making food?
- Should I offer party games?
- What is the best day and time to throw the party?
- What’s a realistic budget?
2. Think Like a Guest
When it comes to hosting a Christmas party at home, it’s a good idea to put yourself in the shoes of your guests. Think about what the experience will be like for them from the moment they are greeted at the door to the moment they leave. Is there a place for guests to store their coats and valuables when they arrive? Where can they set down presents and food contributions? Is there a designated seating area? Where can they grab drinks and appetizers?
As you think through different scenarios, you’ll get more clarity on what sort of prep needs to be done around the house.

3. Send Invites Early
You can read as many blogs as you want about hosting a Christmas party at home, but it won’t mean much if your guests are unable to attend. The holidays are an extremely busy time for people, so be courteous and send invites out as early as possible. Not only is it considerate to give your guests ample time to RSVP, it also increases the likelihood of them being able to come because they aren’t committed to other plans yet.
4. Choose a Theme
While there’s no rule book that says you must have a theme for your holiday extravaganza, it sure makes your home look more magical. Sticking to a festive theme creates cohesion in your space and, of course, impresses your guests.
Remember that your theme can be as simple as choosing a color scheme or holiday-themed motif like snowflakes.
5. Keep It Cozy
Make your guests feel at home during your Christmas gathering by incorporating cozy decor touches. Light up your fireplace, set out extra blankets on the sofa, and toss some soft pillows on the floor for extra seating. You can even take this holiday party idea to the next level by giving away snuggly party favors like fuzzy socks.
6. Spruce Up the Bathroom
While decorating the living room and preparing the dining room are two of the biggest to-dos, you can’t forget about this tip for hosting holiday parties. Add a little festive flair to your guest bathroom and make sure it’s stocked up on all of the essentials like toilet paper, soap, and fresh hand towels. Scented candles and accessories that match your party theme are a couple other decorative items to include too.
7. Remove Breakables
A general tip for hosting holiday parties is to try and reduce your stress as much as possible. That’s why removing any breakables or valuables from your entertaining space is a good idea. The last thing you want to worry about as your hosting is whether or not curious kiddos are going to knock over your antique vase or precious art piece.
8. Cook Ahead
If you’re brave enough to cook most of the food you’ll be serving at your holiday party, this tip is meant for you. Rather than take it all on the day of the party, try your best to prepare as many dishes as you can ahead of time. Even if you cook some of the food the night before, it will still taste delicious the following day!
In addition to cooking ahead, be sure to stock up on plenty of snacks and finger foods, as well as beverages.
9. Consider Buffet-Style Food
Who doesn’t love a good buffet dinner? If you have quite a few guests attending your celebration, consider having a more relaxed atmosphere with buffet-style food. Not only will it take pressure off of you having to serve everyone, it will encourage your guests to move around and mingle as they grab their plate of goodies.
To put this holiday party idea in action, move your buffet table away from the wall so that guests can form lines on either side.
10. Provide Plenty of Trash Cans
It may not be the most glamorous tip for hosting a holiday party, but setting out multiple trash cans is a must. For the convenience of you and your guests, place waste baskets in the areas you’ll be eating and socializing in. You’ll be happy you did once your guests leave and there isn’t a big mess of trash left behind!

11. Accept Help
Just because you volunteer to host a Christmas party at home does not mean you have to do all of the work yourself. As soon as your friends and family start to RSVP, they’re sure to offer their help in some small way or another. Graciously accept the help! It will get your guests more involved and excited for the party. Plus, it will allow you to relax more.
12. Set the Mood with Music
Is it really a holiday party without the soft sounds of Christmas classics like “Silver Bells” and “Baby, It’s Cold Outside?” Set the mood for your gathering by playing seasonal tunes as quiet background noise.
During dinner hour, try to avoid any songs with lyrics as that will make it more difficult to converse.
13. Always Overestimate
Whether it’s drinks, dinnerware, or food, always overestimate the amount of supplies you need for your celebration. Hosting a Christmas party at home is stressful enough, but it’s a lot worse when you have to make a last minute grocery run during the event.
Cook that extra batch of mashed potatoes and buy one more carton of eggnog! If you have lots of leftovers at the end of the night, pack them up and give them to guests as a thank you for coming.

14. Arrange Strategically
Whenever there’s a party, people tend to gather around the food. Because of this, experts suggest strategically putting food stations where you want your guests to socialize. Want them to mingle around the living room and bar? Spread out your dishes in both areas and it will encourage your friends to socialize in that space.
15. Tackle a Deep Clean
This tip for hosting a holiday party goes without explanation. The deep clean is probably one of the most dreaded preparatory tasks of hosting, but there’s no way around it. From vacuuming and mopping to dusting and cleaning the bathroom, make your home spick-and-span for your guests’ arrival.
Follow these holiday party ideas and your gathering is sure to be one for the memory books! As you prepare your home for the holidays, have some fun with these 8 festive crafts for a jolly holiday season.
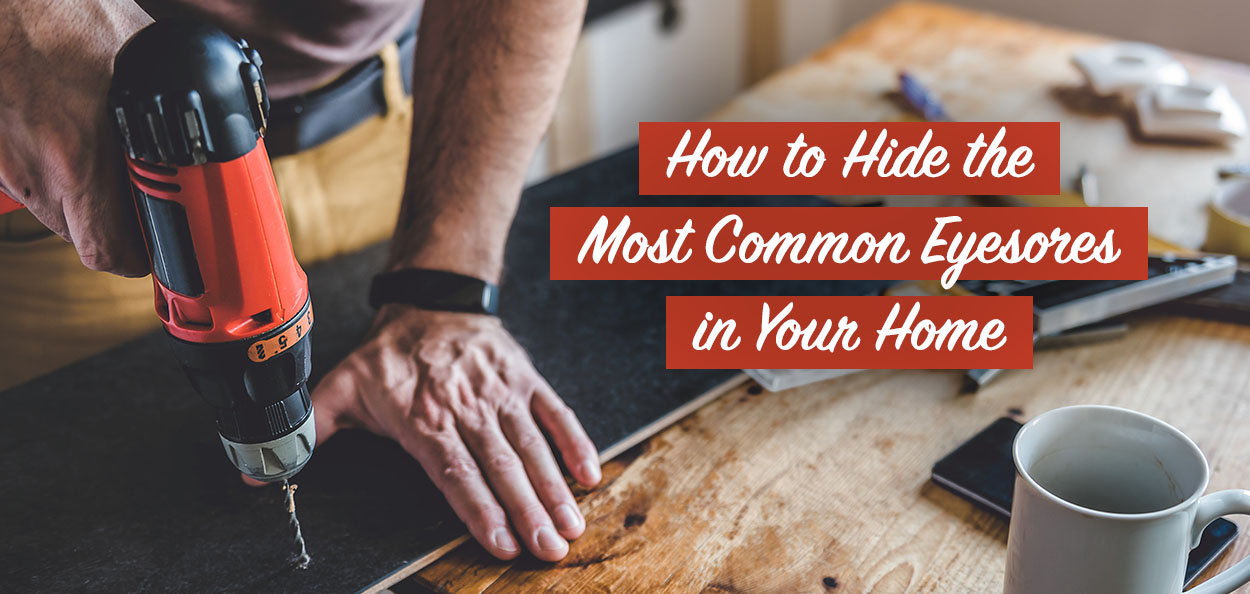
From scratches on the hardwood floor to paint blemishes on the wall, it’s almost impossible to have a home that’s perfect from floor to ceiling. Fixing these blemishes can be both time consuming and expensive, so it’s smart to have a simple back-up plan. Discover creative ways to hide common eyesores with these helpful decor hacks.
Wires, Cords, & Electronics
Between iPhone charging cables and WiFi modems, there are so many electronic knick knacks to keep track of in today’s society. You can stop wondering how to hide plug sockets and wires and start tidying up with a couple easy decor hacks.
Decorative Baskets and Boxes
Baskets and boxes are budget-friendly, multi-functional, and stylish. Depending on the amount of space you need, you can get larger baskets to place on the floor, or smaller baskets to place on countertops and consoles. The bigger the basket or box, the more coverage you get to hide plug sockets and dangling wires. If you feel up to it, you can even create your very own DIY box as a fun weekend project.
Strategic Decor Placement
Sometimes placement is key when you’re brainstorming ideas on how to hide plug sockets and wires. If you’d rather not toss cords and devices in a basket, you can simply cover up the eyesore with home accessories. Stacks of books, houseplants, art pieces, and shelving are a few decor items that can disguise unsightly electronics.

Everyday Pet Supplies
With the sweet cuddles and playtime that comes along with pets, there is also the hassle of dealing with pet supplies. Litter boxes, food bowls, and play toys are a must-have, but they don’t need to be a must-see. Stash away your fur baby’s necessities by trying a couple different pet supply storage ideas.
Table Curtains
Do you have a corner table or console that is rarely used? If you do, consider adding stylish table curtains to create a concealed space for pet supplies. This pet supply storage idea works especially great for litter boxes because it provides easy access for your kitty. You can also tuck away toy boxes, as well as food and water bowls.
As an alternative to table curtains, you can use a decorative table cloth to achieve the same result.
Sleek Cabinet
If you don’t have any leftover cabinet space to hide pet supplies, this pet supply storage idea could be a lifesaver. Build or buy your fur babies a sleek cabinet to house whatever you want to hide from guests. Some even come with a pet door that allows cats to use their litter box. Once you have your litter box or dog food stored in the cabinet, you can slide it into the corner of the room where it’s almost unnoticeable.
Closet Space
It’s time to put that empty closet space to use! Assuming that visitors don’t have access to your closet, you can transform it into a concealed space for all of your pet supplies. For litter boxes, be sure to put down a mat or towel to keep the floor relatively clean. Other supplies like food bags can be placed in a bin within the closet to avoid messy spills.
Unsightly Flooring
From nasty scratches to outdated material, it’s common to have at least one room with flooring that looks less than presentable. Rather than tear it all up and endure a pricey home renovation, try these decor hacks.
Rugs
Area rugs and runners are a major trend in interior design right now, so why not take advantage? This decor hack not only answers the question of how to hide scratches in wood floors, it also gives you the chance to spice up your living space. As you browse rug choices, pick options that complement your home’s design style and give it that extra touch of personality.
Peel-and-Stick Flooring
While it may not be the most permanent solution, peel-and-stick flooring can be a stylish alternative to replacing your unattractive flooring. Whether you’re looking for ways to hide scratches in wood floors or need to mask the ugly 1950’s-style tile in your bathroom, there are plenty of peel-and-stick varieties that can give you the fresh look you need.
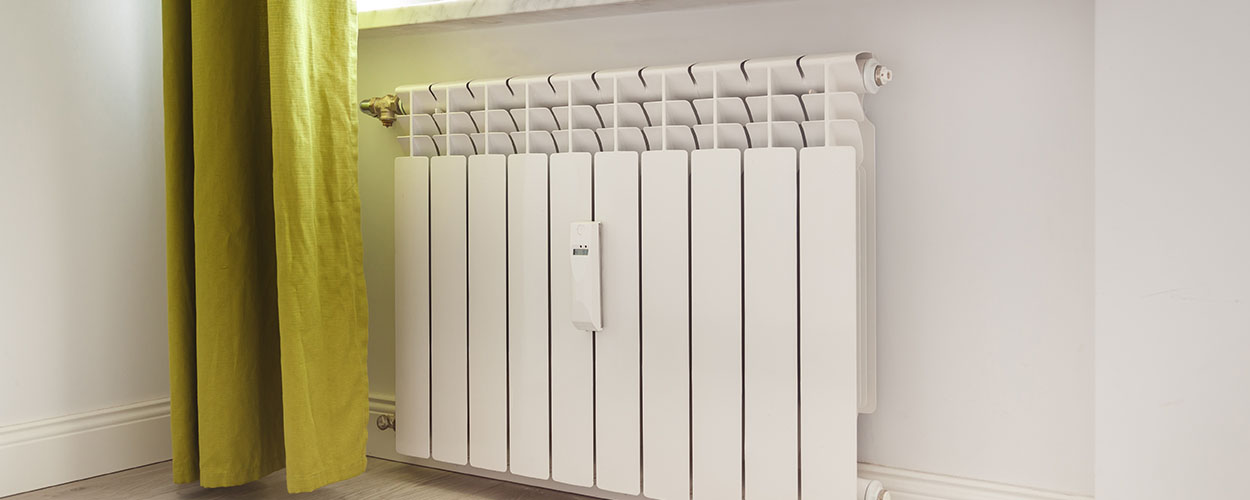
Rusty Old Radiators
There’s nothing like an old radiator to completely distract from your home’s beautiful aesthetic! In the summer months when it’s not being used, experiment with creative ideas to conceal your radiator from view.
Long Drapes
Knock out two birds with one stone by using this decor hack! If your radiator is right in front of your window, hang long drapes to hide it from sight. Not only will the drapes take care of your home’s eyesore, they will give you a chance to display beautiful drapes that accentuate your other decor.
Keep in mind that this decor hack is only safe when your radiator is not in use. During winter months when your radiator is on, switch out your long drapes for shorter alternatives.
Radiator Cover
Put your DIY cap on and build a stylish cover for your radiator. Whether you opt for a rustic cover made of stained pallets or choose a more modern look, you won’t be disappointed with the end result!
Unattractive Wall Space
From chipped paint to scratches and discoloration, it’s difficult to keep all of your wall space pristine. Camouflage the imperfections and elevate your home’s interior design with a few tips and tricks.
Gallery Wall
Need ideas on how to hide bad walls without paint? Gallery walls are here to save the day! Gallery walls are an especially great decor hack if you need to cover up a lot of space because they can quite literally take up your entire wall.
Precision and measurement are key to a beautiful gallery wall, so make sure you do your research before you start the process.
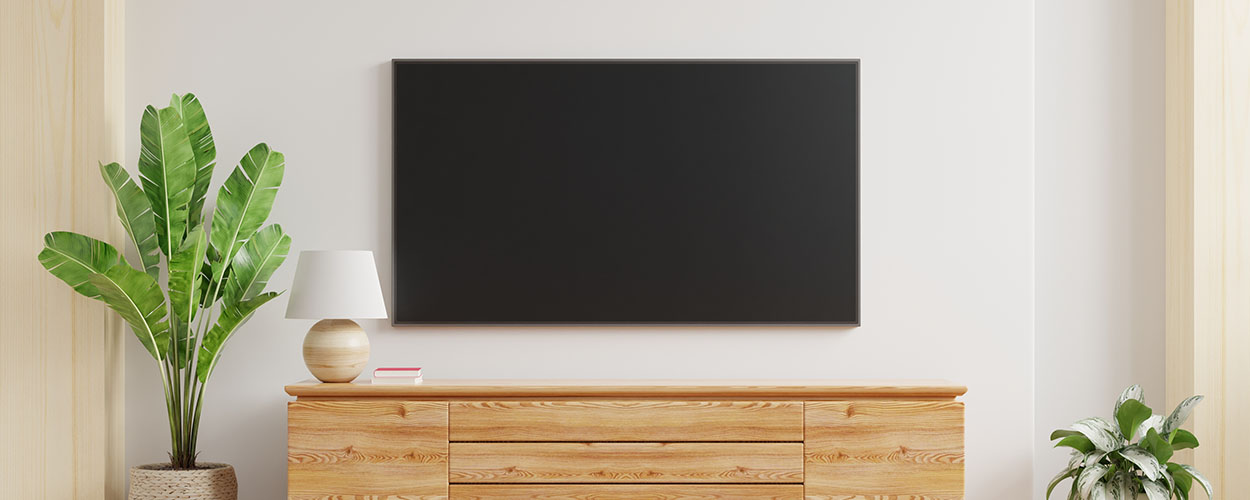
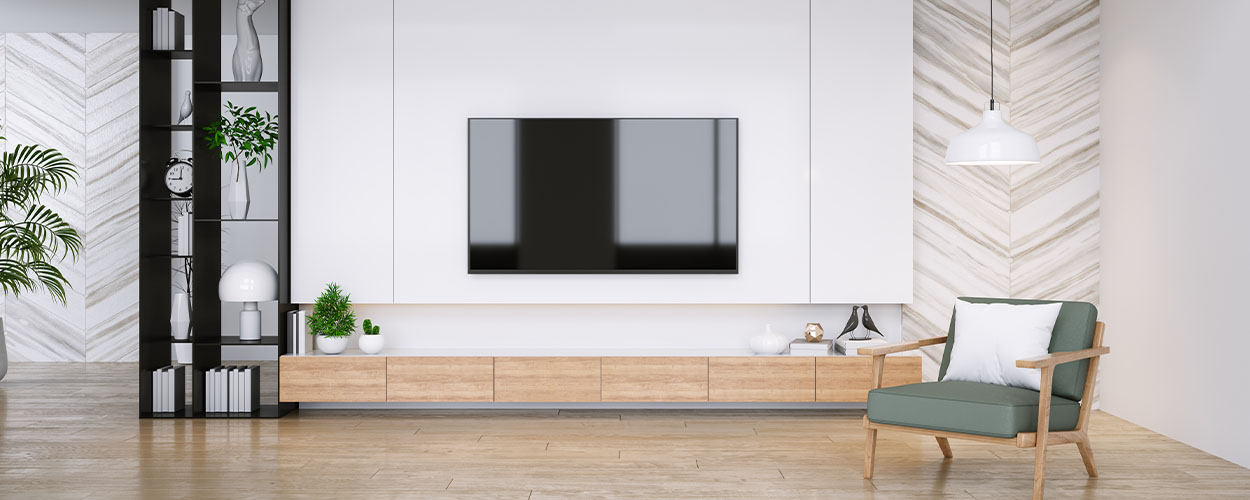
Mounted TV
Mounted wall TVs have become more and more popular over the past few years. Not only do they have a sleek look, they also help to save precious space on your floor. If your wall blemish is in a spot that makes sense, take the time to mount a TV in front of it.
Other Wall Decor
Along with mounted TVs and gallery walls, you can strategically place any other type of decor in front of your most hated wall blemishes. Shelving, hanging plants, tapestries, signage, mirrors, and framed photos are just a handful of ideas to consider.

Smelly Trash Cans
No matter how new and shiny your trash can is, it’s not ideal to have it sitting out in the open in your home. Stash away this eyesore and bury the odor by creating a designated hiding spot.
Trash Cabinet
If your home doesn’t have a built-in trash drawer, there’s no need to worry! A stand alone trash cabinet gets the job done and has the added benefit of being mobile. Move it to a convenient spot in your home and now you have easy access to your trash can.
Instead of leaving your cabinet bare, display a houseplant or decor accessory to help it blend in as one of your home’s stylish furnishings.
Slide-Out Trash Can
Are you limited on space within your home? With a few tools and basic handyman skills, you can easily build your own slide-out trash can. Choose any lower cabinet in your kitchen and drill in the basic hardware. The entire process shouldn’t take any longer than 30 minutes and the pay off is well worth it!
Every home has eyesores and imperfections, but with a little creativity and effort, you can hide them from sight! As you think of ways to improve your home’s appearance, read about 6 home renovation tips you should follow.
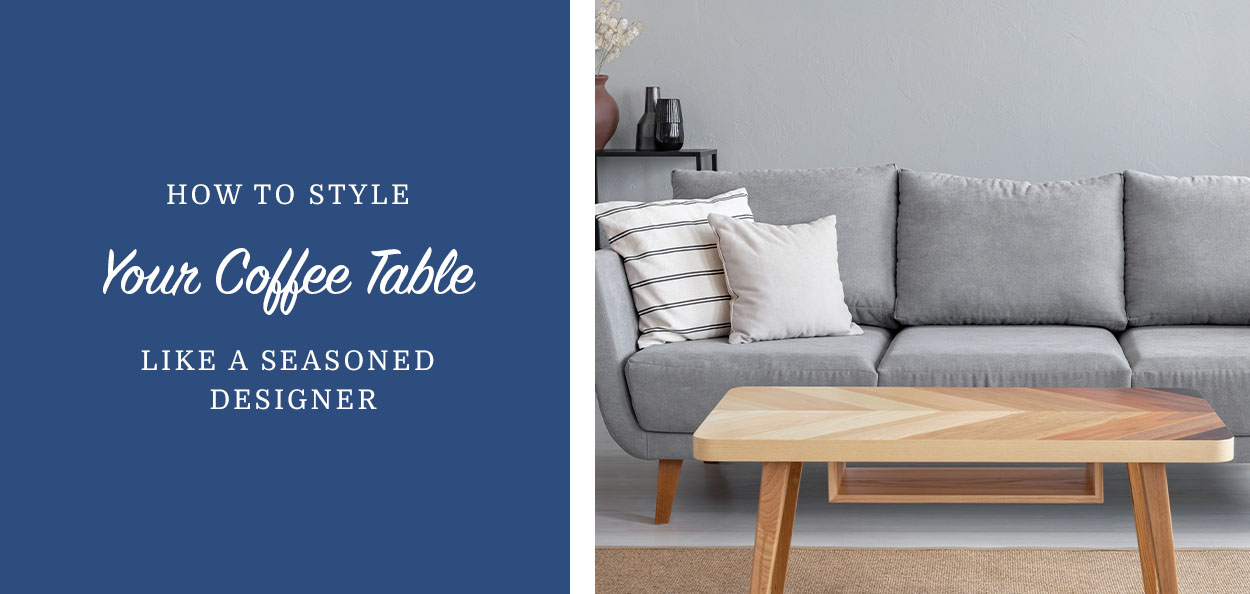
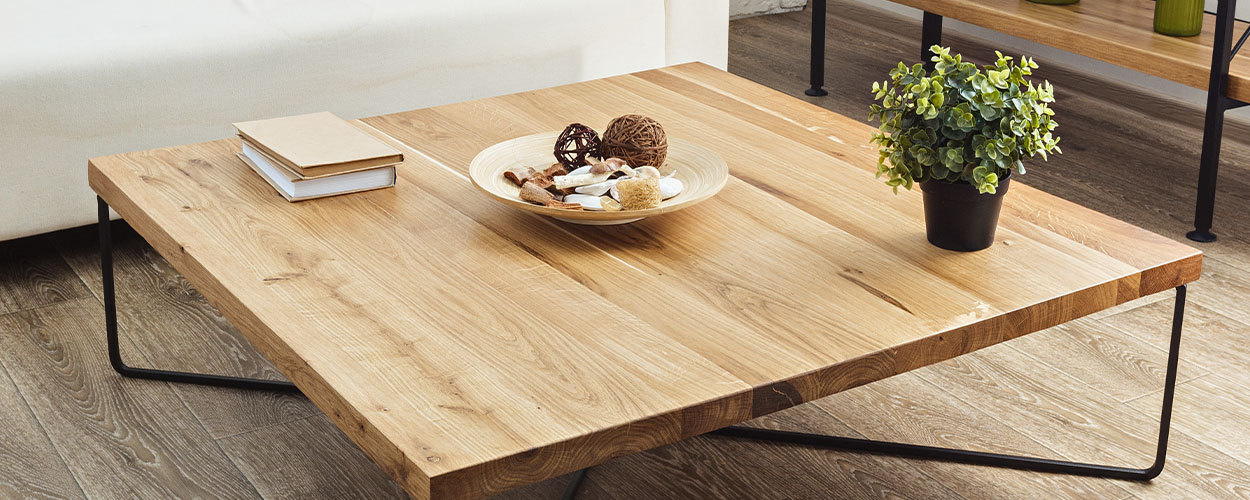
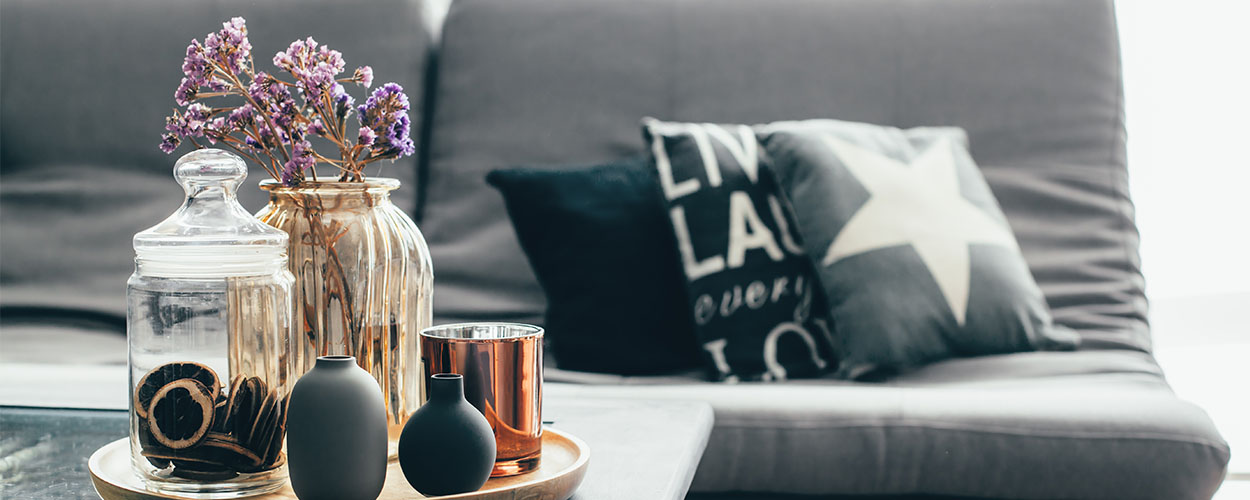
A coffee table might not be the first home decor item you think of when you picture a living room, but it’s one of the most ideal pieces of furniture you can add to your space. Not only does it provide function, a coffee table has the potential to be a stylish statement piece.
Rather than limit your coffee table to its ordinary role of housing TV remotes and drinks, follow these coffee table styling ideas to fuse together design and functionality.
Use a Tray
If you’re looking for ways to decorate your coffee table, finding a decor tray is a good place to start. Many interior designers use trays because they’re both aesthetically pleasing and practical.
Use trays to corral smaller decor items which, in turn, creates a more unified, structured look. Placing your items on a tray also makes it much easier to remove them when you need to clear space on the table.
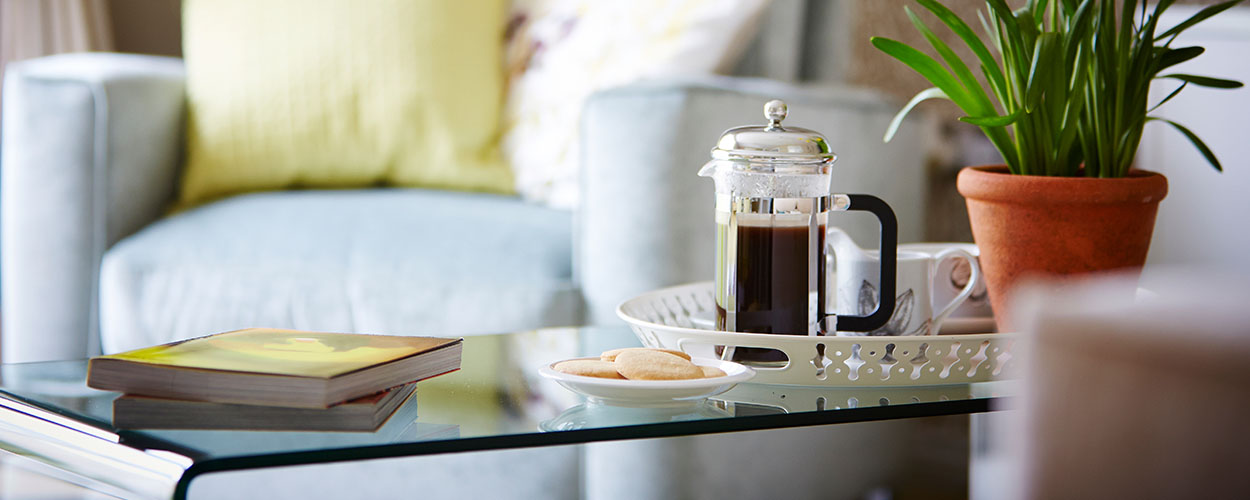
Organize the Everyday Items
It’s no secret that coffee tables are the best for storing common household items like remotes, coasters, and reading glasses. While it may be convenient to leave them strewn across the table’s surface, that is a definite no-no if you want a Pinterest-worthy masterpiece.
Instead of displaying everyday items right on the tabletop, organize them within a basket, wooden box, or tray. Creating a dedicated home for everyday items frees your coffee table of clutter while still allowing you easy access.
Consider the “Rule of Three”
As with other areas of interior design, the “rule of three” is a handy tool when decorating your coffee table. To help you better plan how you should arrange your coffee table decorative accents, divide your table into three sections. Add decor into each zone to keep the overall design more structured and purposeful.
Vary Your Height
As you play around with coffee table styling ideas, pay special attention to the height of your decor pieces. Even though it may seem best to decorate with items of the same height, interior designers recommend the opposite.
When all of your coffee table decorations are the same height, they all blend together and nothing gets noticed. Be sure to include decor of varying sizes in order to create a striking vignette that catches the attention of guests.
Form a Grid
If you have an especially large coffee table, dividing up the space into three sections might not be enough. That’s where the grid comes into play. Tape off sections of the table to form a grid and place your decor within each section. Think of it as a template for how to decorate your coffee table.
Keep It Balanced
This coffee table styling idea is so simple, yet it’s one of the most tricky design tips to implement. Maintaining a balance of size and quantity is crucial if you want your coffee table to look clean and refined.
In order to do this, you need to avoid using too many small objects because that creates a cluttered look. At the same time, beware of including lots of large decor because it can make your tabletop appear heavy and awkward. Try your best to find a happy medium by infusing decor of various sizes and quantities.
Focus on Connection
It’s important to focus on connection as you decide on ways to decorate your coffee table. Give yourself the creative freedom to pick display items that reflect your personality and taste, but make sure they all have similar design characteristics that tie them together. For example, choose decor pieces that share common colors, shapes, styles, or themes.
Incorporate Your Design Style
Your coffee table is an extension of your home’s overall interior design style. Because of this, your coffee table styling ideas should complement the rest of your space, not distract from it. Does your home follow a rustic, farmhouse-inspired design? If it does, your coffee table should echo this same sentiment. Utilize colors, materials, and motifs from your home’s interior design look and integrate them into your coffee table for a more cohesive effect.
Work Every Angle
It’s all about angles, folks! Give yourself the chance to view your coffee table from every angle before you decide that it’s ready to be shown to the world. Why? Not every decor piece or arrangement looks amazing from different vantage points. A picture frame, for instance, doesn’t look very flattering from the back. Find any imperfections and adjust your arrangement accordingly.
Choose a Centerpiece
Take your coffee table to the next level by choosing a focal point or statement piece within the arrangement. It doesn’t need to be particularly grand or tall. Pick an object that stands out with an unusual shape, spark of color, or something of that nature.
Need more inspiration on ways to decorate your coffee table? Check out the top 10 coolest home decor influencers to follow on Instagram and see how they’re styling their own coffee tables!
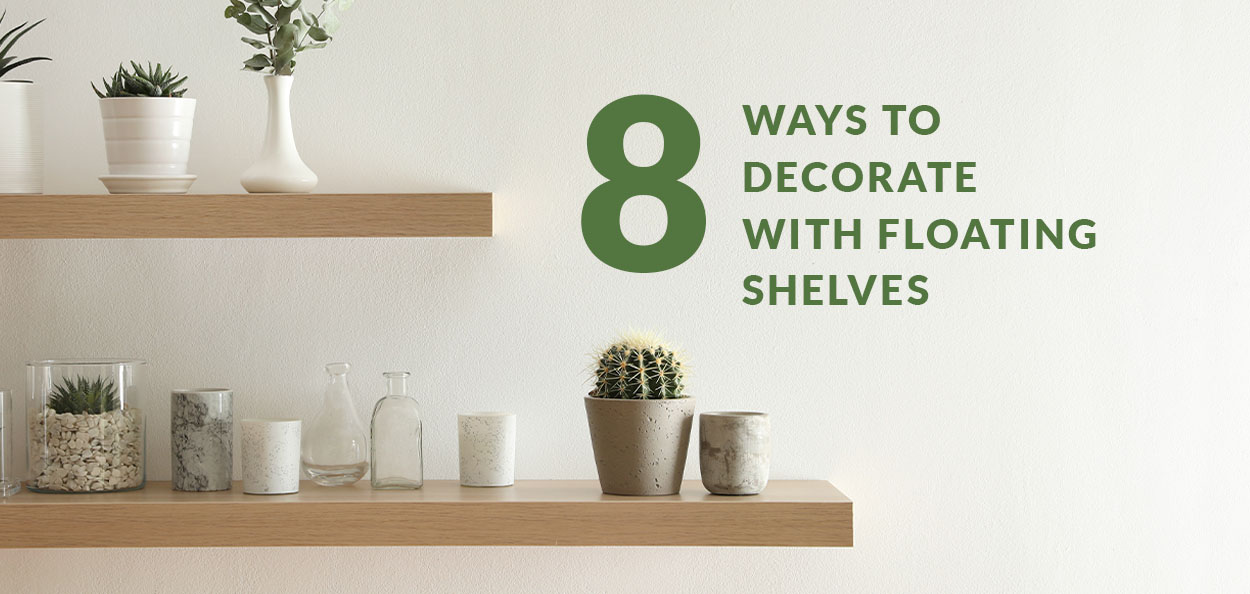
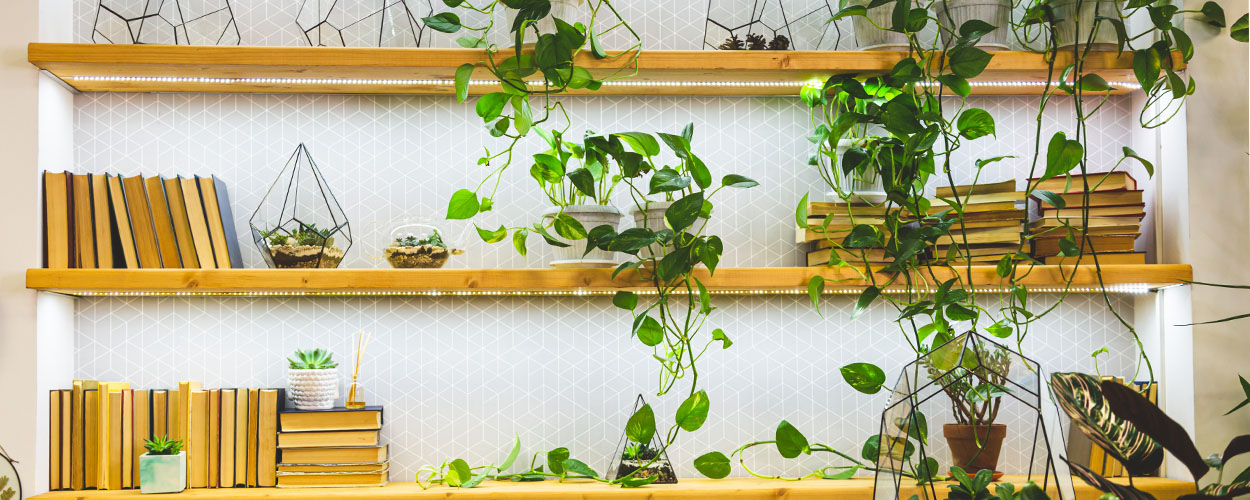
Need a quick and easy way to display and store your home decor? Floating shelves are a seamless and elegant solution that not only provide extra storage, but dress up your empty wall space too. Whether you’re looking to showcase your home’s knick-knacks, family portraits, or memorabilia, consider these decorating ideas for floating wall shelves!
1. Picture Ledge
It’s picture time! If you want more flexibility than a gallery wall, this floating wall shelf idea is a go-to option. Layering your prints is an easy way to build visual interest and show the depth of each picture without having to nail holes in your wall. Whether you choose to go monochromatic or have pops of color, you can also incorporate other items on your picture ledge for more personality.
2. Floating Jungle
We all know the plant lady is the new cat lady. If you find yourself constantly adding new plants to your space, you might be running out of places to put them. That’s where this floating wall shelf idea comes in handy!
Start with your bigger plants on either end of the shelf. This helps to anchor the rest of the items before you begin clustering them together. You can also mix and match the height of your objects like placing smaller plants next to taller ones to create your perfect plant shelf!
3. Entertainment Console
While they may not technically fall under the “floating shelves” category, floating TV and entertainment stands are another way to seamlessly display your home decor up off the ground. Unlike their bulky counterparts, they can be more secure and easier to clean. Place your nostalgic DVD collection, books, and gaming consoles along your floating entertainment stand and be sure to hang it at a reasonable height that’s within reach.
4. Bathroom Organization
If you aren’t among the lucky few that have a spacious bathroom, you’re probably familiar with the never ending battle of trying to keep the space organized. Make the process much more simple by learning how to decorate with floating shelves!
Stick to the essentials like extra toilet paper, towels, or your other go-to products and line them along your shelves. If you want to take things to the next level, you can also add your favorite candle, a small plant, or updated bath accessories.
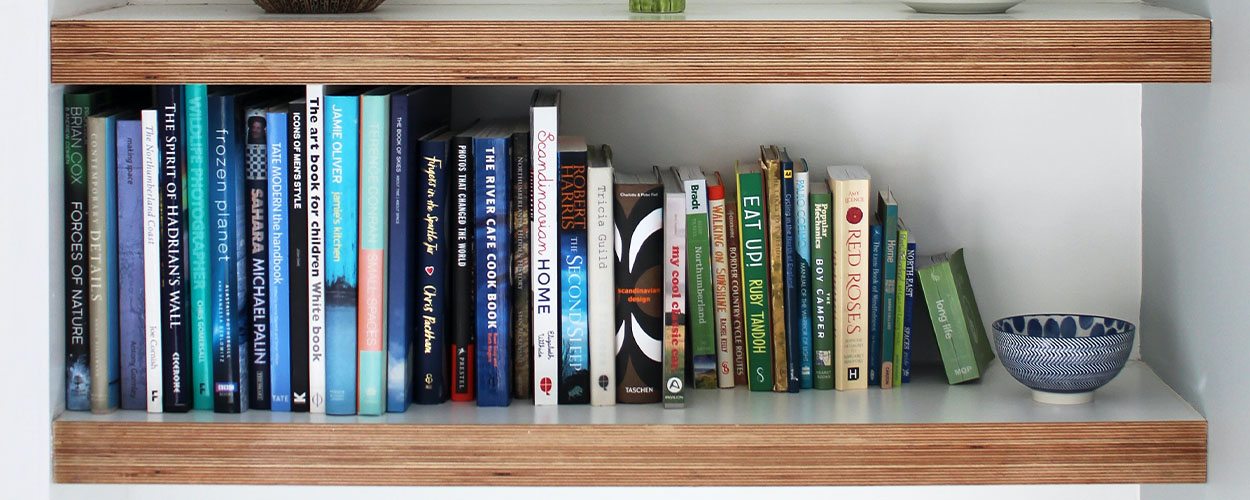
5. At-Home Library Display
If you’re a proud bookworm or need to make books more accessible to your little ones, floating bookshelves can help you display them without having to buy another storage cabinet.
Display books fairly similar in height by spacing them out into groups. Space them equally from one another and categorize them based on genre, color, or author. If your books come in different shapes and sizes, you can decorate the space between them with candles, pottery, or photos.
6. Makeshift Workspace
Do you need a creative way to make an at-home office without a spare room or lots of space? Floating shelves transform dead space into a workspace nook in no time! Suspended workbenches, for example, can make your space cleaner and, in turn, make you more productive.
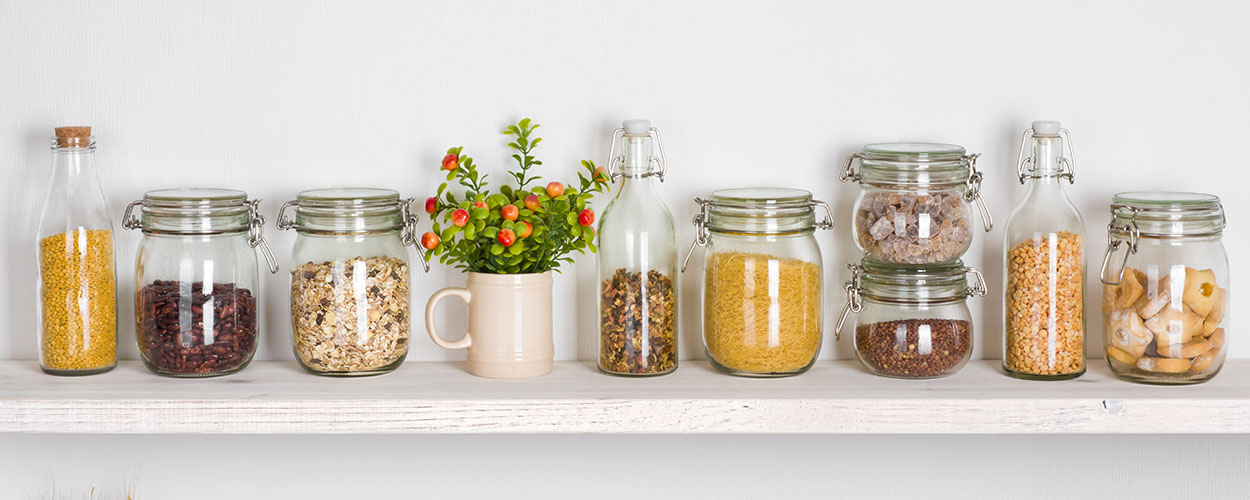
7. Open Cabinet Organization
One of the easiest and affordable decorating ideas for floating wall shelves is creating an open shelf concept in your kitchen. Open shelving is quite functional and can keep your food items visible and easier to access. You can also use this extra space to display your dishes and glassware that not only give you better accessibility, but also a nice touch of decor to an otherwise spotless kitchen.
8. Store-Away Laundry Shelves
If you’re looking for a floating wall shelf idea that gets rid of the mundanity of doing laundry, then look no further! Floating shelves can transform your laundry room layout to be more functional and beautiful.
Displaying your laundry detergent and dryer balls on an easy-to-reach shelf can make laundry feel like a breeze. You can even add your own style through decor like rustic signage and flowers. For a fun challenge, try installing a closet rod to air dry some of your clothes that can’t go into the dryer.
Once you’ve mastered how to decorate floating shelves, your home will be much more organized and even more striking! If you need additional ideas on how to transform your home and organize decor, check out genius ways to free up space in your living room.
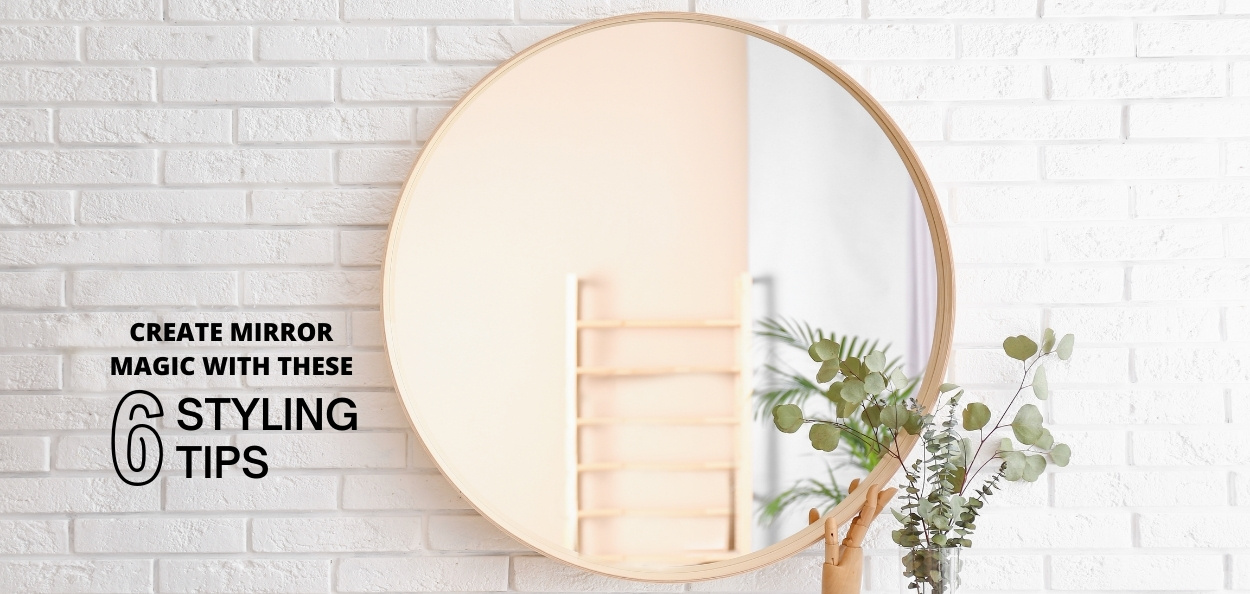
If you’re looking for accent decor that far outshines the rest, mirrors are one of the best options out there. Mirrors have the ability to brighten up your space, make it appear larger than it actually is, and of course, add flair to your home’s interior design style.
While it may seem obvious how to decorate with mirrors, there is some strategy involved if you want to maximize the power of reflection. Create mirror magic in your home by following our mirror tips!
1. Focus on Natural Light
Similarly to placement, this mirror tip is all about reflection and how it can work to your benefit. Mirrors are ideal for homes with very little natural light because they have the ability to reflect sunlight shining into your home.
In order to fully maximize your home’s natural light, place your mirrors adjacent to windows. This will allow your mirror to catch light at the perfect angle and bounce it throughout the room. Keep in mind that the bigger your mirror is, the brighter your space will be.
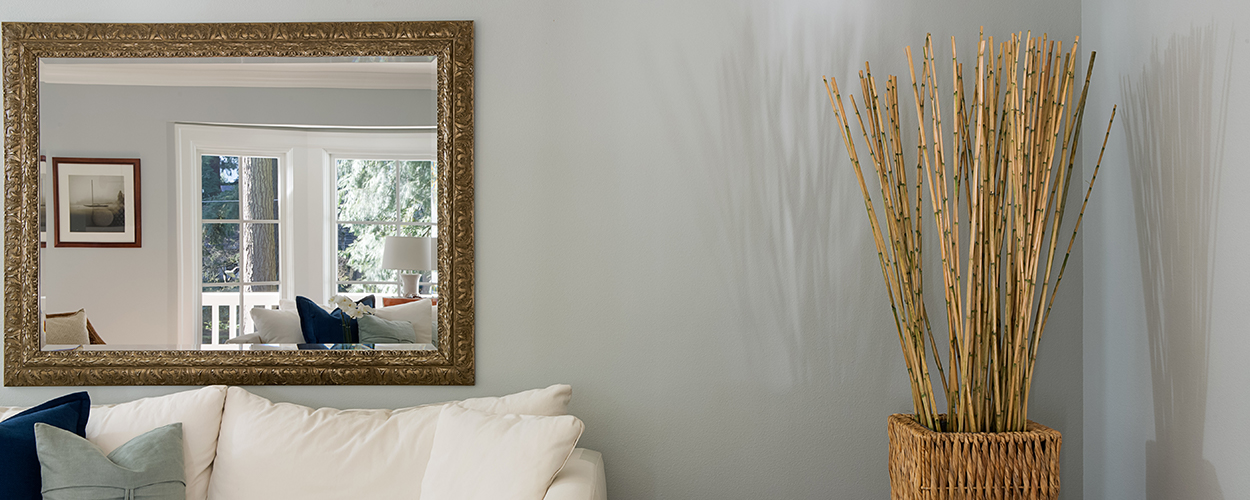
2. Consider Mirror Placement
Unlike other decor pieces like a clock or framed artwork, mirrors don’t necessarily need to be hung at eye level. The perfect placement for your mirrors can vary because you should always consider what the mirror will be reflecting. For example, it may look perfect above your sofa, but does your mirror reflect a blemish or some sort of unattractive feature on the opposing wall?
Try your best to place your mirror in a spot where it reflects something visually appealing so that it not only enhances your wall space, but emphasizes other beautiful parts of your home as well.
3. Incorporate Your Interior Design Style
Home decor mirrors come in every type of interior design style like modern, farmhouse, and bohemian—it all just depends on the frame. When you’re shopping for mirrors, pay close attention to the frame and decide whether that particular mirror matches your home’s design theme. If you aren’t too sure, do a little research on mirror trends for your chosen theme.
Use the opportunity to find mirrors that make a statement and accentuate your design style, rather than distract from it. A mullioned window mirror, for example, is ideal for a farmhouse-style home.
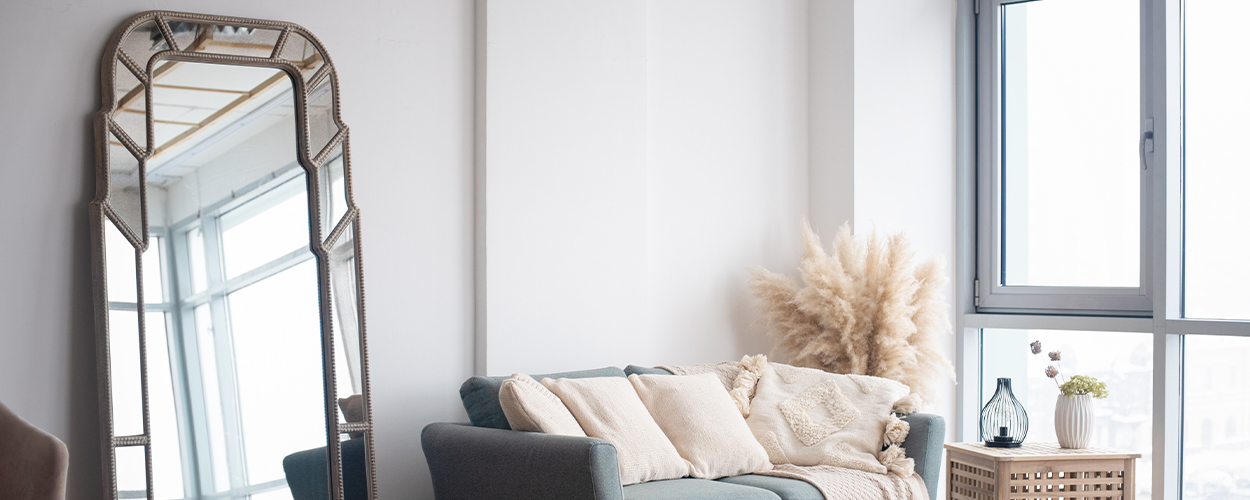
4. Create a Focal Point
While small to medium-sized mirrors are common and get the job done, don’t be afraid to go bold and make your mirror a focal point within your space. Opt for a larger sized mirror and place it within a central part of the room to help create a focal point. Placing a stunning mirror above a mantle or sofa is always a great idea.
You can also opt for a gallery wall by decorating with multiple mirrors. Gallery walls with mirrors look best in rooms with little to no clutter.
5. Go Bigger for a Dramatic Effect
Go big or go home! If you want to see obvious effects after decorating with home decor mirrors, opt for larger sizes. Big mirrors capture more natural light and dramatically brighten your space. The larger the mirror, the larger your space will appear too. This is because mirrors create depth within a room and give the illusion of more space.
6. Follow Proper Hanging Guidelines
When you hang your mirrors, it’s important to use the proper tools to ensure a stable and secure hold. Put away your box of nails and head to the store to grab wall hooks or picture hangers. Use two (one at either end) to make sure your mirror rests flat against the wall.
One measly nail or a wire hung on a single hook can cause the mirror to rest against the wall at an angle, which completely distorts the reflection you’re trying to achieve. Not only that, it can be very dangerous because the mirror has a higher chance of falling.
Follow these mirror tips and your home should look brighter and bigger in no time! For more ideas on how to lighten up your space, check out these summer interior design trends.
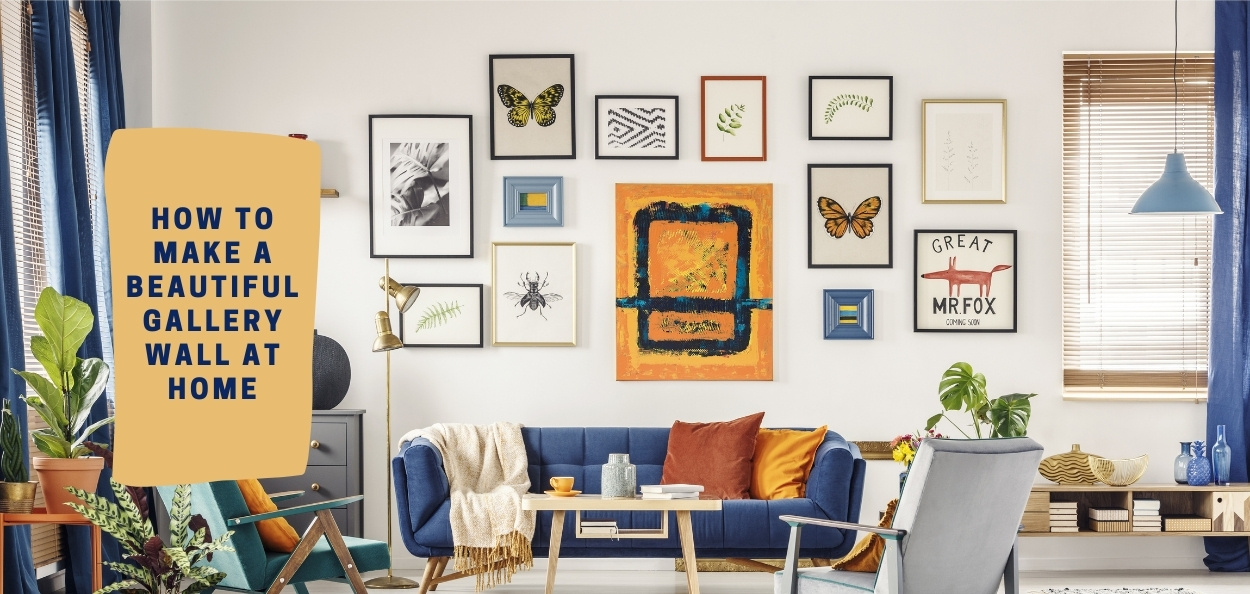
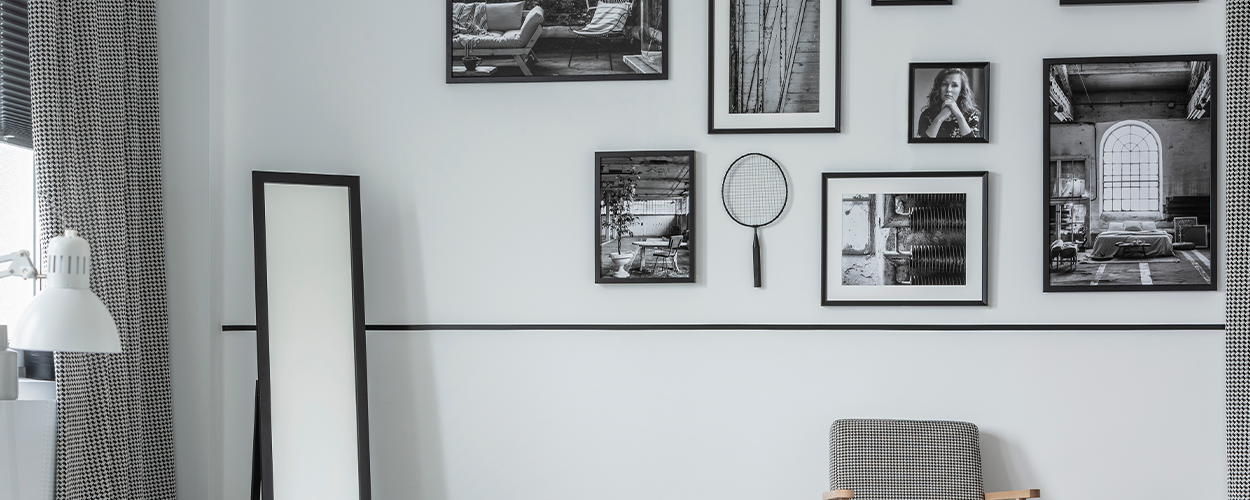
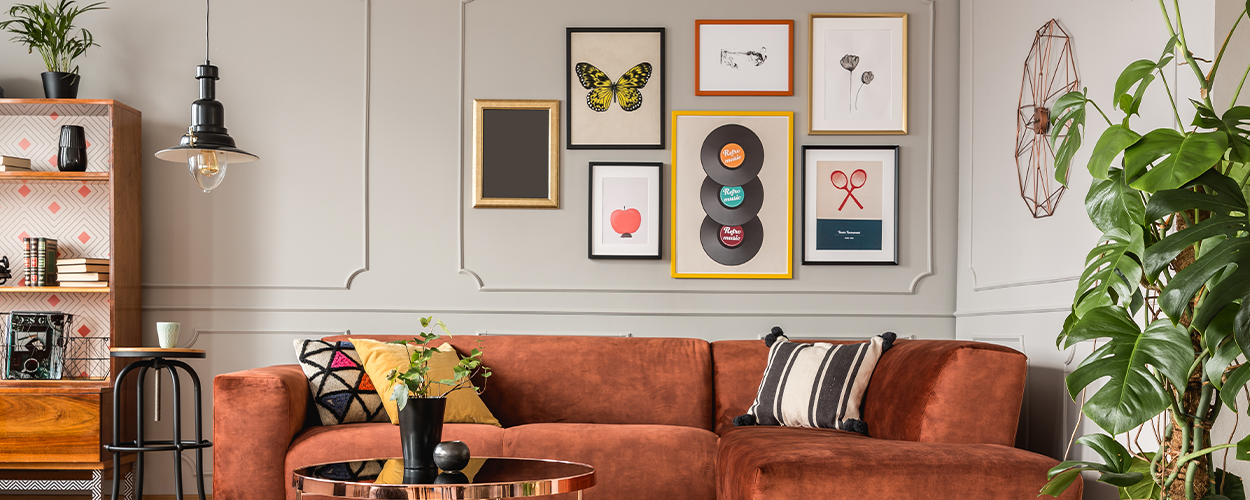
Need to find a creative way to fill up your home’s empty wall space? DIY gallery walls are a unique and easy way to express your personality and decorate your home in a flash. From defining what a gallery wall is to tips on how to create one in your own home, here’s what you should know before diving into this decor project.
What Is a Gallery Wall?
You have probably heard the term “gallery wall” many times before (especially if you’re a fan of interior decorating), but you might not know exactly what it is.
In the most basic sense, a gallery wall is a collection of decor items hung in a grouping. A beautiful gallery wall is often associated with artwork, but it’s important to remember that it can consist of many different items. From framed artwork to photographs and personal treasures, a gallery wall should be made up of items that you love.
Helpful Gallery Wall Tips
Before you dive into curating a DIY gallery wall within your home, it’s a good idea to take a step back and create a loose strategy for how you want your wall to look. Consider these gallery wall tips to help guide your vision!
Plan Before You Hang
As with any DIY home project, it’s smart to plan before you implement. Rather than hang your art as you go, lay your gallery wall items on the floor to get a better idea of what the finished product will look like. This will save you time and lots of holes in your wall!
While you have your arrangement spread out on the floor, be sure to take a picture for easy referencing as you go through the process of hanging your items.
Grow from the Bottom
One of the key strategies to creating a beautiful gallery wall is expanding up not down. Start hanging your framed artwork from the bottom level of your gallery wall and work your way up. This allows you more freedom to grow your gallery wall without running out of space.
If you’re adding a gallery wall above your sofa, a good rule-of-thumb is to start about six inches from the back edge of the furniture.
Level It Up
There’s nothing like a row of crooked frames to completely throw off the aesthetics of a gallery wall. If you choose to eyeball it and the bottom row is slanted, the entire gallery wall will be off.
Instead of relying on your eyes to hang your decor, use a level for at least the first few frames. It will be well worth it in the end!
Keep that Spacing Uniform
Make your DIY gallery wall as eclectic as you want, but focus on uniformity when it comes to spacing. Leaving the same amount of space in between your wall decor will prevent the gallery wall from looking sloppy and enhance the overall look.
Normally, 2-inch spacing is ideal for gallery walls, but there is some wiggle room. If you want to push the limits on spacing, keep in mind the five inch rule. Most interior designers agree that five or more inches of space between your frames is too much and ends up making your wall appear haphazard.
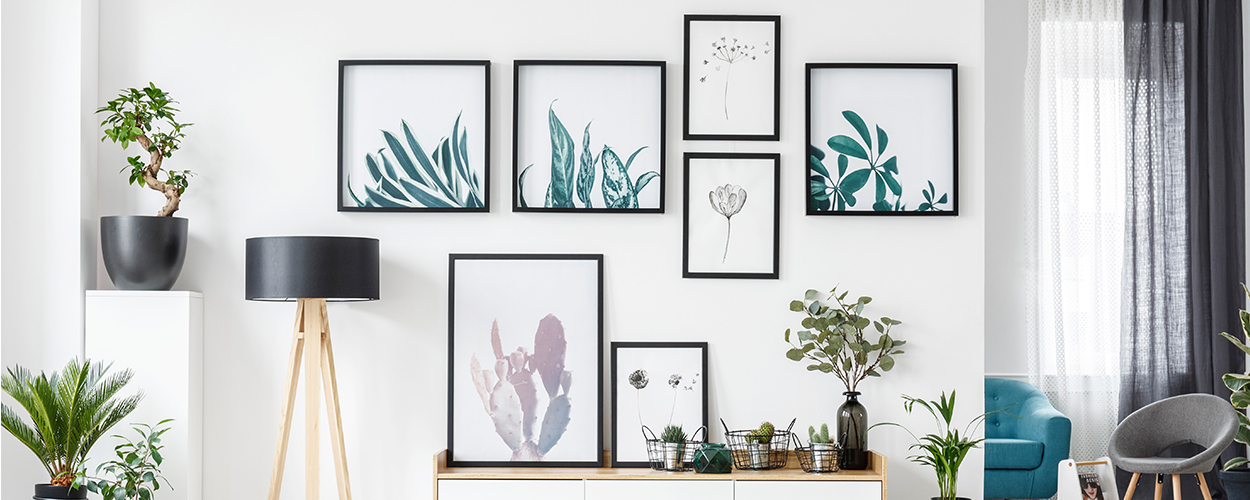
Establish a Theme
While it’s not crucial to have a theme or central concept, it can dramatically improve the aesthetics of your DIY gallery wall if you do. Incorporating a theme to your wall will help tie it together and give it more purpose.
Draw inspiration from hobbies or sights that you love when brainstorming a theme for your wall. If you love sailing, try a nautical theme. Are you a fan of desert scenery? Include desert motifs like cacti.
Use Tape for Measuring
If you aren’t a huge fan of measuring when it comes to hanging wall art, this gallery wall tip is made for you. Put away the rulers and measuring tapes because painter’s tape is the only handy tool you’ll need.
Simply cut the painter’s tape into the amount of space you want between each frame and use the pieces as spacers. Place the spacers between each item as you hang them and voila! This gallery wall tip will speed up the process and make it a lot less frustrating.
Don’t Let Creativity Turn to Chaos
It can be tempting to go wild and let your creativity take over when you’re putting together a gallery wall. Even though creativity is encouraged, there should always be structure and strategy behind that creativity.
First things first, make sure you choose the right spot to curate your DIY gallery wall. It should be placed on a neutral wall that doesn’t compete as a focal point or statement piece. A bare, white wall is an ideal location for a gallery wall.
You should also consider your framing color. Sticking to a consistent frame color for your items plays a big role in making your gallery wall feel organized and cohesive.
Don’t forget about the surrounding furniture either. Be sure to tie in colors and interior design style of the entire space. This will help make the gallery wall a beautiful complement to the room rather than a jarring distraction.
Consider Color
Much like picking a central theme, choosing a color scheme is an important gallery wall tip. Before you start implementing your gallery wall design, think of what color you want to highlight and base your items around that. Not every piece needs to incorporate your chosen shade, but it should be subtly represented throughout your design.
Need more inspiration for your wall decor? Learn more about the why, where, and how of decorating your walls!
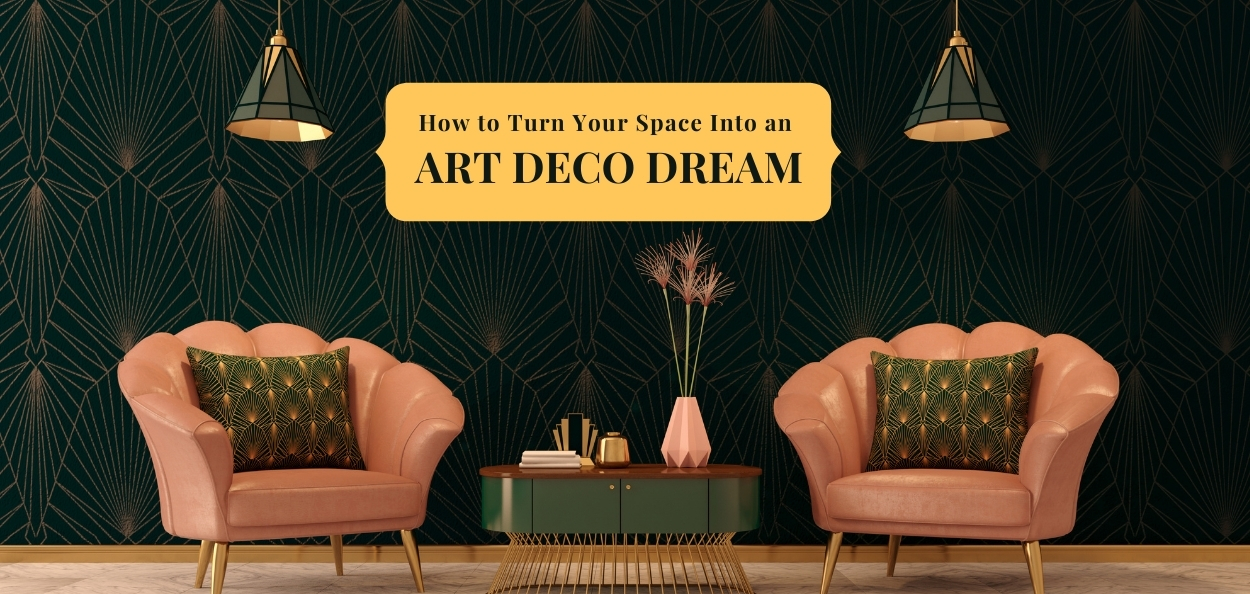
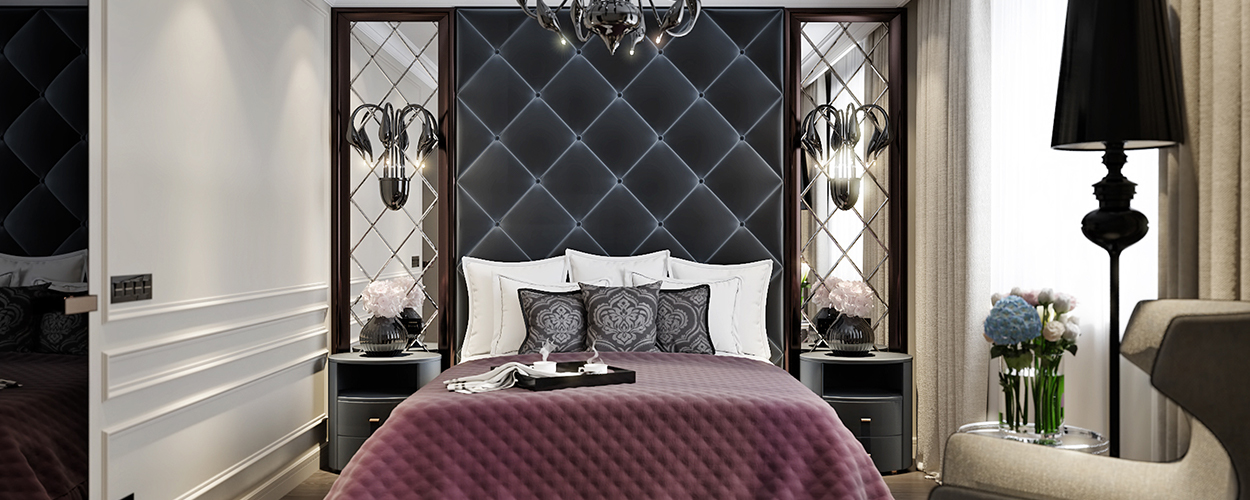
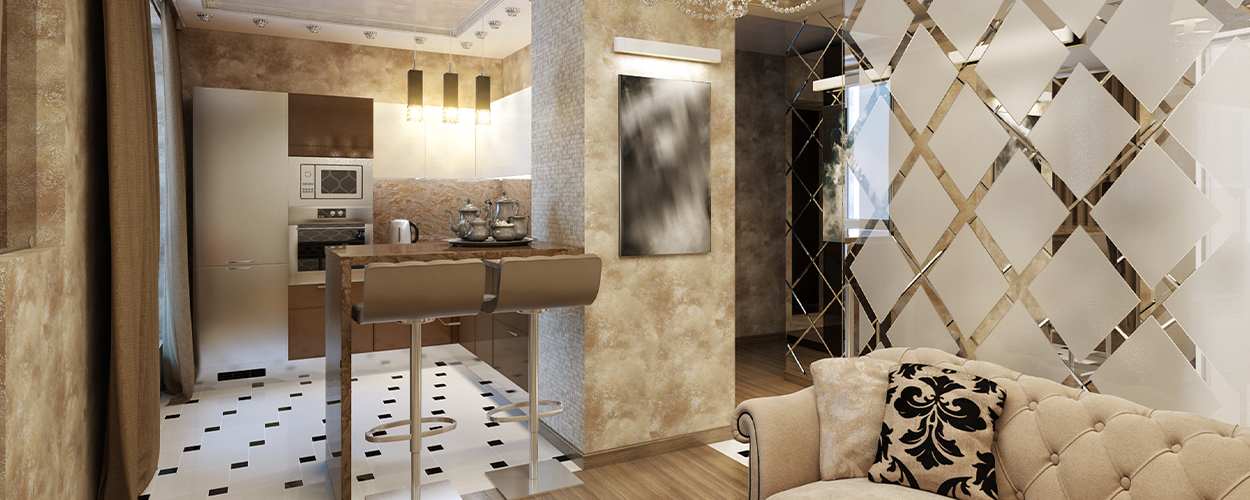
Take a trip back in time with the glitz and glam of art deco interior design style! Art deco home decor has been on the rise and is currently one of the edgiest trends you can try in your home. Transform your space into an art deco dream by learning more about its design characteristics and useful tips on how to adopt the style within your home.
Key Design Characteristics of Art Deco
Just like fashion trends come and go, so do interior design styles like arts décoratifs, commonly referred to as art deco. Believe it or not, this vintage design theme originated back in the roaring 20’s and continued to dominate until the 50’s when mid-century modern took the spotlight.
Art deco is characterized by striking colors, rich materials, and decadent detail work that fuse together to create a luxurious and glamorous look.
Classic Art Deco Materials
Materials that define the art deco interior design style can be tied back to the wealth that new industries created during the booming 1920’s era. Gold and steel are just two examples of widely used materials in art deco furniture, architecture, and accessories. Others include:
- Mirror and chrome
- Lacquer
- Marble
- Ebony
- Velvet
- Zebrawood
Iconic Colors
There is nothing bland or boring about the colors that characterize art deco home decor. Bold and moody color palettes were the go-to back when this design theme was new on the scene and the same goes for today. These striking shades were often contrasted with softer nudes. Here are some of the top colors used in art deco design:
Bold Shades: Bright and deep yellow, red, green, blue, pink, purple, and black
Softer Shades: Cream, beige, white, and taupe
Common Motifs
Art deco interior design style is all about geometric shapes which is why flattened and stylized motifs like fans and flowers are very popular. In addition to that, abstract patterns like chevron, sunbursts, and jagged lines play a key role in distinguishing home decor of this style.
Art Deco Interior Design Ideas
From simple and budget-friendly additions to home renovations that cost a pretty penny, there are many art deco interior design ideas that help turn your space into a vintage vision. Start gathering inspiration with these classic 1920’s decor ideas.
Go for Glam
Art deco interior design style is all about glamour and luxury, so you should have at least a few elements in each room that embrace the extravagance of the 1920’s era. Gilded mirrors and crystal chandeliers are eye-catching and easily add a touch of glam to any space. Rather than buy these items brand new, head to a flea market or local antiques shop to pick up a genuine relic.
Build In Timeless Elements
If budget is no obstacle in your quest to create an art deco style home, you should consider renovating your space to include built-in shelving and dramatic crown molding. These two elements are classic and instantly transport you back in time to a decade gone by.
More is Always Better
Forget about the “less is more” mantra as you brainstorm art deco living room ideas! More is always better when it comes to this interior design style, so don’t be afraid to go big or go home. A cluster of brass pendant lights, for example, is a lot more bold and dramatic than one single light.
Change Up Your Tile
As years come and go, flooring trends are constantly evolving. While subway tile may be trendy now, octagon or diamond-shaped tile has much more of an art deco vibe. Think about including this tile in your bathroom or kitchen to create a timeless look.
Geometric Shapes are Key
As you transform each room in your house, remember that your art deco home decor should be inspired by geometric shapes. There’s no limit to the kind of shapes you can use either. From circles and triangles to sweeping arches, art deco style includes it all.
Try Monochromatic Palettes
There’s just something about monochromatic color schemes that scream “art deco interior design style.” Focusing on a single color and running with it throughout your space achieves a look of opulence like no other. You can curate this look by incorporating a single color into your wall paint (or wallpaper), furniture, and accessories.
Discover another retro interior design style that has come back to life by checking out how to incorporate mid-century modern design into your home!
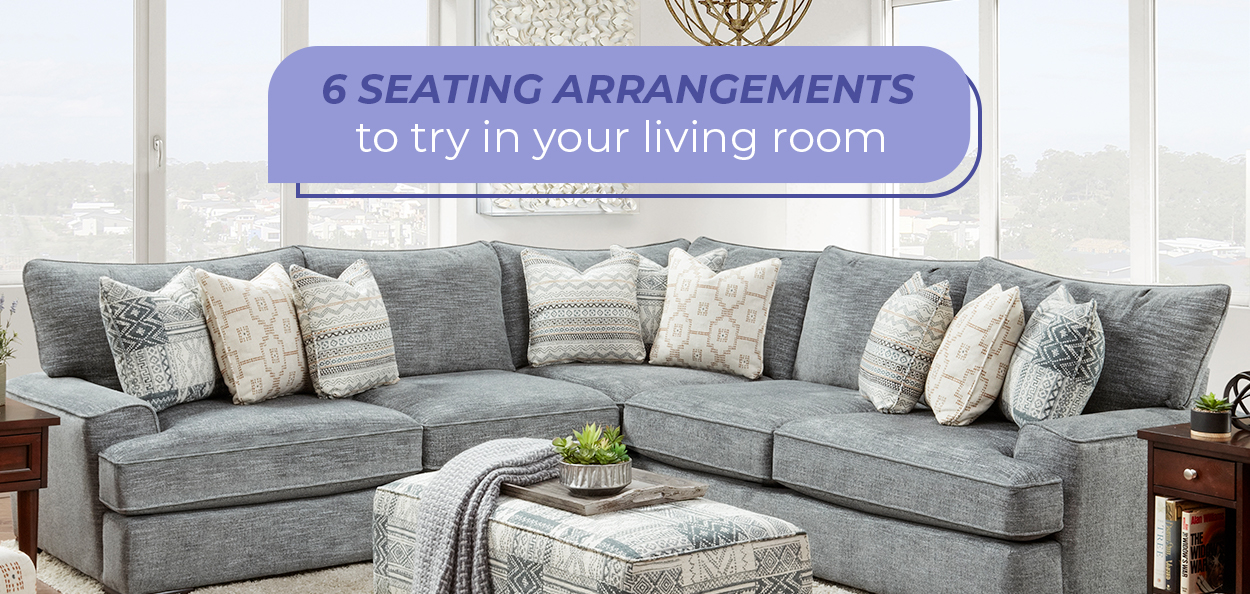
Do you find yourself scratching your head as you try to decide on the best living room seating arrangement for your home? With so many considerations like the size of your living room and the main function of the space, it’s completely normal to feel a little overwhelmed. Make the choice much easier by exploring the most common family room layout ideas to see which ones are best for your decor needs!
Living Room Seating Arrangements
1. Think Circular
If you’re a fan of living room seating with chairs rather than sofas, the circular layout might be best for you. This arrangement is just as it sounds—seating arranged in a circular fashion. You’ll usually find that a round coffee table and rug can help ground the arrangement as well.
Unlike some other layouts, the circular layout is very versatile and has two functions. Because of its intimate nature, the circular layout can not only encourage conversation and interaction, it can also foster a calm, relaxing space meant for privacy.
While armchairs like Fusion’s Bates Nickle are the most ideal, you can create this arrangement with a curved sofa as well. If you need flexibility in your living space, the circular layout is the way to go because you can easily rearrange three or four chairs to prepare for your next dinner party or book club gathering.
2. Try Symmetrical & Parallel
For a classic approach to living room seating, try a symmetrical, parallel-style arrangement. This arrangement is characterized by perfectly mirrored groupings. Most often, you see two opposing sofas separated by a coffee table. However, you can create the same look with paired armchairs or chaises.
A symmetrical parallel living room layout is best if you want your space to feel more formal and dignified. If you love traditional-style homes and formal entertaining, you’ll fall in love with this seating idea.
Despite being asymmetrical, this living room seating arrangement is well-balanced and refined. It does have the potential to be slightly less formal, especially if you choose to include more casual furniture.
3. Don’t Forget Asymmetrical & Parallel
An asymmetrical parallel living room is similar to its symmetrical counterpart, but it does have one key distinction. The opposing furniture pieces are different (asymmetrical) rather than being a mirror image (symmetrical). It’s a good idea to use this particular arrangement in living rooms where extra pathways are important. It’s much easier to work your way around two armchairs than one large sofa, for example.
4. Make It Boxy
It might not be the most common living room seating arrangement, but the box-shaped layout is definitely a worthy option to consider. This arrangement provides a focus in your living room by turning conversation inward and creating a well-defined space for relaxing and entertaining. That’s why box-shaped layouts work so well for rooms without a focal point—the arrangement becomes the focal point.
When you choose this family room layout idea for your home, make sure you factor in the kind of furniture you plan to use. Box-shaped layouts look stunning with cohesive furniture collections that have similar colors, fabrics, and textures. A coffee table is essential as well.
5. Go for an L-Shape
Right angles are what it’s all about when it comes to L-shaped layouts. Whether you choose to include a single chair at one end of your sofa, use two sofas butted together, or keep it simple with an L-shaped sectional, the result is a casual arrangement perfect for relaxed conversation.
This living room seating arrangement is great for small rooms and corners because it doesn’t take up very much space. It also comes in handy for open floor plan homes too. The back of the sofa can be used to divide your space into two zones. A living room and dining room combo is just one example.
6. Opt for U-Shaped
Need ways to fill up space in a large living room? The U-shaped arrangement is just what you need. A variety of individual furniture pieces can achieve this layout. Here are a few ideas to try:
- A U-shaped sofa
- Two parallel sofas with armchairs or a bench at their head
- A sofa with two chairs at either side
U-shaped living room seating is extremely comfortable and ideal for large parties because it facilitates conversation and offers lots of seating for guests.
Tips for Creating the Ideal Living Room Arrangement
Focus on the View
One of the most important factors to consider when arranging your living room furniture is the focal point of the space. A focal point can be any standout feature in the room like a fireplace, bay window, or large art piece. As you choose your family room layout idea, make sure you orient the main furniture piece towards your space’s focal point and arrange the secondary pieces around that.
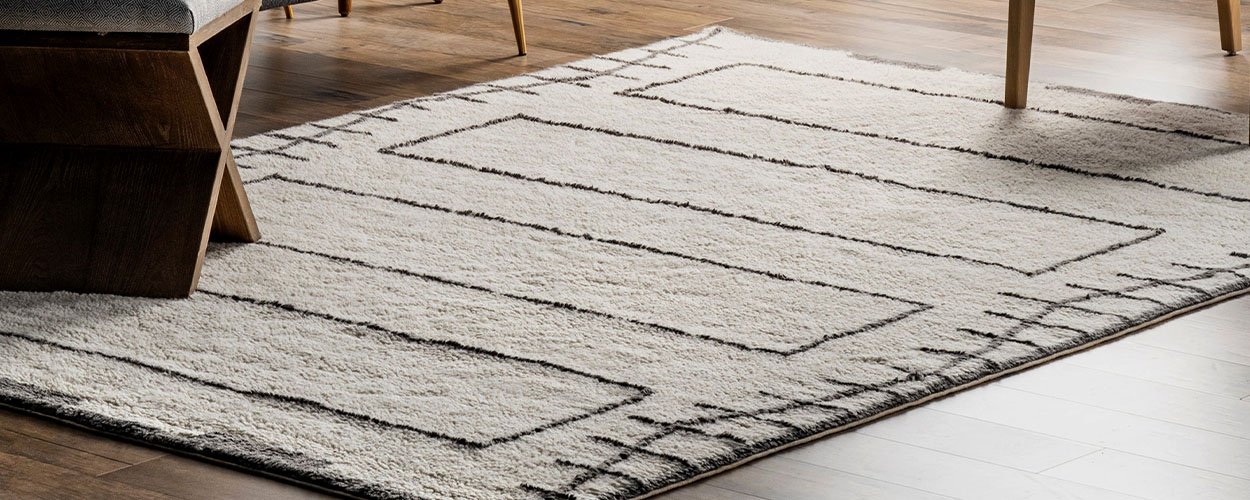
Be Strategic with Rugs
Area rugs are a stylish way to accent your living room furniture and they also help to unify seating groups. If you decide to incorporate a rug into your living room, it’s essential that all furniture pieces fit on top of it. If you have a rug that doesn’t quite hold the entire furniture arrangement, try to at least fit the front legs of all pieces on the rug.
Float Your Furniture
Fight against the urge to push furniture up against walls in small living rooms. While it may seem like the best solution, it actually creates an awkward space in the middle of the room and accentuates the small square footage. As an alternative, bring your furniture out towards the center of the room to create a more open, welcoming atmosphere.
Now that you know more about the most common family room layout ideas, take a look at Fusion Furniture’s collections to start furnishing your space!